Comandă și finalizare comandă
Odoo eCommerce oferă mai multe opțiuni pentru organizarea procesului de comandare și finalizare. Oferă diferite opțiuni de butoane de comandare și pași de finalizare secvențiali, dintre care unii suportă funcționalități adiționale. Butoanele și paginile de finalizare aferente pot fi personalizate folosind editorul de site-uri web.
Opțiuni pentru adăugarea în coș
Comportament implicit pentru adăugarea în coș
La apăsarea butonului Adaugă în coș, pot fi declanșate diferite acțiuni. Pentru a le configura, accesează , derulează în jos până la secțiunea eCommerce și selectează una dintre următoarele opțiuni pentru funcționalitatea Adaugă în coș:
Rămâne pe pagina produsului: Clientul rămâne pe pagina produsului după adăugarea unui produs în coș. Dacă produsul adăugat are produse opționale asociate, clientul poate alege între Adaugă în coș (pentru a rămâne pe pagina produsului) și Treci la finalizare (pentru a fi redirecționat către coș).
Treci la coș: Clientul este redirecționat imediat către coș.
Cumpără acum
Pentru a permite clienților să aleagă să meargă direct la pasul Rezumatul comenzii, adăugați un buton suplimentar Cumpără acum. Pentru a face acest lucru, accesați pagina oricărui produs, deschideți editorul site-ului, accesați fila Stil și dați clic pe butonul Cumpără acum de lângă Opțiuni de achiziție.

Recomandează produse
Clienții pot recomanda articole dintr-o Comandă de vânzare anterioară:
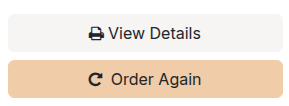
din portalul lor de client, folosind butonul Comandă din nou. Toate produsele din comanda selectată sunt adăugate automat în coș, iar clienții pot apoi să Elimine orice articole pe care nu doresc să le recomande.
din coș, dând clic pe Recomandează rapid la pasul Rezumatul comenzii. Clienții pot apoi ajusta cantitățile după cum este necesar și să dea clic pe butonul (coș) de lângă produsul/produsele pe care doresc să le recomande.

Pașii de plată
În timpul finalizării comenzii, clienții trec prin următorii pași:
Fiecare pas poate fi personalizat folosind editorul site-ului prin adăugarea de blocuri de construcție sau deschiderea filei Stil pentru a activa diverse opțiuni de finalizare.
Notă
Conținutul adăugat prin blocuri de construcție este specific fiecărui pas.
Sfat
Restricționează accesul la magazin și finalizare pentru anumiți clienți, de exemplu, într-o configurare B2B.
Rezumatul comenzii
Pasul Rezumatul comenzii permite clienților să vadă articolele adăugate în coș, să ajusteze cantitățile, să Elimine produse și să recomande produse dintr-o comandă anterioară. Sunt afișate și informații despre prețurile produselor și taxele aplicate. Clienții pot apoi da clic pe butonul Finalizare pentru a continua la pasul Adresă.
Deschideți editorul de website pentru a activa opțiuni de finalizare comandă precum:
Accesorii sugerate: pentru a prezenta produse accesorii;
Cod promoțional: pentru a permite clienților să valorifice carduri cadou și să aplice coduri de reducere sau coduri promoționale;
Adaugă la lista de dorințe: Activează listele de dorințe pentru a permite utilizatorilor autentificați să elimine un produs din coș și să îl adauge la lista de dorințe folosind opțiunea Salvează pentru mai târziu.
Notă
Dacă o poziție fiscală este detectată automat, taxa pe produs este determinată pe baza adresei IP a clientului.
Dacă furnizorul de plăți instalat <../../finance/payment_providers> suportă finalizare rapidă, se afișează un buton dedicat care permite clienților să meargă direct din coș la pagina de confirmare fără a completa formularul de contact.
Adresă
După ce și-au revizuit comanda:
Clienții neautentificați sunt invitați să Se autentifice sau să introducă Numele și adresa de Email, împreună cu adresa de livrare și detaliile telefonice;
Clienții autentificați pot selecta adresa de livrare corespunzătoare.
Apoi pot alege o metodă de livrare, selecta sau introduce Adresa de facturare (sau pot activa opțiunea La fel ca adresa de livrare dacă adresele sunt identice) și apăsa Confirmă pentru a trece la pasul următor.
Sfat
Pentru clienții B2B, poți, de asemenea, să activezi câmpuri B2B opționale în editorul de site-uri web.
Poți adăuga o căsuță de bifat pentru ca utilizatorii fără cont să se înscrie la un buletin informativ. Pentru aceasta, accesează , derulează în jos până la secțiunea eCommerce, activează funcția Newsletter și selectează o Listă de buletine informative.
Când este selectată metoda de livrare Ridicare din magazin, clientul poate Alege un punct de ridicare, cu condiția ca mai multe puncte de ridicare să fie disponibile.
Validare automată a adresei
Utilizați Google Places API pentru a vă asigura că adresele de livrare ale partenerilor sunt valide. Adresele sunt validate automat pe măsură ce utilizatorul tastează în timpul finalizării comenzii.
Pentru a activa această funcționalitate, Google Places API trebuie configurat mai întâi. Apoi, accesați . În secțiunea General, activați Google Address Validation, apoi inserați Google Places API key în câmpul API Key.
Informații suplimentare
Poți adăuga un pas Informații suplimentare în procesul de finalizare pentru a colecta informații suplimentare despre clienți printr-un formular online, care este apoi inclus în comanda de vânzare. Pentru aceasta, activează opțiunea Pas suplimentar în editorul de site-uri web. Formularul poate fi personalizat după necesități.
Plată
La pasul Plată, clienții pot alege o Metodă de plată, pot introduce detaliile de plată și pot da clic pe Plătește acum.
Notă
Când este activată opțiunea de plată Numerar la livrare, clientul trebuie să dea clic pe butonul Confirmă și să plătească la livrare.
Pentru a pune la dispoziția clienților metode de plată, configurează și activează unul sau mai mulți furnizori de plăți. Pentru aceasta, accesează , Activează furnizorul de plăți relevant și configurează-l.
Sfat
Opțiunile afișate la finalizare depind de furnizorii de plăți activi, de metodele de plată activate, de țara și moneda clientului și, opțional, de suma maximă stabilită pentru furnizor.
Pentru a afișa un raport de disponibilitate pentru furnizorii de plăți și metodele de plată și pentru a ajuta la diagnosticarea problemelor potențiale de disponibilitate în formularul de plată, activează modul dezvoltator și dă clic pe pictograma (bug).
Termeni și condiții
Pentru a solicita clienților să accepte termenii și condițiile înainte de plată, deschide editorul de site-uri web și activează comutatorul Acceptă termenii în fila Stil.
portofele electronice și carduri cadou
Clienții pot plăti cu un portofel electronic sau card cadou în timpul finalizării. Pentru a oferi aceste opțiuni, accesează și activează în secțiunea eCommerce. Apoi, accesează și creează un program de card cadou și/sau portofel electronic.

Confirmare comandă
Pasul final al procesului de finalizare a comenzii este pagina de confirmare a comenzii, care oferă un rezumat al detaliilor achiziției clientului. O comandă de vânzare este creată automat în backend. Activați setarea Factură automată pentru a trimite automat o factură clientului.
Vedeți și