การสั่งซื้อและชำระเงิน
อีคอมเมิร์ซของ Odoo มีตัวเลือกหลายอย่างในการจัดระเบียบกระบวนการสั่งซื้อและชำระเงิน โดยมีตัวเลือก ปุ่มสั่งซื้อ ที่แตกต่างกันและ ขั้นตอนการชำระเงิน ตามลำดับ ซึ่งบางตัวเลือกรองรับฟีเจอร์เพิ่มเติม ปุ่มและหน้าการชำระเงินที่เกี่ยวข้องสามารถปรับแต่งได้โดยใช้ โปรแกรมแก้ไขเว็บไซต์
ตัวเลือกเพิ่มลงตะกร้า
พฤติกรรมการเพิ่มลงตะกร้าเริ่มต้น
เมื่อคลิกปุ่ม เพิ่มลงในตะกร้า สามารถเรียกใช้การกระทำต่างๆ ได้ ในการกำหนดค่า ให้ไปที่ เลื่อนลงไปที่ส่วน อีคอมเมิร์ซ และเลือกหนึ่งในตัวเลือกต่อไปนี้สำหรับคุณสมบัติ เพิ่มลงในตะกร้า:
อยู่ในหน้าสินค้า: ลูกค้าจะอยู่ในหน้าสินค้าหลังจากเพิ่มสินค้าลงในตะกร้า หากสินค้าที่เพิ่มมี สินค้าเสริม ที่เชื่อมโยง ลูกค้าสามารถเลือกระหว่าง เพิ่มลงในตะกร้า (เพื่ออยู่ในหน้าสินค้า) และ ไปที่หน้าชำระเงิน (เพื่อถูกเปลี่ยนเส้นทางไปยังตะกร้า)
ไปที่ตะกร้า: ลูกค้าจะถูกเปลี่ยนเส้นทางไปยังตะกร้าทันที
ซื้อตอนนี้
เพื่อให้ลูกค้าเลือกไปที่ขั้นตอน Order summary โดยตรง ให้เพิ่มปุ่ม Buy now เพิ่มเติม โดยไปที่หน้าสินค้าใดๆ เปิดเครื่องมือแก้ไขเว็บไซต์ ไปที่แท็บ Style และคลิกปุ่ม Buy Now ถัดจาก Purchase Options

เรียงลำดับสินค้าใหม่
ลูกค้าสามารถสั่งซื้อสินค้าซ้ำจากคำสั่งขายก่อนหน้านี้ได้:
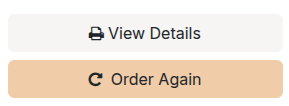
จากพอร์ทัลลูกค้าของพวกเขา โดยใช้ปุ่ม Order Again สินค้าทั้งหมดจากคำสั่งซื้อที่เลือกจะถูกเพิ่มลงในรถเข็นโดยอัตโนมัติ และลูกค้าสามารถ Remove รายการใดๆ ที่ไม่ต้องการสั่งซื้อซ้ำได้
จากรถเข็น โดยคลิก Quick reorder ที่ ขั้นตอนสรุปคำสั่งซื้อ จากนั้นลูกค้าสามารถปรับจำนวนตามต้องการและคลิกปุ่ม (cart) ถัดจากสินค้าที่ต้องการสั่งซื้อซ้ำ

ขั้นตอนการชำระเงิน
ระหว่างการชำระเงิน ลูกค้าจะผ่านขั้นตอนดังต่อไปนี้:
แต่ละขั้นตอนสามารถปรับแต่งได้โดยใช้ตัวแก้ไขเว็บไซต์ด้วยการเพิ่ม:doc:บล็อกการสร้าง <../website/web_design/building_blocks> หรือเปิดแท็บ:guilabel:`สไตล์`เพื่อเปิดใช้งานตัวเลือกชำระเงินต่างๆ
Note
เนื้อหาที่เพิ่มผ่านบล็อกการสร้างจะ**เฉพาะเจาะจง**สำหรับแต่ละขั้นตอน
Tip
จำกัดการเข้าถึง:ref:ร้านค้า <ecommerce/customer_accounts/shop-access>`และ:ref:`การชำระเงิน <ecommerce/customer_accounts/checkout-access>`สำหรับลูกค้าเฉพาะ เช่น ในการตั้งค่าธุรกิจแบบ :doc:`B2B <../ecommerce/configuration/b2b_b2c>
สรุปคำสั่งซื้อ
ขั้นตอน Order summary ช่วยให้ลูกค้าดูรายการสินค้าที่เพิ่มลงในตะกร้า ปรับจำนวน ลบ`สินค้า และ :ref:`สั่งซื้อสินค้าซ้ำจากคำสั่งซื้อก่อนหน้า <ecommerce/checkout/reorder> ข้อมูลเกี่ยวกับราคาสินค้าและภาษีที่ใช้จะแสดงด้วย ลูกค้าสามารถคลิกปุ่ม Checkout เพื่อไปยังขั้นตอน ที่อยู่
เปิดตัวแก้ไขเว็บไซต์เพื่อ:ref:`เปิดใช้งาน <ecommerce/checkout/customize_steps>`ตัวเลือกการชำระเงิน เช่น:
อุปกรณ์เสริมแนะนำ: เพื่อแสดง:ref:
สินค้าอุปกรณ์เสริม <ecommerce/products/cross_upselling>Promo Code: เพื่อให้ลูกค้าสามารถใช้ บัตรของขวัญ และใช้ รหัสส่วนลด หรือ รหัสโปรโมชัน
Add to Wishlist: เปิดใช้งานรายการโปรด เพื่อให้ผู้ใช้ที่ลงชื่อเข้าใช้สามารถลบสินค้าออกจากตะกร้าและเพิ่มลงในรายการโปรดโดยใช้ตัวเลือก Save for Later
Note
หาก:doc:`สถานะทางภาษี <../../finance/accounting/taxes/fiscal_positions>`ถูกตรวจพบโดยอัตโนมัติ ภาษีของสินค้าจะถูกกำหนดตามที่อยู่ IP ของลูกค้า
หาก:doc:
ผู้ให้บริการชำระเงิน <../../finance/payment_providers>`ที่ติดตั้งรองรับ:ref:`การชำระเงินด่วน <payment_providers/express_checkout>จะมีปุ่มเฉพาะแสดงขึ้น ซึ่งช่วยให้ลูกค้าสามารถไปจากตะกร้าสินค้าไปยังหน้ายืนยันได้โดยตรงโดยไม่ต้องกรอกแบบฟอร์มติดต่อ
ที่อยู่
เมื่อพวกเขาตรวจสอบคำสั่งซื้อของตนแล้ว:
ลูกค้าที่ยังไม่ได้ลงชื่อเข้าใช้จะได้รับแจ้งให้ Sign in หรือป้อน ชื่อ และที่อยู่ อีเมล พร้อมทั้งที่อยู่จัดส่งและรายละเอียดโทรศัพท์
ลูกค้าที่ลงชื่อเข้าใช้สามารถเลือก:guilabel:`ที่อยู่สำหรับจัดส่ง`ที่เหมาะสมได้
จากนั้นพวกเขาสามารถ:doc:เลือกวิธีการจัดส่ง <shipping> เลือกหรือป้อน:guilabel:ที่อยู่สำหรับออกใบแจ้งหนี้ (หรือสลับสวิตช์:guilabel:`เหมือนกับที่อยู่จัดส่ง`หากที่อยู่สำหรับออกใบแจ้งหนี้และที่อยู่จัดส่งเหมือนกัน) และคลิก:guilabel:`ยืนยัน`เพื่อดำเนินการไปยังขั้นตอนถัดไป
Tip
สำหรับลูกค้า B2B คุณยัง เปิดใช้งาน ฟิลด์ B2B เพิ่มเติมในโปรแกรมแก้ไขเว็บไซต์ได้
คุณสามารถเพิ่มช่องทำเครื่องหมายสำหรับผู้ใช้ที่ไม่มีบัญชีเพื่อสมัครรับจดหมายข่าวได้ โดยไปที่:menuselection:
เว็บไซต์ --> การกำหนดค่า --> การตั้งค่าเลื่อนลงไปที่ส่วน:guilabel:อีคอมเมิร์ซเปิดใช้งานคุณสมบัติ:guilabel:จดหมายข่าวและเลือก:guilabel:รายชื่อจดหมายข่าวเมื่อเลือกวิธีจัดส่ง รับสินค้าที่ร้าน ลูกค้าสามารถ เลือกจุดรับสินค้า ได้ หากมีจุดรับสินค้าหลายแห่ง
การตรวจสอบที่อยู่อัตโนมัติ
ใช้ Google Places API เพื่อให้แน่ใจว่าที่อยู่จัดส่งของคู่ค้ามีความถูกต้อง ที่อยู่จะได้รับการตรวจสอบโดยอัตโนมัติขณะที่ผู้ใช้พิมพ์ระหว่างชำระเงิน
หากต้องการเปิดใช้งานฟีเจอร์นี้ จำเป็นต้องกำหนดค่า Google Places API ก่อน จากนั้นไปที่ ในส่วน ทั่วไป ให้เปิดใช้งาน การตรวจสอบที่อยู่ของ Google จากนั้นวาง คีย์ API ของ Google Places ในฟิลด์ คีย์ API
ข้อมูลเสริม
คุณสามารถเพิ่มขั้นตอน ข้อมูลเพิ่มเติม ในกระบวนการชำระเงินเพื่อรวบรวมข้อมูลลูกค้าเพิ่มเติมผ่านแบบฟอร์มออนไลน์ ซึ่งจะถูกรวมไว้ใน:ref:คำสั่งขาย <ecommerce/handling/sales> ในการดำเนินการดังกล่าว ให้:ref:เปิดใช้งาน <ecommerce/checkout/customize_steps>`ตัวเลือก :guilabel:`ขั้นตอนเพิ่มเติม ในตัวแก้ไขเว็บไซต์ แบบฟอร์มสามารถ:ref:`ปรับแต่ง <website/building_blocks/form>`ได้ตามต้องการ
การชำระเงิน
ในขั้นตอน ชำระเงิน ลูกค้าสามารถเลือก วิธีชำระเงิน ป้อนรายละเอียดการชำระเงิน และคลิก Pay now
Note
เมื่อเปิดใช้งานตัวเลือกชำระเงิน เก็บเงินปลายทาง ลูกค้าต้องคลิกปุ่ม ยืนยัน และชำระเงินเมื่อได้รับสินค้า
เพื่อให้ลูกค้าสามารถใช้วิธีการชำระเงินได้ ให้กำหนดค่าและเปิดใช้งาน:doc:ผู้ให้บริการชำระเงิน </applications/finance/payment_providers>`อย่างน้อยหนึ่งรายการ โดยไปที่:menuselection:`เว็บไซต์ --> การกำหนดค่า --> ผู้ให้บริการชำระเงิน เปิดใช้งาน`ผู้ให้บริการชำระเงินที่เกี่ยวข้อง และ:ref:`กำหนดค่า <payment_providers/add_new>
Tip
ตัวเลือกที่แสดงเมื่อชำระเงินจะขึ้นอยู่กับผู้ให้บริการชำระเงินที่ใช้งานอยู่ วิธีการชำระเงิน และหากมีการกำหนด:ref:`จำนวนเงินสูงสุด <payment_providers/maximum_amount>`สำหรับผู้ให้บริการ
เพื่อแสดงรายงาน ความพร้อมใช้งาน สำหรับผู้ให้บริการชำระเงินและวิธีการชำระเงิน และช่วยวินิจฉัยปัญหาความพร้อมใช้งานที่อาจเกิดขึ้นในแบบฟอร์มการชำระเงิน ให้เปิดใช้งาน โหมดนักพัฒนา และคลิกไอคอน (แมลง)
เงื่อนไขและข้อกำหนด
เพื่อกำหนดให้ลูกค้าต้องยอมรับ:doc:ข้อกำหนดและเงื่อนไข <../../finance/accounting/customer_invoices/terms_conditions>`ก่อนชำระเงิน ให้เปิดตัวแก้ไขเว็บไซต์และสลับสวิตช์:guilabel:`ยอมรับเงื่อนไข`ในแท็บ:guilabel:`สไตล์
eWallet และบัตรของขวัญ
ลูกค้าสามารถชำระเงินด้วย eWallet หรือบัตรของขวัญระหว่างชำระเงินได้ เพื่อให้ตัวเลือกเหล่านี้ ให้ไปที่:menuselection:เว็บไซต์ --> การกำหนดค่า --> การตั้งค่า และเปิดใช้งาน:menuselection:ส่วนลด ความภักดี และบัตรของขวัญ`ในส่วน:guilabel:`อีคอมเมิร์ซ จากนั้นไปที่:menuselection:เว็บไซต์ --> อีคอมเมิร์ซ --> บัตรของขวัญและ eWallet และ:doc:สร้างบัตรของขวัญและ/หรือโปรแกรม eWallet </applications/sales/sales/products_prices/ewallets_giftcards>

การยืนยันคำสั่งซื้อ
ขั้นตอนสุดท้ายของกระบวนการชำระเงินคือหน้ายืนยันคำสั่งซื้อ ซึ่งให้สรุปรายละเอียดการสั่งซื้อของลูกค้า คำสั่งขายจะถูกสร้างขึ้นโดยอัตโนมัติในระบบหลังบ้าน เปิดใช้งานการตั้งค่า ใบแจ้งหนี้อัตโนมัติ เพื่อส่งใบแจ้งหนี้ถึงลูกค้าโดยอัตโนมัติ
ดูเพิ่มเติม