Sites web multiples
Odoo allows you to create multiple websites from the same database. This can be useful, for example, if you have multiple brands operating under your organization, or if you want to create separate websites for different products/services or audiences.
Créer un autre site web
Créer plusieurs sites web nécessite d’avoir au moins un nom de domaine. Différentes alternatives existent, mais avant de créer un autre site web, vous devriez soit
Enregistrer un nom de domaine gratuitement avec Odoo pour votre premier site web, puis, pour votre deuxième site web, soit :
Utiliser un nom de domaine que vous avez acheté pour votre premier site web, puis, pour votre deuxième site web, soit :
Once it is time to map your second domain name’s address to your second Odoo website, you can create <../../website_creation> it and map it
directly by entering the second website’s address in the Website Domain field (e.g.,
https://www.yourseconddomain.com or https://subdomain.yourdomain.com).
Astuce
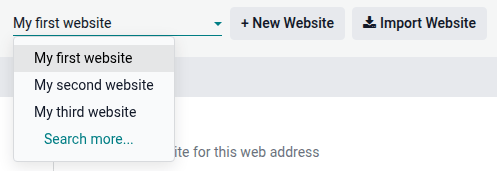
Pour passer d’un site web à un autre, cliquer sur le menu déroulant de sélection du site web dans le coin supérieur droit et sélectionner le site web vers lequel vous souhaitez basculer.

Configuration spécifique au site web
La plupart des paramètres du site web sont spécifiques à chaque site. Pour accéder aux paramètres d’un site web, aller à et sélectionner le site web souhaité à l’aide du menu déroulant de sélection en haut à gauche de la page des paramètres.
Note
Les paramètres partagés par tous les sites web sont indiqués par l’icône (information).

Lors de la création d’un autre site web, celui-ci utilise les paramètres par défaut ; les paramètres ne sont pas copiés d’un site web à un autre.
Fonctionnalités d’eCommerce
Les fonctionnalités eCommerce telles que les produits, les catégories eCommerce, les listes de prix, les remises, les fournisseurs de paiement, etc., peuvent être restreintes à un site web spécifique.
Comptes clients
Pour permettre à vos clients d’utiliser le même compte sur tous vos sites web, aller à et activer Comptes clients partagés.
Tarification
Les produits peuvent avoir des prix différents selon le site web en utilisant les listes de prix. Pour ce faire :
Allez à .
Faites défiler jusqu’à la section Boutique - Produits et définissez Listes de prix sur Plusieurs prix par produit.
Cliquez sur Listes de prix pour définir de nouvelles listes de prix ou modifier des listes de prix existantes.
Sélectionnez la liste de prix ou cliquez sur Nouveau pour en créer une nouvelle, ensuite sélectionnez l’onglet Configuration et définissez le champ Site Web.
Disponibilité du contenu sur les sites web
Note
Toutes les applications installées liées au site web (par ex., eCommerce, eLearning, Forum, etc.) et leurs pages associées sont également disponibles sur le nouveau site web. Il est possible de les retirer du menu du site web.
Par défaut, la plupart des enregistrements (produits, cours, messages de forum, etc.) créés depuis le frontend sont affichés sur tous les sites web. Pour restreindre le contenu à un seul site web, rechercher le champ Site web dans le backend.
Par exemple, pour les produits, aller à , sélectionner un produit, ouvrir l’onglet eCommerce et spécifier sur quel site web le produit doit être disponible.

Astuce
Dans un environnement multi-sociétés, chaque site web peut être lié à une société spécifique afin que seules les données de cette société (par ex., produits, événements, etc.) soient affichées sur le site web. Pour afficher les données spécifiques à une société, aller à Site Web –> Configuration –> Paramètres et définir la société souhaitée dans le champ Société.
Note
Lors de la génération de liens, par exemple un lien vers un devis dans le portail client, Odoo utilise la logique suivante pour sélectionner le domaine du site web :
Si une société a un seul site web, le domaine de ce site web est utilisé.
Si une société a plusieurs sites web, Odoo utilise le domaine du site web créé en premier. Pour modifier l’ordre de priorité, activer le mode développeur, aller à et utiliser l’icône (poignée de déplacement) pour réorganiser les sites web.
Si le site web d’une société n’a aucun domaine, l”URL de base web est utilisée.
Pages du site web
Pour modifier le site web sur lequel une page est publiée, procéder comme suit :
Allez à .
Ouvrez le panneau de recherche et sélectionnez le site web sur lequel la page est actuellement publiée.

Cochez la case à côte de la ou des pages que vous voulez modifier.
Cliquez sur le champ Site Web et sélectionnez le site web ou laissez le vide pour publier la page sur tous les sites web.
Note
Chaque site web doit avoir sa propre page d’accueil ; vous ne devriez pas utiliser la même page d’accueil pour plusieurs sites web.
Analyse
Chaque site web a ses propres analytics. Pour basculer entre les sites web, utiliser les boutons dans le coin supérieur droit.

D’autres données de rapport, telles que les données du tableau de bord eCommerce, les analyses des ventes en ligne et les visiteurs, peuvent être regroupées par site web en ouvrant le panneau de recherche et en sélectionnant Regrouper par –> Site Web.