Creare un progetto
Sviluppare una piattaforma
Accedi a
Odoo.sh <https://www.odoo.sh>e fai clic su Deploy your platform (sviluppa la tua piattaforma).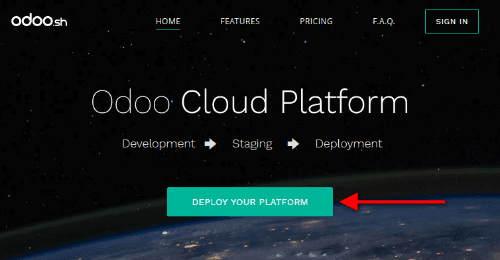
Accedi con un account GitHub.

Autorizza Odoo.sh facendo clic due volte su Authorize odoo.

Nota
Odoo.sh richiede a GitHub di:
accedere al login di GitHub e all’indirizzo e-mail
creare un nuovo repository, se inizi da zero
accedere a repository esistenti, inclusi quelli dell’organizzazione, in caso inizi da un repository esistente
creare un webhook per inviarti notifiche ogni volta che vengono apportate modifiche
eseguire commit delle modifiche per uno sviluppo più semplice.
Compila il modulo Deploy your platform e fai clic su Deploy:
repository GitHub: per creare un nuovo repository, scegli New repository e inserisci un nome. Per utilizzarne uno esistente, scegli Existing repository e selezionalo
Odoo Version: seleziona la versione principale di Odoo che vuoi utilizzare.
Suggerimento
Utilizza la versione principale più recente di Odoo al momento della creazione di un nuovo repository. Se stai pianificando l’importazione di un database o di applicazioni esistenti, potrebbe essere necessario che le versioni coincidano.
Se inizi su Odoo Online e pianifichi di spostarti su Odoo.sh in seguito, crea il tuo database utilizzando odoo.com/start-lts per assicurarti che siano compatibili, in quanto le versioni minori non sono supportate da Odoo.sh.
Subscription Code: inserisci il tuo codice di abbonamento a Odoo Enterprise che include Odoo.sh. A volte viene anche chiamato riferimento abbonamento oppure codice di attivazione.
Suggerimento
I partner possono utilizzare i codici partnership per avviare una prova (le build di prova sono limitate a 1GB di archiviazione e due staging). Se un cliente procede con il lancio di un progetto, deve iscriversi a un piano Odoo Enterprise che include l’hosing Odoo.sh e utilizza il suo codice di abbonamento.
Hosting location: seleziona la regione dove verrà ospitata la tua piattaforma.

Importare un database
Una volta sviluppata la tua piattaforma, puoi importare un database nel tuo progetto Odoo.sh se utilizza una versione supportata di Odoo.
Nota
Per via della Politica di backup di Odoo, il processo di importazione richiede quattro volte la dimensione del dump del tuo database disponibile nell’archivazione. Ad esempio, un file dump di 10 GB richiede almeno 40 GB di spazio disponibile. Consigliamo di assegnare più di quattro volte della dimensione del dump provvisoriamente per poi ridurre l’archiviazione quando l’importazione è giunta al termine.
Se il tuo progetto è una prova creata con un codice partnership, puoi anche importare solamente i dump database fino a 1 GB.
Inviare moduli in produzione
Se stai utilizzando moduli community o personalizzati, aggiungili a un ramo nel repository GitHub.
Nota
I database con hosting su Odoo Online non supportano i modelli personalizzati.
Odoo.sh individua automaticamente le cartelle che contengono moduli Odoo. Puoi organizzarli come preferisci. Ad esempio, puoi posizionarli direttamente nella directory radice del tuo repository oppure raggrupparli per categoria (ad es. accounting, project, etc.).
Per i moduli community disponibili pubblicamente, potresti anche utilizzare moduli secondari.
Scaricare un backup
Vai su /web/database/manager della tua istanza Odoo on-premise e fai clic su Backup.

Seleziona zip (include filestore) come formato di backup.

Nota
Avrai bisogno della Password master del tuo server Odoo. Se non la hai, contatta l’amministratore di sistema.
Se non puoi accedere al gestore di database, potrebbe essere stato disabilitato dall’amministratore di sistema. Consulta la documentazione relativa alla sicurezza del gestore di database.
Accedi all’account del portale e vai alla pagina I miei database, scarica un backup facendo clic sull’icona (ingranaggio) e poi su Download.

Avvertimento
Solo le versioni principali di Odoo sono compatibili con Odoo.sh.
Caricare il backup
Nel tuo progetto Odoo.sh, accedi alla scheda Backup del ramo di Produzione e fai clic su Importa database per caricare il backup scaricato in precedenza.

Una volta completata l’importazione, puoi accedere al database usando il pulsante Collegati nella scheda Cronologia del ramo.
Importante
L’importazione di un backup sovrascrive tutti i dati presenti attualmente nel branch. Se vuoi preservare i dati esistenti, scarica un backup manuale.
Controllare i server e-mail in uscita
Odoo.sh fornisce un server e-mail predefinito. Per utilizzarlo, assicurati che non sia stato abilitato nessun server e-mail in uscita nel tuo database. Per farlo, attiva la modalità sviluppatore e vai su
Dopo aver importato il tuo database, tutti i server e-mail in uscita configurati sono disattivati e viene utilizzato il server Odoo.sh predefinito.
Avvertimento
La porta 25 è chiusa e resterà chiusa. Se ti colleghi a un altro server SMTP esterno, utilizza le porte 465 o 587.
Controllare azioni programmate
Le azioni programmate vengono disattivate per impostazione predefinita dopo aver importato il tuo database. Questo evita che il database appena importato esegua azioni potenzialmente dannose come:
inviare e-mail in coda
inviare e-mail di massa
effettuare la sincronizzazione con servizi di terze parti (ad es. calendario, archiviazione cloud).
Se pianifichi di utilizzare il database importato in produzione, riattiva solo le azioni programmate di cui hai bisogno. Per farlo, attiva la modalità sviluppatore e vai su .
Registrare l’abbonamento
Dopo l’importazione, il database viene considerato un duplicato e verrà scollegato dall’abbonamento Enterprise.
Nota
Puoi avere solo un database attivo per abbonamento.
Se vuoi che il database importato diventi il tuo ambiente di produzione:
scollega il database precedente dall’abbonamento
registra il nuovo.
Consulta la documentazione relativa alla registrazione dei database per avere istruzioni step by step.