Customer accounts
Using customer accounts for an ecommerce shop enables you to manage customers, control access to the shop, the checkout, or the customer portal, and support both B2B and B2C operations.
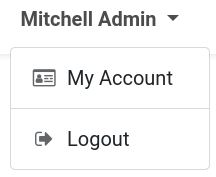
After logging in, customers can access their customer portal by clicking their username in the top-right corner of the screen and selecting My Account. From there, they can view all their documents in one place, such as quotations, orders, invoices, and more.
Suggerimento
The customer account page can be customized with building blocks and other features through the website builder.
Customer account creation
You can choose whether customer accounts and document access are available to everyone or restricted to invited users only. To do so, go to , then scroll down to the Privacy section. Under Customer Account, select one of the following options:
On invitation: Customers can only create an account if the website owner sends them an invitation.
Free sign up: Every website visitor can create an account and sign in. They will get access to the portal by default.
To send an email invitation to a customer:
Go to .
Select a customer or click New to create one, ensuring an Email address is set.
Click the (Actions) icon next to the record’s name at the top-left and select Grant portal access.
In the Portal Access Management pop-up, click Grant Access to send the invitation.
Suggerimento
To invite multiple customers at once, switch to the customers List view, select several customers, click the Actions button, and select Grant portal access.
Once done, the customer(s) receive an email confirming their account creation, including instructions on setting a password and activating their account.
Nota
When selecting the Free sign up, a clickable Don’t have an account? link appears under the login form on the website.
The On invitation option is especially useful for B2B businesses that prefer to keep prices hidden on the website and grant access only to invited customers.
Suggerimento
It is possible to configure a website form with a Create a Customer action to automatically create a customer record in the backend when filled in.
Restrizioni accesso
Once a customer account is created, it is still possible to adjust the access rights either globally or for individual users:
Revoke access or re-invite a customer using the related buttons in the Portal Access Management pop-up.
Restrict access to the shop;
Decide whether customers need to create an account to complete the checkout.
Suggerimento
It is also possible to define the types of documents customers have access to. To do so, click your username in the upper-right corner of the website, select My Account and open the website builder. On the Customize tab, enable or disable access to specific documents as needed.
Shop access
To restrict access to the entire online shop for users who are not logged-in, go to , scroll to Privacy and under Ecommerce Access, select Logged in users. Select All users if the shop should be visible to every website visitor.
Suggerimento
To restrict access to the shop’s pricing, use pricelists with country groups.
Checkout access
To allow customers to checkout as guests or force them to sign in/create an account, go to , scroll down to the Shop - Checkout Process section, and configure the Sign in/up at checkout setting. The following options are available:
Optional: Customers can check out as guests and register later via the order confirmation email to track their order.
Disabled (buy as guest): Customers can checkout as guests without creating an account.
Mandatory (no guest checkout): Customers must sign in or create an account at the Review Order step to complete their purchase.
Nota
Settings are specific to each website, allowing you to configure a B2C website with guest checkout and a B2B website that requires customers to sign in.
To use the wishlist feature, customers must create an account to save their favorite items for later.
Multi-website account
When managing multiple websites, it is possible to make customer accounts available across all websites, allowing each customer to use a single account. To do so, go to , in the Privacy section, enable the Shared Customer Accounts option.
Nota
When operating both B2B and B2C online shops, it is recommended to use separate websites for each business model.