Work approvals and overtime
Odoo’s Attendances app requires management oversight in order to ensure all logged attendances are correct, especially overtime hours and incomplete shifts.
Management dashboard
All attendance records that require approval, typically due to overlapping work entries or unapproved time off, are managed from a centralized management dashboard. To access this, navigate to .
The Management dashboard only displays attendance records for current employees that need to be approved, in a default list view. This is due to the two default filters in the search bar, the To Approve and Active Employees.
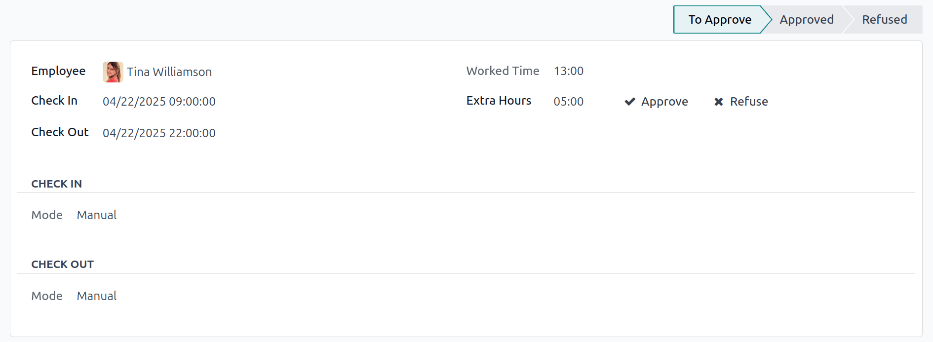
Each attendance record displays the following information:
Employee: The name of the employee.
Check In: The date and time the employee checked in.
Check Out: The date and time the employee checked out.
Worked Time: The number of worked hours the employee logged.
Worked Extra Hours: The amount of overtime worked.
Extra Hours: The total approved extra hours.

Approvals and refusals
Attendance records can be approved and refused directly from the Management dashboard. At the far-right of each record, Approve and Refuse buttons appear. Click the corresponding button to either approve or refuse the logged attendance record.
Observera
When approving or refusing attendance records from the Management dashboard, it is not possible to view the details of the attendance record.
Partial approvals
It is possible to approve a portion of the logged Extra Hours and not the full amount. To approve only a portion of overtime, click into an attendance record to view the details.
The top half of the record displays the specific check in and check out details, including the method used. The Check In and Check Out information in the top half of the form can be modified, if needed. Click into the desired field, and make any needed changes.
The bottom half of the form contains the Overtime Details tab. This tab lists the overtime rules used to calculate the extra hours, along with the pay rate and status. The extra hours listed in this tab can be modified, allowing for partial overtime approval.
Click into the Extra Hours (encoded) field of the line being modified. Enter the amount
of hours being approved in an HH:MM format, then click Approve at the
end of the line.
After editing and approving the Extra Hours (encoded) field, the status changes to Approved, and the Extra Hours field in the top half of the form updates to display the approved overtime.
Viktigt
Once partial overtime is approved, it is still possible to deny overtime by clicking the icon next to the Extra Hours field in the top half of the form, or clicking Refuse at the end of the overtime entry in the Overtime Details tab.
Observera
Occasionally, verifying an employee’s location when checking-in may be needed. The method the employee checked-in to work is found on the individual record, in the Mode field.
The Mode field is not modifiable, as it only logs the method the attendance record was created.
The possible options are:
Kiosk: The employee physically checked in or out using a kiosk device. The employee was present at the kiosk to check-in.
Systray: The employee checked in or out directly from the database. Depending on the IP Address displayed on the detailed attendance record, the employee’s location at the time of check-in can be determined.
Manual: The record was created manually in the Attendances app. This is typically done by management, to add a missing record.
Convert overtime to time off
Some companies allow for the conversion of overtime into time off. To convert all or a portion of overtime into time off, navigate to . Click on the desired attendance record to view the specific attendance details.
In the Overtime Details tab, adjust the amount of overtime being converted to time off in the Extra Hours (encoded) field, if necessary. Next, click the checkbox in the Compensable as Time Off column, indicating the overtime should be converted to time off. Click Approve at the end of the line, and the status changes to Approved, and the Extra Hours field in the top half of the form updates to reflect the approved overtime.

Create attendance records
When necessary, users with the required access rights are able to create attendance records manually in the Attendances app. Some situations requiring this is when employees forget to check in and out for shifts, as employees cannot retroactively create attendance records.
To add a missing attendance record, navigate to . Click the New button in the upper-left corner to open a Create pop-up window. Enter the following information on the form, then click Save & Close:
Employee: Select the employee the record is being created for. The signed-in user populates this field, by default.
Check In: Using the calendar, select the check in date and time, then click Apply. By default, the current date is selected, and the time is set to
12:00:AM.Check Out: Using the calendar, select the check out date and time, then click Apply. By default, the following date is selected, and the time is set to
12:00:AM.Worked Time: This field is automatically populated with the difference from the selected Check In and Check Out times. This field cannot be modified.
Extra Hours: This field is not modifiable as overtime must be approved. This field displays zero (
00:00) by default.
