Plugin för Outlook
Outlook gör det möjligt för tredjepartsapplikationer att ansluta för att utföra databasåtgärder från e-postmeddelanden. Odoo har ett plugin för Outlook som gör det möjligt att skapa en möjlighet från e-postpanelen.
Observera
Outlook-tillägget är tillgängligt för både skrivbords- och webbversioner av Outlook. Se Microsofts artikel om tillägg.
Konfiguration
Outlook Mail Plugin måste konfigureras både på Odoo och Outlook.
Viktigt
Se till att kontrollera databasversionen i appen Inställningar –> Allmänna inställningar, längst ner på sidan.
För databasversioner 19.2 och senare, se den senaste dokumentationen för installationsinstruktioner.
Aktivera Mail-plugin
Aktivera först modulen E-postplugin i databasen. Gå till , aktivera E-postplugin och Spara konfigurationen.
Installera plugin-programmet för Outlook
Ladda ner () följande XML-fil för senare uppladdning: https://download.odoocdn.com/plugins/outlook/manifest.xml.
Öppna sedan Outlook-brevlådan och välj ett e-postmeddelande. Klicka därefter på knappen Appar i det övre högra hörnet och klicka sedan på Hämta tillägg.

Efter detta steg, välj Mina tillägg fliken på vänster sida.

Under Anpassade tillägg längst ned klickar du på + Lägg till ett anpassat tillägg och väljer sedan Lägg till från fil…

För nästa steg, bifoga filen manifest.xml som laddats ner ovan och tryck på OK. Läs sedan varningen och klicka på Install.

Anslut databasen
Nu är Outlook anslutet till Odoo-databasen. Öppna ett e-postmeddelande i Outlook-brevlådan, klicka på knappen Appar i det övre högra hörnet och välj Odoo Inbox Addin.

Den högra panelen kan nu visa Företagsinsikter. Längst ner klickar du på Login.

Observera
Endast ett begränsat antal Företagsinsikter (Lead Enrichment) är tillgängliga som en testdatabas. Denna funktion kräver förbetalda krediter.
Tips
Om panelen fortfarande är tom efter en kort stund är det möjligt att webbläsarens cookie-inställningar förhindrade den från att laddas. Observera att dessa inställningar också ändras om webbläsaren är i inkognitoläge.
För att åtgärda problemet, konfigurera webbläsaren så att den alltid tillåter cookies på Odoo’s plugin-sida.
För Google Chrome, ändra webbläsarens cookie-inställningar genom att följa guiden på: https://support.google.com/chrome/answer/95647 och lägg till download.odoo.com i listan över Sajter som alltid kan använda cookies.
När detta är klart måste Outlook-panelen öppnas igen.
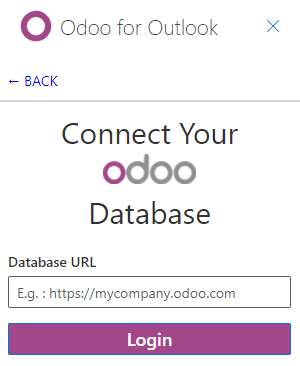
Ange nu Odoo-databasens URL och klicka på Login.
Klicka sedan på Allow för att öppna popup-fönstret.

Om användaren inte är inloggad i databasen anger du autentiseringsuppgifterna. Klicka på Allow för att låta Outlook Plugin ansluta till databasen.

Använda inkorgspluginet
För att använda pluginet öppnar du ett e-postmeddelande i Outlook-brevlådan, klickar på knappen Appar i det övre högra hörnet och väljer Odoo Inbox Addin för att öppna panelen.
Observera
Alternativen som är tillgängliga i panelen varierar beroende på vilka appar som är installerade i databasen.
Skapa en kontakt
För att skapa en kontaktpost i Odoo från ett e-postmeddelande klickar du på ikonen (cirkel plus).
Observera
En kontaktpost måste skapas innan en lead/möjlighet kan skapas.
Skapa en möjlighet
För att skapa en möjlighet från ett e-postmeddelande klickar du på ikonen (plus) bredvid Möjligheter. Detta öppnar en ny möjlighetspost i Odoo i en ny flik. E-postmeddelandets ämne används som möjlighetens rubrik och innehållet i e-postmeddelandet läggs till på fliken Anteckningar i möjligheten.
Skapa en arbetsuppgift
För att skapa en arbetsuppgift från ett e-postmeddelande klickar du på ikonen (plus) bredvid Uppgifter. Ange sedan titeln på projektet där arbetsuppgiften ska skapas i det resulterande fältet och välj lämpligt projekt från listan. Detta öppnar en ny arbetsuppgiftspost i Odoo i en ny flik. E-postmeddelandets ämne används som arbetsuppgiftens rubrik och innehållet i e-postmeddelandet läggs till på fliken Beskrivning.
Skapa ett ärende
För att skapa ett ärende från ett e-postmeddelande klickar du på ikonen (plus) bredvid Ärenden. Detta öppnar en ny ärendepost i Odoo i en ny flik. E-postmeddelandets ämne används som ärendets rubrik och innehållet i e-postmeddelandet läggs till på fliken Beskrivning i ärendet.