환경설정
설정
Sign’s general settings, available via , allow you to:
add Default Terms & Conditions to the signature request email
Manage template access; once enabled, it is possible to restrict access to a template to specific user groups when creating or editing the template
enable the following additional authentication methods, manage the service, and buy credits:
manage authentication via SMS and buy credits
upload a
.p12or.pfxfile containing a personal digital certificate, allowing you to add a cryptographic, or digital, signature to a document
기본 이용약관
Terms and conditions allow a business to standardize the legal relationship with its clients, define obligations and expectations, manage risk, and protect its interests by setting clear rules for aspects such as liability and dispute resolution.
To add default terms and conditions to signature requests:
Go to and enable Sign Default Terms & Conditions.
필요한 옵션을 선택합니다:
Terms in Email: This option is selected by default and places the terms and conditions at the bottom of the signature request email. Add your terms and conditions to the text box.
Terms as Web Page: This option displays the terms and conditions on a web page; the link to that page is then added as a link in the signature request email. Click Save, then click Update Terms. Add your terms and conditions to the text box, then click Save. Click Preview to see how the terms and conditions will be displayed.
팁
In the text box, type
/to open the powerbox, then use commands to insert headings, bulleted lists, etc.:guilabel:`저장`을 클릭합니다.
참고
It is also possible to manually attach files, such as terms and conditions, when configuring a signature request. For templates, files can be attached by default in the Communication section of the template Configuration when creating or editing the template.
필드
Fields are added to documents to indicate what information must be completed by the signers. Various fields are available by default. These fields can be edited and additional fields can be created if needed.
필드 생성 및 수정
필드를 생성하거나 편집하려면:
로 이동합니다.
Click New to create a new field or click on a field to open and edit it.
다음 필드를 작성하거나 편집합니다:
Field Name: Enter or edit the field name. This is visible in the list of fields in the left panel when a document is being prepared for signature.
Type: Choose the relevant field type from the dropdown; there are nine possible field types.
Placeholder: Optionally, specify a placeholder text that provides the signer with a hint or example during the signing process. If this field is left blank, the Field Name is used as placeholder text.
Tip: Add a tip that will be displayed inside an arrow to the left of the document during the signing process to help the signer understand what action to take (e.g., “Sign here”).
For Text fields only, optionally change the default Field Size from Regular Text to Short Text or Long Text.
참고
The size of any field can be modified manually when adding the field to a document.
For Text and Multiline Text fields only, optionally use the Linked to field to configure auto-completion so the field can be auto-completed during the signing process.
필드 유형
Signature: Signers enter their signature either by generating an automatic signature based on their name, drawing it using their mouse, or uploading a local file (usually an image). Each subsequent Signature field in a document reuses the data entered in the first field.
Initial: Signers enter their initials, in a similar way to the Signature field.
Text and Multiline Text: Signers can enter text on a single line or on multiple lines, respectively. These field types can be configured to be auto-completed during the signing process.
Checkbox: Signers can tick a box (e.g., to confirm they accept the terms and conditions).
Radio: Signers can select a single option from a series of options (defined when the field is added to the document) by clicking the radio button beside the desired option.
Selection: Signers can select a single option from a series of options (defined when the field is added to the document) via a dropdown menu.
Strikethrough: Signers can reject certain phrases by clicking the strikethrough field, which adds a visible line through the text.
Stamp: Signers can add a company stamp (defined when the field is added to the document).
자동 입력 필드 환경설정
To reduce the need for manual input and ensure accurate and consistent information, it is possible to have certain fields automatically completed with data from your database during the signing process. This is done by linking a Sign field to a field from a specific Odoo model.
서명 필드 자동 완성 기능을 활성화하려면:
로 이동합니다.
관련된 필드를 엽니다.
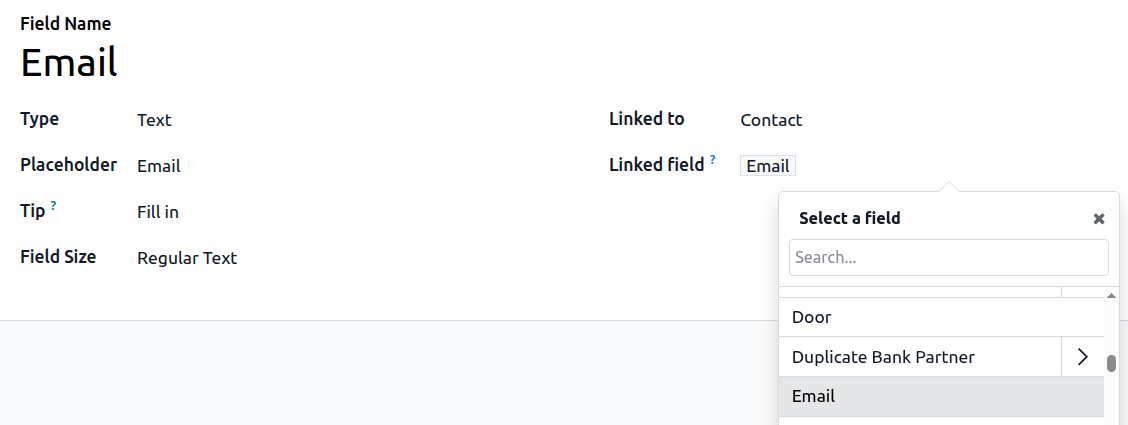
From the dropdown beside Linked to select the model, e.g., Contact, that contains the field you want to link to.
Click beside Linked Field, then use the field selector to select the relevant field, e.g., Email.
참고
When a document containing this field is being signed, the field is auto-completed. By default, field can still be edited after auto-completion. However, this can be prevented by editing the field after it has been added to the document and setting it to Read-only.
Example
In the example, the Email field in the Sign app is linked to the Email field in the Contact model. When the contact completes the document, their email address, as it appears in their record in the Odoo database, is automatically added to the document.