Categories and variants
Odoo eCommerce provides multiple ways to configure, present, and sell different product options to customers while organizing products by category for a better overview and smoother navigation.
ตัวเลือกสินค้า
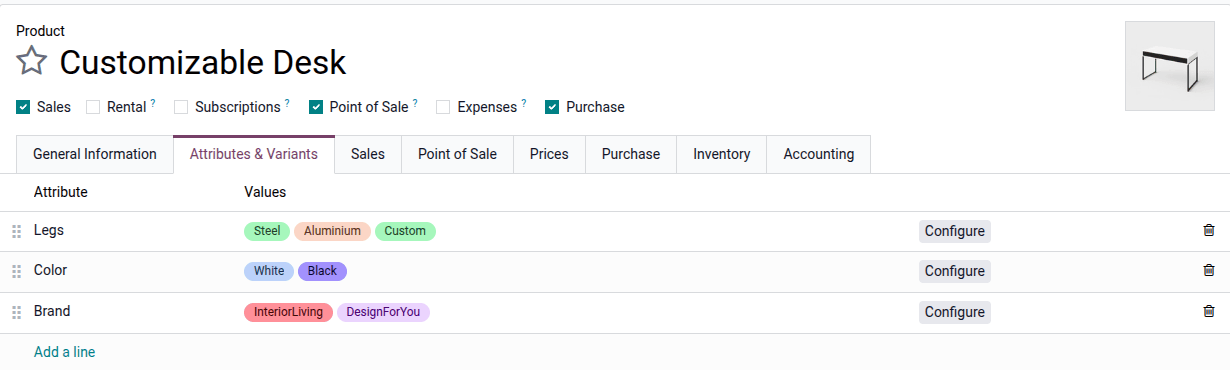
Product variants are different versions of the same product, created by combining attributes like color, size, material, etc., which can lead to differences in price and/or availability.
To configure product variants for a product:
Go to .
Scroll down to the eCommerce section and enable the Product Variants feature.
Access the product form and go to the Attributes & Variants tab.
Click Add a line and select the relevant attribute and its values. Repeat this step for each additional attribute.
The product variants are created automatically (or not) based on the attribute's configuration.
See also
คุณลักษณะ
Attributes refer to the characteristics of a product, such as its color or material. Each attribute includes a set of values.
Once your attributes are created, set the following options on the attribute form to control where and/or how they appear on the website:
eCommerce Filter: Set the field to Visible to make the attribute available in the shop's filter section.
On Product Cards: Set the field to Visible or Hover to display attributes on the product card on the shop page. These options are only available when variants are created instantly for the attribute.
When the field is set to Visible, the Show Thumbnails option can be toggled to show a product variant image instead of the attribute values.
It is also possible to add a variant picture on the product card on the shop page. To do so, go to the product form, click the Variants smart button, select a variant, and click the (Edit) icon to add a picture for each variant. Make sure that the Show Thumbnails option is enabled on the attribute form.
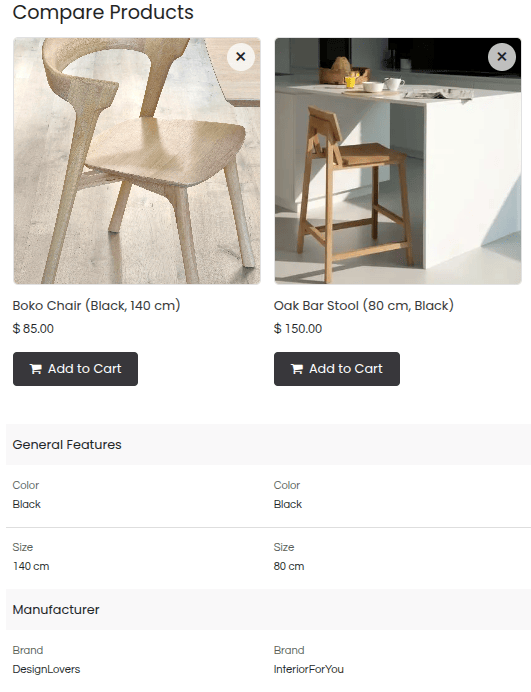
Attribute categories
To group similar attributes under the same section when comparing products, select the relevant eCommerce Category or create a new one. Click the (internal link) icon next to the category name to:
Rename the category.
Change its Sequence.
Reorder the Related Attributes to define the order in which they are displayed in the comparison summary.
Add attributes to the category by clicking Add a line.
E-commerce categories
E-commerce categories are used to organize products into groups, making it easier for customers to browse the online store.

To create e-commerce categories, go to , and click New. On the category form, add a Name, optionally enter a Parent category, restrict it to a specific Website, and write a Description, if needed. You can also add a Cover Image for the category.
To use eCommerce categories, go to , select the product you wish to modify, go to the Sales tab, navigate to the Ecommerce shop section, and select the Categories it belongs to.
Note
A single product can belong to multiple e-commerce categories.
Define how to display categories on the shop page.
Categories that do not contain any products are not visible on the shop page.
See also