Ferie
L’applicazione Ferie di Odoo funge da hub centralizzato per tutte le informazioni relative alle ferie. Questa applicazione gestisce richieste, saldi, assegnazioni, approvazioni e report.
Gli utenti possono richiedere ferie e vedere una panoramica delle proprie richieste e dei saldi ferie. I manager possono assegnare ferie a singoli individui, team o all’intera azienda e approvare le richieste di ferie.
Detailed reports can be run to see how much time off (and what kinds of time off) are being used, accrual plans can be created, and public holidays can be set.
Nota
Si noti che solo gli utenti con diritti di accesso specifici possono vedere tutti gli aspetti dell’app Ferie.
Tutti gli utenti possono accedere alle sezioni Le mie ferie e Panoramica dell’app Ferie. Tutte le altre sezioni richiedono diritti di accesso specifici.
To better understand how access rights affect the Time Off app, refer to the Nuovi dipendenti document, specifically the section about configuring the work information tab.
Configurazione
Per allocare le ferie ai dipendenti e affinché i dipendenti possano richiedere e utilizzare le loro ferie, i vari tipi di ferie devono essere prima configurati e poi allocati ai dipendenti (se l’allocazione è richiesta).
Tipi di ferie
Per visualizzare i tipi di ferie attualmente configurati, navigare in . I tipi di ferie vengono presentati in una vista elenco.
The Time Off app comes with four preconfigured time off types: Paid Time Off, Sick Time Off, Unpaid, and Compensatory Days. These can be modified to suit business needs, or used as-is.
Crea tipo di ferie
Per creare un nuovo tipo di ferie, andare su . Da qui, cliccare sul pulsante Nuovo per visualizzare un modulo vuoto per il tipo di ferie.
Enter the name for the particular type of time off in the blank line at the top of the form, such as
Sick Time or Vacation. Then, enter the following information on the form.
Nota
Gli unici campi obbligatori nel modulo del tipo di ferie sono il nome del Tipo di ferie, il campo Prendi ferie in e il campo Tipo di ferie. Inoltre, le sezioni Richieste di ferie e Richieste di allocazione devono essere configurate.
Time Off Requests section
Approvazione: selezionare il tipo specifico di approvazione richiesto per il tipo di ferie. Le opzioni sono:
Nessuna validazione: non sono richieste approvazioni quando si richiede questo tipo di ferie. La richiesta di ferie viene approvata automaticamente.
Da responsabile ferie: solo il responsabile ferie specificato, impostato su questo modulo nel campo Responsabile ferie notificato, deve approvare la richiesta di ferie. Questa opzione è selezionata per impostazione predefinita.
Da approvatore del dipendente: solo l’approvatore specificato del dipendente per le ferie, che è impostato nella scheda Informazioni di lavoro nel modulo del dipendente, deve approvare la richiesta di ferie.
By Employee’s Approver and Time Off Officer: Both the employee’s specified time off approver and the Time Off Officer are required to approve the time off request.
Allocation Requests section
Richiede allocazione: se le ferie devono essere allocate ai dipendenti, selezionare Sì. Se le ferie possono essere richieste senza che siano state precedentemente allocate, selezionare Nessun limite. Se viene selezionato Nessun limite, le seguenti opzioni non compaiono nel modulo.
Richieste del dipendente: selezionare Richieste di giorni extra consentite se il dipendente può richiedere più ferie rispetto a quelle allocate.
Se i dipendenti non devono poter effettuare richieste per più ferie rispetto a quelle allocate, selezionare l’opzione Non consentito.
Example
Dieci giorni sono allocati al dipendente per questo particolare tipo di ferie e l’opzione Richieste di giorni extra consentite è abilitata. Il dipendente vuole prendere una vacanza di dodici giorni. Può inviare una richiesta per due giorni aggiuntivi, poiché l’opzione Richieste di giorni extra consentite è abilitata.
Importante
È importante notare che richiedere ferie aggiuntive non garantisce che le ferie vengano concesse.
Approvazione: Selezionare il tipo di approvazioni necessarie per l’assegnazione di questo particolare tipo di ferie.
Approved by Time Off Officer indicates the Time Off Officer set on this form must approve the allocation.
No validation needed indicates that no approvals are required.
Sezione configurazione
Notified Time Off Officer: Select the person who is notified and responsible for approving requests and allocations for this specific type of time off.
Take Time Off in: Select the format the time off is requested in from the drop-down menu.
Le opzioni sono:
Giorno: se le ferie possono essere richieste solo in incrementi di giorni interi (8 ore).
Mezza giornata: se le ferie possono essere richieste solo in incrementi di mezza giornata (4 ore).
Ore: se le ferie possono essere prese in incrementi orari.
Dedurre ore extra: Abilitare questa opzione se la richiesta di ferie deve tenere conto di eventuali ore extra accumulate dal dipendente.
Example
Se un dipendente lavora due ore extra per la settimana e richiede cinque ore di ferie, la richiesta sarebbe per tre ore, poiché le due ore extra lavorate vengono utilizzate per prime e dedotte dalla richiesta.
Consenti di allegare documento giustificativo: abilitare questa opzione per consentire al dipendente di allegare documenti alla richiesta di ferie. Questo è utile in situazioni in cui è richiesta documentazione, come per congedi medici a lungo termine.
Tipo di ferie: dal menu a discesa, selezionare il tipo di ferie, Tempo lavorato oppure Assenza. Tempo lavorato indica che le ferie prese contano come tempo lavorato per qualsiasi tipo di maturazione verso cui il dipendente sta lavorando, mentre Assenza non conta per nessun tipo di maturazione.
Azienda: se nel database sono create più aziende e questo tipo di ferie si applica solo a un’azienda, selezionare l’azienda dal menu a discesa. Se questo campo viene lasciato vuoto, il tipo di ferie si applica a tutte le aziende nel database. Questo campo compare solo in un database multi-azienda.
Negative Cap section
Enable the Allow Negative Cap option if employees are able to request more time off than they currently have, allowing a negative balance. If enabled, an Amount in Negative field appears. In this field, enter the maximum amount of negative time allowed, in days.
Example
Sara attualmente ha tre giorni del tipo di ferie Vacation. Sta pianificando un viaggio che richiede cinque giorni di ferie.
The Vacation time off type has the Allow Negative Cap option enabled, and the
Amount in Negative is set to five.
Queste impostazioni consentono a Sara di inviare una richiesta per cinque giorni del tipo di ferie Vacation. Se approvato, il suo saldo ferie Vacation sarà di meno due (-2) giorni.

Sezione libro paga
Se il tipo di ferie deve creare Voci lavorative nell’app Libro paga, selezionare il Tipo di voce di lavoro dall’elenco a discesa.
Sezione Fogli ore
Nota
La sezione Fogli ore appare solo se l’utente è in modalità sviluppatore. Consultare il documento Modalità sviluppatore (modalità di debug) per dettagli su come accedere alla modalità sviluppatore.
Quando un dipendente prende ferie ed utilizza anche i fogli ore, Odoo crea voci nell’app Fogli ore per le ferie. Questa sezione definisce come vengono inserite.
Progetti: selezionare il progetto in cui appaiono le voci del tipo di ferie.
Attività: selezionare l’attività che appare nel foglio ore per questo tipo di ferie. Le opzioni predefinite sono: Ferie, Riunione o Formazione.
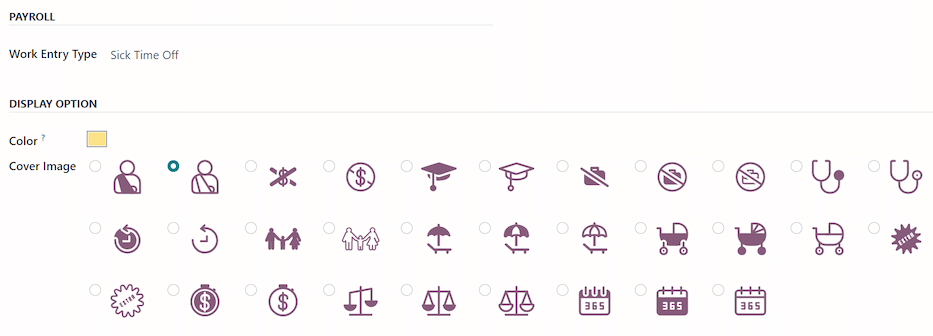
Display Option section
Colore: Selezionare un colore da utilizzare nella dashboard dell’applicazione Ferie.
Immagine di copertina: Selezionare un’icona da utilizzare nella dashboard dell’applicazione Ferie.
Piani di maturazione
Alcune ferie vengono guadagnate tramite un piano di maturazione, il che significa che per ogni periodo di tempo specificato in cui un dipendente lavora (ora, giorno, settimana, ecc.), matura un importo specificato di ferie.
Example
Se un dipendente matura un giorno di ferie per ogni settimana lavorata, guadagnerebbe 0,2 giorni di ferie per ogni ora lavorata. Alla fine di una settimana lavorativa di quaranta ore, guadagnerebbe un intero giorno di ferie (8 ore).
Creare un piano di maturazione
Per creare un nuovo piano di maturazione, andare a . Quindi, fare clic sul pulsante Nuovo, che visualizza un modulo di piano di maturazione vuoto.
Inserisci le seguenti informazioni nel modulo:
Nome: inserire il nome del piano di maturazione.
Tempo di maturazione guadagno: selezionare quando il dipendente inizia a maturare ferie, All’inizio del periodo di maturazione o Alla fine del periodo di maturazione.
Tempo di riporto: selezionare quando il dipendente ha ricevuto il tempo precedentemente guadagnato. Le opzioni sono:
All’inizio dell’anno: Selezionare questa opzione se l’accumulo viene riportato il 1° gennaio dell’anno successivo.
Alla data di assegnazione: Selezionare questa opzione se l’accumulo viene riportato non appena il tempo viene assegnato al dipendente.
Altro: selezionare questa opzione se nessuna delle altre due opzioni è applicabile. Quando selezionata, appare un campo Data di riporto. Selezionare la data utilizzando i due menu a discesa, uno per il giorno e uno per il mese.
Basato sul tempo lavorato: abilitare questa opzione se la maturazione delle ferie è determinata dalle ore lavorate del dipendente. I giorni non considerati come tempo lavorato non contribuiscono al piano di maturazione in Odoo.
Example
An employee is granted time off from an accrual plan configured to accrue one day of vacation for every five days worked. The accrual plan is based on the employee’s worked time (the Based on worked time checkbox is ticked).
Il dipendente lavora settimane standard di 40 ore. Secondo il piano di maturazione, dovrebbe guadagnare quattro giorni di ferie al mese.
The employee takes five days off. The time off type the employee has taken has the Kind of Time Off configured as an Absence.
Since the accrual plan only grants time off based on the worked time, the employee does not accrue a vacation day for the five days of time off that is considered an absence.
At the end of the month, the employee accrues only three days, instead of four.
Transizione traguardo: questo campo è visibile solo dopo che sono state configurate almeno due regole sul piano di maturazione. Questa selezione determina quando i dipendenti passano a un nuovo traguardo. Se sono idonei a cambiare traguardi nel mezzo di un periodo di paga, decidere se il dipendente cambia traguardi Immediatamente o Dopo il periodo di questa maturazione (dopo il periodo di paga corrente).
Company: This field only appears in a multi-company database. Using the drop-down menu, select the company the accrual plan applies to. If left blank, the accrual plan can be used for all companies.

Regole
Le regole devono essere create affinché i dipendenti possano maturare ferie dal piano di maturazione.
Per creare una nuova regola, fare clic sul pulsante Nuova Milestone nella sezione grigia Regole, e apparirà un modulo modale Crea Milestone.
Compilare i seguenti campi nel modulo:
Maturazione dipendente: Selezionare i parametri per le ferie maturate in questa sezione.
Per prima cosa, selezionare Giorni o Ore per l’incremento del tempo maturato utilizzando il menu a tendina.
Successivamente, inserire l’importo numerico del parametro selezionato che viene maturato. Il formato numerico è
X.XXXX, in modo che possano essere configurati anche giorni o ore parziali.Infine, selezionare la frequenza con cui il tempo viene maturato utilizzando il menu a tendina. Le opzioni predefinite sono Ogni ora, Giornaliero, Settimanale, Due volte al mese, Mensile, Due volte all’anno e Annuale.
A seconda dell’opzione selezionata, potrebbero apparire campi aggiuntivi. Ad esempio, se viene selezionato Due volte al mese, appaiono due campi aggiuntivi per specificare i due giorni di ogni mese in cui si verifica la milestone.
Cap accrued time: If there is a maximum amount of days the employee can accrue with this plan, enable this option.
When enabled, two additional fields appear beneath it. Select the type of time period from the drop-down menu, either Days or Hours.
Then, enter a numerical value in the field to specify the maximum amount of time that can be accrued.
Milestone reached: Enter the number and value of the time period that must pass before the employee starts to accumulate time off. The first value is numerical; enter a number in the first field.
Then, select the type of time period using the drop-down menu in the second field. The options are: Days, Months, or Years.
Riporto: selezionare come vengono gestite le ferie non utilizzate. Le opzioni sono:
None. Accrued time reset to 0: Any unused time off is gone.
Tutto il tempo maturato viene riportato: Tutte le ferie non utilizzate vengono trasferite all’anno solare successivo.
Carry over with a maximum: Unused time off is rolled over to the next calendar year, but there is a cap. An Up to field appears if this is selected. Enter the maximum number of Days that can roll over to the following year. Any time off beyond this parameter is lost.
Importante
Se il campo Riporto è impostato su Nessuno. Tempo maturato azzerato a 0, quella regola sovrascrive il Tempo di Riporto impostato sul piano di maturazione.
Se un’azienda crea un piano di maturazione, concedendo ai dipendenti ferie All’inizio del periodo di maturazione (cioè, all’inizio dell’anno), e imposta il Tempo di Riporto sul piano di maturazione a All’inizio dell’anno, ciò consente il riporto delle ferie non utilizzate all’anno successivo.
Successivamente, l’azienda aggiunge regole al piano di maturazione, allocando cinque giorni di ferie, annualmente, il primo dell’anno (una settimana di ferie allocata il 1° gennaio).
Se il campo Riporto è impostato su Nessuno. Tempo di maturazione azzerato a 0 nel pop-up Crea Milestone, le ferie non utilizzate non vengono riportate, anche se nel modulo Piano di Maturazione, il Tempo di Riporto è impostato su All’inizio dell’anno.
Il riporto impostato sulla regola ha la precedenza sul riporto impostato sul modulo del piano di maturazione.
Una volta completato il modulo, fare clic su Salva e Chiudi per salvare il modulo Crea Milestone e chiudere il modale, oppure fare clic su Salva e Nuovo per salvare il modulo e creare un’altra milestone. Aggiungere tutte le milestone desiderate.

Giorni festivi
To observe public or national holidays, and provide extra days off as holidays to employees, configure the observed public holidays in Odoo.
It is important to configure these days in Odoo, so employees are aware of the days they have off, and do not request time off on days that are already set as a public holiday (non-working days).
Inoltre, tutte le festività pubbliche configurate nell’app Ferie si riflettono anche in qualsiasi app che utilizza gli orari di lavoro, come Calendario, Pianificazione, Produzione e altre.
A causa dell’integrazione di Odoo con altre app che utilizzano gli orari di lavoro, è considerata una buona pratica assicurarsi che tutte le festività pubbliche siano configurate.
Create public holiday
To create a public holiday, navigate to .
All currently configured public holidays appear in a list view.
Fare clic sul pulsante Nuovo e apparirà una nuova riga in fondo all’elenco.
Inserire le seguenti informazioni su quella nuova riga:
Nome: inserire il nome della festività.
Azienda: se in un database multi-aziendale, l’azienda corrente compila questo campo per impostazione predefinita. Non è possibile modificare questo campo.
Nota
The Company field is hidden, by default. To view this field, click the (additional options) icon in the top-right corner of the list, to the far-right of the column titles, and activate the Company selection from the drop-down menu that appears.
Start Date: Using the date and time picker, select the date and time the holiday starts, then click Apply. By default, this field is configured for the current date. The start time is set according to the start time for the company (according to the working schedules). If the user’s computer is set to a different time zone, the start time is adjusted according, compared to the company’s time zone.
End Date: Using the date and time picker, select the date and time the holiday ends, then click Apply. By default, this field is configured for the current date, and the time is set to the end time for the company (according to the working schedules). If the user’s computer is set to a different time zone, the start time is adjusted accordingly, compared to the company’s time zone.
Example
Un’azienda situata a San Francisco opera dalle 9:00 alle 18:00, con una giornata lavorativa di otto ore e un’ora di pausa pranzo.
Per un utente a New York, con il fuso orario del computer impostato su Eastern Standard Time, una festività pubblica creata mostra un orario di inizio dalle 12:00 alle 21:00, tenendo conto della differenza di fuso orario di tre ore.
Allo stesso modo, un utente situato a Los Angeles, con il fuso orario del computer impostato su Pacific Standard Time, vede l’orario della festività pubblica come 9:00 - 18:00.
Orario di lavoro: se la festività deve essere applicata solo ai dipendenti con un orario di lavoro specifico, selezionare l’orario di lavoro dal menu a discesa. Se lasciato vuoto, la festività si applica a tutti i dipendenti.
Work Entry Type: If using the Payroll app, this field defines how the work entries for the holiday appear. Select the work entry type from the drop-down menu.

Giorni obbligatori
Alcune aziende hanno giorni speciali in cui uffici specifici, o l’intero personale, è tenuto a essere presente e le ferie non sono consentite in quei giorni specifici.
Questi tipi di giorni sono chiamati giorni obbligatori in Odoo. Possono essere configurati a livello aziendale o specifici per ufficio. Una volta configurati, i dipendenti nell’ufficio o azienda specificati non possono inviare richieste di ferie per questi giorni obbligatori.
Creare giorni obbligatori
Nessun giorno obbligatorio è configurato in Odoo per impostazione predefinita. Per creare un giorno obbligatorio, andare a .
Fare clic sul pulsante Nuovo nell’angolo in alto a sinistra e appare una riga vuota nell’elenco.
Inserire le seguenti informazioni su quella nuova riga:
Nome: inserire il nome del giorno obbligatorio.
Azienda: se in un database multi-aziendale, questo campo è visibile e l’azienda corrente compila questo campo per impostazione predefinita. Utilizzando il menu a discesa, selezionare l’azienda per cui è il giorno obbligatorio.
Uffici: questa colonna è nascosta per impostazione predefinita. Prima, fare clic sull’icona (opzioni aggiuntive) nell’angolo in alto a destra, accanto a Colore, quindi spuntare la casella accanto a Uffici per rivelare quella colonna.
Successivamente, selezionare gli uffici desiderati dal menu a discesa. È possibile selezionare più uffici e non c’è limite al numero di uffici che possono essere aggiunti.
Se questo campo viene lasciato vuoto, il giorno obbligatorio si applica all’intera azienda.
Data di inizio: utilizzando il selettore del calendario, selezionare la data di inizio del giorno obbligatorio.
Data di fine: utilizzando il selettore del calendario, selezionare la data di fine del giorno obbligatorio. Se si sta creando un singolo giorno obbligatorio, la data di fine deve essere la stessa della data di inizio.
Color: If desired, select a color from the available presented options. If no color is desired, select the
No coloroption, represented by a white box with a red line diagonally across it. The selected color appears on the main Time Off app dashboard, in both the calendar and in the legend.

Panoramica
To view a color-coded schedule of the user’s time off, and/or of the team managed by them, navigate
to . This presents a calendar with the default filter of
My Team, in a month view.
To change the time period displayed, click on the Month button to reveal a drop-down menu. Then, select either Day, Week, or Year to present the calendar in that corresponding view.
To navigate forward or backward in time, in the selected increment (Month, Week, etc.), click the ← (left arrow) or → (right arrow) to move either forward or backward in that specified amount of time.
For example, if Month is selected, the arrows adjust the view by one month.
To return to a view containing the current day, click the Today button at any time.
I membri del team sono elencati in ordine alfabetico su singole righe e le loro ferie richieste, indipendentemente dallo stato (convalidato o da approvare), sono visibili sul calendario.
Ogni dipendente è codificato per colore. Il colore del dipendente viene selezionato casualmente e non corrisponde al tipo di ferie da lui richiesto.
Lo stato delle ferie è rappresentato dal dettaglio del colore della richiesta, che appare piena (convalidato) o a strisce (da approvare).
Il numero di giorni o ore richiesti è scritto sulla richiesta (se c’è spazio sufficiente).
Nella parte inferiore del calendario, nella riga Totale, un grafico a barre mostra quante persone dovrebbero essere assenti in un dato giorno. Il numero su ogni singola barra rappresenta il numero di dipendenti assenti per quei giorni evidenziati.
Fare clic su una voce di ferie per visualizzare i dettagli per quella specifica voce di ferie. Vengono elencati il numero totale di ore o giorni, insieme all’ora di inizio e di fine delle ferie. Per visualizzare i dettagli della richiesta di ferie in una finestra modale, fare clic sul pulsante Visualizza.

Reportistica
The reporting feature allows users to view time off for their team, either by employee or type of time off. This allows users to see which employees are taking time off, how much time off they are taking, and what time off types are being used.
Any report can be added to a spreadsheet, when in either the (Graph) or (Pivot) view, through the Insert in Spreadsheet button that appears in the top-left of the report.
Nota
Se l’app Documenti è installata, appare un’opzione per aggiungere il report a un foglio di calcolo. In caso contrario, il report può essere aggiunto a una Dashboard.
Per dipendente
To view a report of employee time off requests, navigate to .
Il report predefinito presenta i dati dell’anno corrente in una vista elenco, mostrando tutti i dipendenti in ordine alfabetico. La riga di ciascun dipendente è compressa per impostazione predefinita. Per espandere una riga, fare clic in un punto qualsiasi della riga.
La vista si espande e le richieste di ferie sono organizzate per tipo di ferie. Fare clic in un punto qualsiasi di una riga del tipo di ferie per espanderla e visualizzare tutte le singole richieste di ferie che rientrano in quel tipo.
Le informazioni mostrate nell’elenco includono: il nome del Dipendente, il Numero di giorni di ferie richiesti, la Data di inizio, la Data di fine, lo Stato e la Descrizione.

Il report può essere visualizzato anche in altri modi. Fare clic sull’opzione pulsante corrispondente nell’angolo in alto a destra della pagina per visualizzare i dati in quel modo specifico. Le varie opzioni sono una vista (Elenco), o vista predefinita, (Grafico), tabella (Pivot), o vista (Calendario).
When a selection has been made, additional options appear for that particular selection. For more detailed information on the reports and their various options, refer to the reporting documentation.
Per tipo
To view a list of all time off, organized by time off type, navigate to . This shows all time off requests in a default bar chart.
Passare il mouse su una barra per visualizzare la Durata (giorni) di quel tipo specifico di ferie.

Fare clic su una barra per accedere a una vista elenco dettagliata di tutte le richieste di ferie per quel tipo di ferie.
Ogni richiesta è elencata, con le seguenti informazioni visualizzate: il Dipendente, il Numero di giorni, il Tipo di richiesta, la Data di inizio, la Data di fine, lo Stato e la Descrizione.
Il report può essere visualizzato anche in altri modi. Fare clic sull’opzione pulsante corrispondente nell’angolo in alto a destra della pagina per visualizzare i dati in quel modo. Le varie opzioni sono un (Grafico) (la vista predefinita), (Elenco), o tabella (Pivot).
When a selection has been made, additional options appear for that particular selection. For more detailed information on the reports, and their various options, refer to the reporting documentation.
Vedi anche