Nghỉ phép
Ứng dụng Nghỉ phép của Odoo hoạt động như trung tâm tập trung cho tất cả thông tin liên quan đến nghỉ phép. Ứng dụng này quản lý các yêu cầu, số dư, phân bổ, phê duyệt và báo cáo.
Người dùng có thể yêu cầu nghỉ phép và xem tổng quan về các yêu cầu và số dư nghỉ phép của họ. Người quản lý có thể phân bổ nghỉ phép cho cá nhân, nhóm hoặc toàn bộ công ty và phê duyệt yêu cầu nghỉ phép.
Detailed reports can be run to see how much time off (and what kinds of time off) are being used, accrual plans can be created, and public holidays can be set.
Ghi chú
Lưu ý, chỉ những người dùng có quyền truy cập cụ thể mới có thể xem tất cả các khía cạnh của ứng dụng Nghỉ phép.
Tất cả người dùng có thể truy cập các phần Nghỉ phép của tôi và Tổng quan của ứng dụng Nghỉ phép. Tất cả các phần khác yêu cầu quyền truy cập cụ thể.
To better understand how access rights affect the Time Off app, refer to the Nhân viên mới document, specifically the section about configuring the work information tab.
Cấu hình
Để phân bổ thời gian nghỉ cho nhân viên, và để nhân viên yêu cầu và sử dụng thời gian nghỉ của họ, các loại thời gian nghỉ khác nhau phải được cấu hình trước, sau đó phân bổ cho nhân viên (nếu cần phân bổ).
Các loại nghỉ phép
Để xem các loại nghỉ phép hiện đã cấu hình, điều hướng đến . Các loại nghỉ phép được hiển thị dưới dạng danh sách.
The Time Off app comes with four preconfigured time off types: Paid Time Off, Sick Time Off, Unpaid, and Compensatory Days. These can be modified to suit business needs, or used as-is.
Tạo loại nghỉ phép
Để tạo một loại thời gian nghỉ mới, điều hướng tới . Từ đây, nhấp vào nút Tạo mới để hiển thị biểu mẫu loại thời gian nghỉ trống.
Enter the name for the particular type of time off in the blank line at the top of the form, such as
Sick Time or Vacation. Then, enter the following information on the form.
Ghi chú
Các trường bắt buộc duy nhất trên biểu mẫu loại thời gian nghỉ là tên của Loại thời gian nghỉ, Nghỉ tính theo, và Loại hình thời gian nghỉ. Ngoài ra, các phần Yêu cầu thời gian nghỉ và Yêu cầu phân bổ phải được cấu hình.
Time Off Requests section
Phê duyệt: chọn loại phê duyệt cụ thể nào được yêu cầu cho loại thời gian nghỉ. Các tùy chọn là:
Không cần xác nhận: Không cần phê duyệt khi yêu cầu loại thời gian nghỉ này. Yêu cầu thời gian nghỉ được tự động phê duyệt.
Bởi Quản lý thời gian nghỉ: Chỉ có Quản lý thời gian nghỉ được chỉ định, được đặt trên biểu mẫu này trong trường Quản lý thời gian nghỉ được thông báo, mới được yêu cầu phê duyệt yêu cầu thời gian nghỉ. Tùy chọn này được chọn theo mặc định.
Bởi người phê duyệt của Nhân viên: Chỉ có người phê duyệt được chỉ định của nhân viên cho thời gian nghỉ, được đặt trên tab Thông tin công việc trên biểu mẫu nhân viên, mới được yêu cầu phê duyệt yêu cầu thời gian nghỉ.
By Employee's Approver and Time Off Officer: Both the employee's specified time off approver and the Time Off Officer are required to approve the time off request.
Allocation Requests section
Yêu cầu phân bổ: Nếu thời gian nghỉ phải được phân bổ cho nhân viên, chọn Có. Nếu thời gian nghỉ có thể được yêu cầu mà không cần phân bổ thời gian nghỉ trước đó, chọn Không giới hạn. Nếu chọn Không giới hạn, các tùy chọn sau sẽ không xuất hiện trên biểu mẫu.
Yêu cầu của Nhân viên: Chọn Cho phép yêu cầu ngày nghỉ thêm nếu nhân viên có thể yêu cầu nhiều thời gian nghỉ hơn số đã được phân bổ.
Nếu nhân viên không được phép yêu cầu thời gian nghỉ nhiều hơn số đã được phân bổ, chọn tùy chọn Không cho phép.
Example
Mười ngày được phân bổ cho nhân viên cho loại nghỉ phép cụ thể này và tùy chọn Cho Phép Yêu Cầu Ngày Bổ Sung được bật. Nhân viên muốn nghỉ phép mười hai ngày. Họ có thể gửi yêu cầu thêm hai ngày nữa vì tùy chọn Cho Phép Yêu Cầu Ngày Bổ Sung đã được bật.
Quan trọng
Cần lưu ý rằng việc yêu cầu thêm thời gian nghỉ phép không đảm bảo rằng thời gian nghỉ phép sẽ được chấp thuận.
Phê duyệt: Chọn loại phê duyệt bắt buộc để phân bổ loại nghỉ phép cụ thể này.
Approved by Time Off Officer indicates the Time Off Officer set on this form must approve the allocation.
No validation needed indicates that no approvals are required.
Phần cấu hình
Notified Time Off Officer: Select the person who is notified and responsible for approving requests and allocations for this specific type of time off.
Take Time Off in: Select the format the time off is requested in from the drop-down menu.
Các tùy chọn là:
Ngày: nếu nghỉ phép chỉ có thể yêu cầu theo bội số nguyên ngày (8 giờ).
Nửa Ngày: nếu nghỉ phép chỉ có thể yêu cầu theo bội số nửa ngày (4 giờ).
Giờ: nếu nghỉ phép có thể được yêu cầu theo bội số giờ.
Khấu trừ giờ làm thêm: Bật tùy chọn này nếu yêu cầu nghỉ phép cần tính đến bất kỳ thời gian làm thêm nào mà nhân viên đã tích lũy.
Example
Nếu nhân viên làm thêm hai giờ trong tuần và yêu cầu nghỉ năm giờ, yêu cầu sẽ là ba giờ vì hai giờ làm thêm được sử dụng trước và trừ vào yêu cầu.
Cho Phép Đính Kèm Tài Liệu Hỗ Trợ: Bật tùy chọn này để cho phép nhân viên đính kèm tài liệu vào yêu cầu nghỉ phép. Điều này hữu ích trong các tình huống cần tài liệu chứng minh, chẳng hạn như nghỉ ốm dài hạn.
Loại Nghỉ Phép: Từ menu thả xuống, chọn loại nghỉ phép, Thời Gian Làm Việc hoặc Vắng Mặt. Thời Gian Làm Việc cho biết thời gian nghỉ được tính vào thời gian làm việc cho bất kỳ loại tích lũy nào mà nhân viên đang hướng tới, trong khi Vắng Mặt không tính vào bất kỳ loại tích lũy nào.
Công Ty: Nếu nhiều công ty được tạo trong cơ sở dữ liệu và loại nghỉ phép này chỉ áp dụng cho một công ty, chọn công ty từ menu thả xuống. Nếu để trống trường này, loại nghỉ phép áp dụng cho tất cả các công ty trong cơ sở dữ liệu. Trường này chỉ xuất hiện trong cơ sở dữ liệu đa công ty.
Negative Cap section
Enable the Allow Negative Cap option if employees are able to request more time off than they currently have, allowing a negative balance. If enabled, an Amount in Negative field appears. In this field, enter the maximum amount of negative time allowed, in days.
Example
Sara hiện có ba ngày nghỉ phép loại Vacation. Cô ấy đang lên kế hoạch cho chuyến đi cần năm ngày nghỉ.
The Vacation time off type has the Allow Negative Cap option enabled, and the
Amount in Negative is set to five.
Các thiết lập này cho phép Sara gửi yêu cầu năm ngày nghỉ loại Vacation. Nếu được chấp thuận, số dư nghỉ phép Vacation của cô ấy sẽ là âm hai (-2) ngày.

Phần bảng lương
Nếu loại nghỉ phép cần tạo Công trong ứng dụng Bảng Lương, chọn Loại Mục Làm Việc từ danh sách thả xuống.
Phần chấm công
Ghi chú
Phần Chấm Công chỉ xuất hiện nếu người dùng đang ở chế độ nhà phát triển. Tham khảo tài liệu Chế độ lập trình viên (chế độ gỡ lỗi) để biết chi tiết về cách truy cập chế độ nhà phát triển.
Khi nhân viên nghỉ phép và cũng đang sử dụng chấm công, Odoo tạo các mục trong ứng dụng Chấm Công cho thời gian nghỉ. Phần này xác định cách chúng được nhập.
Dự Án: Chọn dự án mà các mục loại nghỉ phép xuất hiện.
Nhiệm Vụ: Chọn nhiệm vụ xuất hiện trong bảng chấm công cho loại nghỉ phép này. Các tùy chọn mặc định là: Nghỉ Phép, Họp, hoặc Đào Tạo.
Display Option section
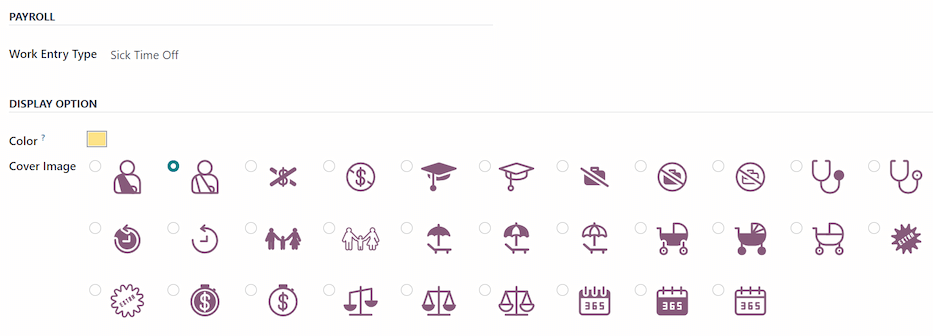
Màu sắc: Chọn màu sẽ được sử dụng trong bảng điều khiển ứng dụng Nghỉ phép.
Ảnh bìa: Chọn biểu tượng sẽ được sử dụng trong bảng điều khiển ứng dụng Nghỉ phép.
Kế hoạch tích luỹ
Một số loại nghỉ phép được tích lũy thông qua kế hoạch tích lũy, nghĩa là cứ sau một khoảng thời gian nhất định nhân viên làm việc (giờ, ngày, tuần, v.v.), họ kiếm được hoặc tích lũy một lượng thời gian nghỉ phép nhất định.
Example
Nếu nhân viên tích lũy một ngày nghỉ phép cho mỗi tuần làm việc, họ sẽ kiếm được 0,2 ngày nghỉ phép cho mỗi giờ làm việc. Vào cuối tuần làm việc bốn mươi giờ, họ sẽ kiếm được một ngày nghỉ phép trọn vẹn (8 giờ).
Tạo kế hoạch tích lũy
Để tạo kế hoạch tích lũy mới, điều hướng đến . Sau đó, nhấp vào nút Tạo mới, một biểu mẫu kế hoạch tích lũy trống sẽ hiển thị.
Nhập thông tin sau đây trên biểu mẫu:
Tên: Nhập tên kế hoạch tích lũy.
Thời gian tích lũy được nhận: Chọn thời điểm nhân viên bắt đầu tích lũy thời gian nghỉ phép, có thể là Vào đầu kỳ tích lũy hoặc Vào cuối kỳ tích lũy.
Thời gian chuyển sang: Chọn thời điểm nhân viên nhận thời gian đã kiếm được trước đó. Các tùy chọn là:
Vào đầu năm: Chọn tùy chọn này nếu phần tích lũy chuyển sang ngày 1 tháng 1 của năm tiếp theo.
Tại ngày phân bổ: Chọn tùy chọn này nếu phần tích lũy chuyển sang ngay khi thời gian được phân bổ cho nhân viên.
Khác: Chọn tùy chọn này nếu hai tùy chọn còn lại không áp dụng. Khi được chọn, trường Ngày chuyển sang sẽ xuất hiện. Chọn ngày bằng cách sử dụng hai menu thả xuống, một cho ngày và một cho tháng.
Dựa trên thời gian làm việc: Bật tùy chọn này nếu việc tích lũy thời gian nghỉ phép được xác định bởi số giờ làm việc của nhân viên. Các ngày không được coi là thời gian làm việc sẽ không đóng góp vào kế hoạch tích lũy trong Odoo.
Example
An employee is granted time off from an accrual plan configured to accrue one day of vacation for every five days worked. The accrual plan is based on the employee's worked time (the Based on worked time checkbox is ticked).
Nhân viên làm việc theo tuần tiêu chuẩn 40 giờ. Theo kế hoạch tích lũy, họ sẽ kiếm được bốn ngày nghỉ phép mỗi tháng.
The employee takes five days off. The time off type the employee has taken has the Kind of Time Off configured as an Absence.
Since the accrual plan only grants time off based on the worked time, the employee does not accrue a vacation day for the five days of time off that is considered an absence.
At the end of the month, the employee accrues only three days, instead of four.
Chuyển mốc: Trường này chỉ hiển thị khi đã cấu hình tối thiểu hai quy tắc trong kế hoạch tích lũy. Tùy chọn này xác định thời điểm nhân viên được chuyển lên mốc mới. Nếu nhân viên đủ điều kiện để thay đổi mốc trong giữa kỳ trả lương, bạn cần quyết định xem họ sẽ chuyển mốc Ngay lập tức hay Sau kỳ tích lũy này (tức là sau khi kỳ trả lương hiện tại kết thúc).
Company: This field only appears in a multi-company database. Using the drop-down menu, select the company the accrual plan applies to. If left blank, the accrual plan can be used for all companies.

Quy tắc
Các quy tắc phải được tạo ra để nhân viên có thể tích lũy thời gian nghỉ phép từ kế hoạch tích lũy.
Để tạo quy tắc mới, nhấp vào nút Mốc mới trong phần Quy tắc màu xám, và một biểu mẫu dạng cửa sổ Tạo mốc sẽ xuất hiện.
Điền các trường sau vào biểu mẫu:
Nhân viên tích lũy: Chọn các thông số cho thời gian nghỉ phép được tích lũy trong phần này.
Đầu tiên, chọn Ngày hoặc Giờ cho đơn vị thời gian tích lũy bằng menu thả xuống.
Tiếp theo, nhập số lượng của thông số đã chọn được tích lũy. Định dạng số là
X.XXXX, để có thể cấu hình cả ngày hoặc giờ lẻ.Cuối cùng, chọn tần suất tích lũy thời gian bằng menu thả xuống. Các tùy chọn mặc định là Hàng giờ, Hàng ngày, Hàng tuần, Hai lần một tháng, Hàng tháng, Hai lần một năm, và Hàng năm.
Tùy thuộc vào tùy chọn nào được chọn, các trường bổ sung có thể xuất hiện. Ví dụ, nếu Hai lần một tháng được chọn, hai trường bổ sung sẽ xuất hiện để chỉ định hai ngày trong mỗi tháng mà mốc xảy ra.
Cap accrued time: If there is a maximum amount of days the employee can accrue with this plan, enable this option.
When enabled, two additional fields appear beneath it. Select the type of time period from the drop-down menu, either Days or Hours.
Then, enter a numerical value in the field to specify the maximum amount of time that can be accrued.
Milestone reached: Enter the number and value of the time period that must pass before the employee starts to accumulate time off. The first value is numerical; enter a number in the first field.
Then, select the type of time period using the drop-down menu in the second field. The options are: Days, Months, or Years.
Chuyển sang: chọn cách xử lý thời gian nghỉ phép chưa sử dụng. Các tùy chọn là:
None. Accrued time reset to 0: Any unused time off is gone.
Tất cả thời gian tích lũy được chuyển sang: Tất cả thời gian nghỉ phép chưa sử dụng được chuyển sang năm dương lịch tiếp theo.
Carry over with a maximum: Unused time off is rolled over to the next calendar year, but there is a cap. An Up to field appears if this is selected. Enter the maximum number of Days that can roll over to the following year. Any time off beyond this parameter is lost.
Quan trọng
Nếu trường Chuyển sang được đặt thành Không. Thời gian tích lũy đặt lại về 0, quy tắc đó sẽ ghi đè Thời gian chuyển sang được đặt trên kế hoạch tích lũy.
Nếu một công ty tạo kế hoạch tích lũy, cấp cho nhân viên thời gian nghỉ phép Vào đầu kỳ tích lũy (tức là đầu năm), và đặt Thời gian chuyển sang trên kế hoạch tích lũy thành Vào đầu năm, nó cho phép thời gian nghỉ phép chưa sử dụng chuyển sang năm tiếp theo.
Sau đó, công ty thêm các quy tắc vào kế hoạch tích lũy, phân bổ năm ngày nghỉ phép, hàng năm, vào ngày đầu tiên của năm (một tuần nghỉ phép được phân bổ vào ngày 1 tháng 1).
Nếu trường Chuyển sang được đặt thành Không. Thời gian tích lũy đặt lại về 0 trên cửa sổ bật lên Tạo mốc, thì thời gian nghỉ phép chưa sử dụng sẽ không được chuyển sang, mặc dù trên biểu mẫu Kế hoạch tích lũy, Thời gian chuyển sang được đặt thành Vào đầu năm.
Kế hoạch chuyển sang được đặt trên quy tắc có ưu tiên cao hơn kế hoạch chuyển sang được đặt trên biểu mẫu kế hoạch tích lũy.
Sau khi hoàn thành biểu mẫu, nhấp Lưu & Đóng để lưu biểu mẫu Tạo Mốc và đóng cửa sổ, hoặc nhấp Lưu & Tạo mới để lưu biểu mẫu và tạo một mốc khác. Thêm bao nhiêu mốc tùy thích.

Ngày nghỉ lễ
To observe public or national holidays, and provide extra days off as holidays to employees, configure the observed public holidays in Odoo.
It is important to configure these days in Odoo, so employees are aware of the days they have off, and do not request time off on days that are already set as a public holiday (non-working days).
Ngoài ra, tất cả các ngày lễ công cộng được cấu hình trong ứng dụng Nghỉ phép cũng được phản ánh trong bất kỳ ứng dụng nào sử dụng lịch làm việc, chẳng hạn như Lịch, Lập kế hoạch, Sản xuất, v.v.
Do tích hợp của Odoo với các ứng dụng khác sử dụng lịch làm việc, nên đảm bảo cấu hình tất cả các ngày lễ công cộng được coi là phương pháp hay nhất.
Create public holiday
To create a public holiday, navigate to .
All currently configured public holidays appear in a list view.
Nhấp nút Tạo mới và một dòng mới xuất hiện ở cuối danh sách.
Nhập thông tin sau trên dòng mới đó:
Tên: Nhập tên ngày lễ.
Công ty: Nếu trong cơ sở dữ liệu đa công ty, công ty hiện tại sẽ điền vào trường này theo mặc định. Không thể chỉnh sửa trường này.
Ghi chú
The Company field is hidden, by default. To view this field, click the (additional options) icon in the top-right corner of the list, to the far-right of the column titles, and activate the Company selection from the drop-down menu that appears.
Ngày bắt đầu: Sử dụng bộ chọn ngày và giờ, chọn ngày và giờ bắt đầu kỳ nghỉ, sau đó nhấp Áp dụng. Theo mặc định, trường này được cấu hình cho ngày hiện tại. Thời gian bắt đầu được đặt theo giờ làm việc của công ty (theo lịch làm việc). Nếu máy tính của người dùng được đặt ở múi giờ khác, thời gian bắt đầu sẽ được điều chỉnh tương ứng so với múi giờ của công ty.
Ngày kết thúc: Sử dụng bộ chọn ngày và giờ, chọn ngày và giờ kết thúc kỳ nghỉ, sau đó nhấp Áp dụng. Theo mặc định, trường này được cấu hình cho ngày hiện tại và thời gian được đặt theo giờ kết thúc của công ty (theo lịch làm việc). Nếu máy tính của người dùng được đặt ở múi giờ khác, thời gian bắt đầu sẽ được điều chỉnh tương ứng so với múi giờ của công ty.
Example
Một công ty đặt tại San Francisco hoạt động từ 9:00 sáng - 6:00 chiều, với ngày làm việc tám giờ và một giờ nghỉ trưa.
Đối với người dùng ở New York, với múi giờ máy tính được đặt thành Giờ chuẩn phía Đông, một ngày lễ công cộng đã tạo hiển thị thời gian bắt đầu là 12:00 chiều - 9:00 tối, tính đến sự chênh lệch múi giờ ba giờ.
Tương tự, người dùng ở Los Angeles, với múi giờ máy tính được đặt thành Giờ chuẩn phía Thái Bình Dương, thấy thời gian ngày lễ công cộng là 9:00 sáng - 6:00 chiều.
Giờ làm việc: Nếu ngày lễ chỉ áp dụng cho nhân viên có một bộ giờ làm việc cụ thể, chọn giờ làm việc từ menu thả xuống. Nếu để trống, ngày lễ áp dụng cho tất cả nhân viên.
Work Entry Type: If using the Payroll app, this field defines how the work entries for the holiday appear. Select the work entry type from the drop-down menu.

Ngày bắt buộc
Một số công ty có những ngày đặc biệt mà các phòng ban cụ thể hoặc toàn bộ nhân viên được yêu cầu có mặt và không được phép nghỉ phép vào những ngày cụ thể đó.
Các loại ngày này được gọi là ngày bắt buộc trong Odoo. Chúng có thể được cấu hình cho toàn công ty hoặc cụ thể cho từng phòng ban. Khi được cấu hình, nhân viên trong phòng ban hoặc công ty được chỉ định sẽ không thể gửi yêu cầu nghỉ phép cho những ngày bắt buộc này.
Tạo ngày bắt buộc
Không có ngày bắt buộc nào được cấu hình trong Odoo theo mặc định. Để tạo ngày bắt buộc, điều hướng đến .
Nhấp vào nút Tạo ở góc trên bên trái và một dòng trống xuất hiện trong danh sách.
Nhập thông tin sau trên dòng mới đó:
Tên: Nhập tên của ngày bắt buộc.
Công ty: Nếu trong cơ sở dữ liệu đa công ty, trường này hiển thị và công ty hiện tại sẽ điền vào trường này theo mặc định. Sử dụng menu thả xuống, chọn công ty mà ngày bắt buộc áp dụng.
Phòng ban: Cột này được ẩn theo mặc định. Đầu tiên, nhấp vào biểu tượng (tùy chọn bổ sung) ở góc trên bên phải, bên cạnh Màu, sau đó đánh dấu vào ô checkbox bên cạnh Phòng ban để hiển thị cột đó.
Tiếp theo, chọn các phòng ban mong muốn từ menu thả xuống. Có thể chọn nhiều phòng ban và không có giới hạn về số lượng phòng ban có thể được thêm vào.
Nếu trường này để trống, ngày bắt buộc sẽ áp dụng cho toàn bộ công ty.
Ngày bắt đầu: Sử dụng công cụ chọn lịch, chọn ngày bắt đầu của ngày bắt buộc.
Ngày kết thúc: Sử dụng công cụ chọn lịch, chọn ngày kết thúc của ngày bắt buộc. Nếu tạo một ngày bắt buộc đơn lẻ, ngày kết thúc phải giống với ngày bắt đầu.
Color: If desired, select a color from the available presented options. If no color is desired, select the
No coloroption, represented by a white box with a red line diagonally across it. The selected color appears on the main Time Off app dashboard, in both the calendar and in the legend.

Tổng quan
To view a color-coded schedule of the user's time off, and/or of the team managed by them, navigate
to . This presents a calendar with the default filter of
My Team, in a month view.
To change the time period displayed, click on the Month button to reveal a drop-down menu. Then, select either Day, Week, or Year to present the calendar in that corresponding view.
To navigate forward or backward in time, in the selected increment (Month, Week, etc.), click the ← (left arrow) or → (right arrow) to move either forward or backward in that specified amount of time.
For example, if Month is selected, the arrows adjust the view by one month.
To return to a view containing the current day, click the Today button at any time.
Các thành viên trong nhóm được liệt kê theo thứ tự bảng chữ cái trên từng dòng riêng biệt, và thời gian nghỉ phép họ yêu cầu, bất kể trạng thái (đã xác nhận hoặc cần phê duyệt), đều hiển thị trên lịch.
Mỗi nhân viên được mã hóa màu. Màu của nhân viên được chọn ngẫu nhiên và không tương ứng với loại nghỉ phép họ yêu cầu.
Trạng thái của nghỉ phép được thể hiện bằng chi tiết màu sắc của yêu cầu, hiển thị dạng đặc (đã xác nhận) hoặc sọc (cần phê duyệt).
Số ngày hoặc giờ yêu cầu được ghi trên yêu cầu (nếu có đủ không gian).
Ở cuối lịch, trong dòng Tổng, biểu đồ thanh hiển thị có bao nhiêu người dự kiến nghỉ vào bất kỳ ngày nào. Số trên mỗi thanh riêng lẻ thể hiện số lượng nhân viên nghỉ trong những ngày được đánh dấu đó.
Nhấp vào một mục nghỉ phép để xem chi tiết cho mục nghỉ phép cụ thể đó. Tổng số giờ hoặc ngày được liệt kê, cùng với thời gian bắt đầu và kết thúc của nghỉ phép. Để xem chi tiết yêu cầu nghỉ phép trong cửa sổ bật lên, hãy nhấp vào nút Xem.

Báo cáo
The reporting feature allows users to view time off for their team, either by employee or type of time off. This allows users to see which employees are taking time off, how much time off they are taking, and what time off types are being used.
Any report can be added to a spreadsheet, when in either the (Graph) or (Pivot) view, through the Insert in Spreadsheet button that appears in the top-left of the report.
Ghi chú
Nếu ứng dụng Tài liệu được cài đặt, một tùy chọn để thêm báo cáo vào bảng tính sẽ xuất hiện. Nếu không, báo cáo có thể được thêm vào Bảng điều khiển.
Theo nhân viên
To view a report of employee time off requests, navigate to .
Báo cáo mặc định trình bày dữ liệu của năm hiện tại trong chế độ xem danh sách, hiển thị tất cả nhân viên theo thứ tự bảng chữ cái. Dòng của mỗi nhân viên được thu gọn theo mặc định. Để mở rộng một dòng, nhấp vào bất kỳ đâu trên dòng đó.
Chế độ xem mở rộng và các yêu cầu nghỉ phép được sắp xếp theo loại nghỉ phép. Nhấp vào bất kỳ đâu trên dòng loại nghỉ phép để mở rộng và xem tất cả các yêu cầu nghỉ phép riêng lẻ thuộc loại đó.
Thông tin hiển thị trong danh sách bao gồm: tên Nhân viên, Số ngày nghỉ được yêu cầu, Ngày bắt đầu, Ngày kết thúc, Trạng thái và Mô tả.

Báo cáo cũng có thể được hiển thị theo nhiều cách khác. Nhấp vào nút tùy chọn tương ứng ở góc trên bên phải của trang để xem dữ liệu theo cách cụ thể đó. Các tùy chọn khác nhau là (Danh sách), hoặc chế độ xem mặc định, (Biểu đồ), bảng (Pivot), hoặc chế độ xem (Lịch).
When a selection has been made, additional options appear for that particular selection. For more detailed information on the reports and their various options, refer to the reporting documentation.
By type
To view a list of all time off, organized by time off type, navigate to . This shows all time off requests in a default bar chart.
Di chuột qua một thanh để xem Thời lượng (Ngày) của loại thời gian nghỉ cụ thể đó.

Nhấp vào một thanh để chuyển đến chế độ xem danh sách chi tiết về tất cả các yêu cầu nghỉ phép cho loại thời gian nghỉ đó.
Mỗi yêu cầu được liệt kê, với thông tin sau được hiển thị: Nhân viên, Số ngày, Loại yêu cầu, Ngày bắt đầu, Ngày kết thúc, Trạng thái và Mô tả.
Báo cáo cũng có thể được hiển thị theo nhiều cách khác. Nhấp vào nút tùy chọn tương ứng ở góc trên bên phải của trang để xem dữ liệu theo cách đó. Các tùy chọn khác nhau là (Biểu đồ) (chế độ xem mặc định), (Danh sách), hoặc bảng (Pivot).
When a selection has been made, additional options appear for that particular selection. For more detailed information on the reports, and their various options, refer to the reporting documentation.
Xem thêm