Batch picking
Batch picking enables a single picker to handle multiple orders at once, reducing the number of times needed to navigate to a warehouse location. When picking in batches, orders are grouped and consolidated into a picking list. After the picking, the batch is taken to an output location, where the products are sorted into their respective delivery packages.
Since orders must be sorted at the output location after being picked, this picking method suits businesses with a few products that are ordered often. Storing high-demand items in easily accessible locations can increase the number of orders that are fulfilled efficiently.
Batch picking is ideal for industries or warehouses that handle high order volumes with a stable demand. This method increases efficiency by allowing workers to pick items for multiple orders in one trip through the warehouse, reducing travel time and boosting productivity.
Configuration
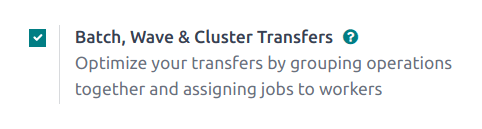
To activate the batch picking option, begin by going to . Under the Operations section, check the Batch, Wave & Cluster Transfers box.
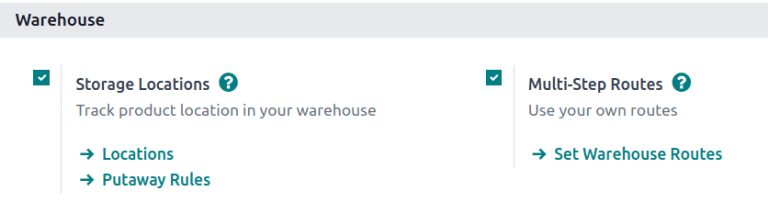
Since batch picking is a method to optimize the pick operation in Odoo, the Storage Locations and Multi-Step Routes options under the Warehouse heading must also be checked on this settings page. When finished, click Save.
See also
Create batch transfers
To manually group transfers directly from the , hover over the desired operation type from the Inventory Overview menu (e.g., the Receipts Kanban card), click the (vertical ellipsis) icon, then select Prepare Batch.

On the batch transfer form, fill out the following fields accordingly:
Responsible: Optionally select an employee assigned to the picking. Leave this field blank if any worker can fulfill this picking.
Operation Type: From the drop-down menu, select the operation type under which the picking is categorized.
Scheduled Date: Specify the date by which the Responsible person should complete the transfer.
See also
To learn more about the Dock Location, Vehicle, and Vehicle Category fields, see dispatch management system.
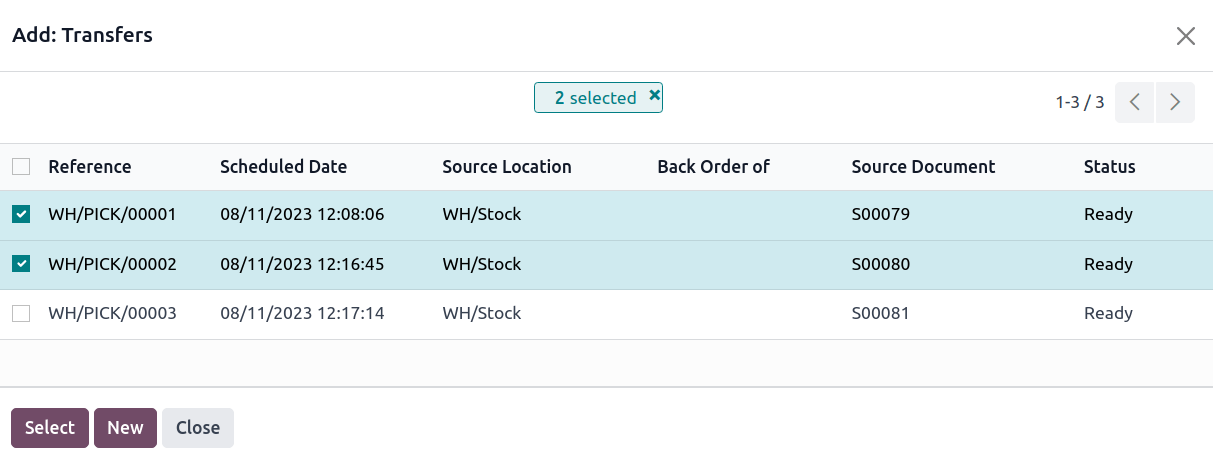
Next, in the Transfers tab, click Add a line to open the Add: Transfers window.
If the Operation Type field is filled, the list will filter transfer records matching the selected Operation Type.
Click Create New to create a new transfer. Click Select to add the selected transfers to the batch picking.
Once the transfer records are selected, click Confirm to confirm the batch picking.
Example
A new batch transfer is assigned to the Responsible, Joel Willis, for the Pick
Operation Type. The Scheduled Date is set to August 11.
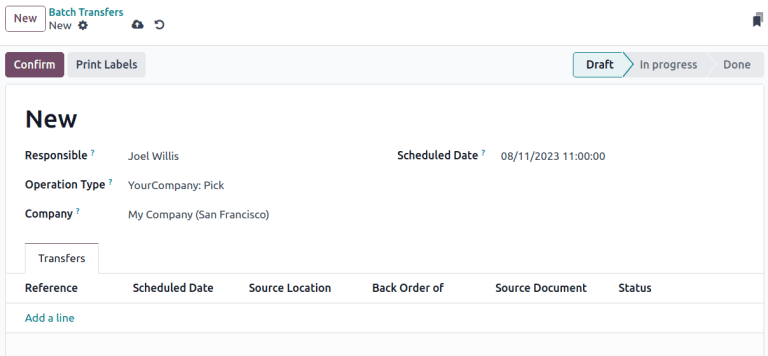
Clicking the Add a line button opens the Add:Transfers window, displaying only
pickings. This is because the Operation Type was set to Pick on the batch transfer
form.
Click the checkbox to the side of the transfers, WH/PICK/00001 and WH/PICK/00002, to include
them in the new transfer. Then, click the Select button to close the Add:Transfers
window.
Add batch from transfers list
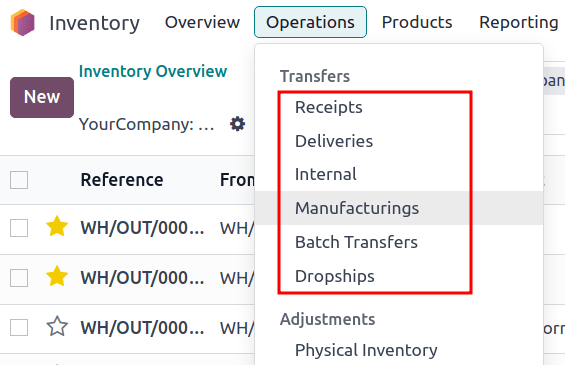
Another method of creating batch transfers is available using the Add to batch option in a list. Navigate to the drop-down menu, and select any of the Transfers to open a filtered list of transfers.
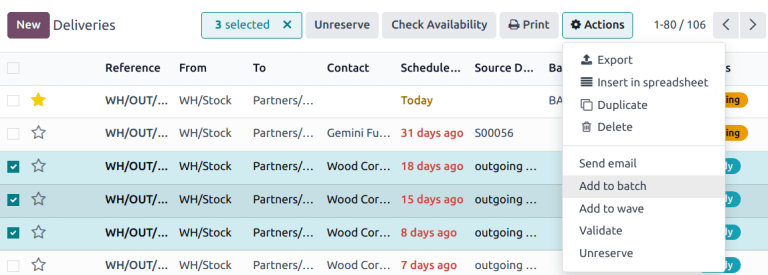
On the transfers list, select the checkbox to the left of the selected transfers to add to a batch. Next, navigate to the Actions button and click Add to batch from the resulting drop-down menu.
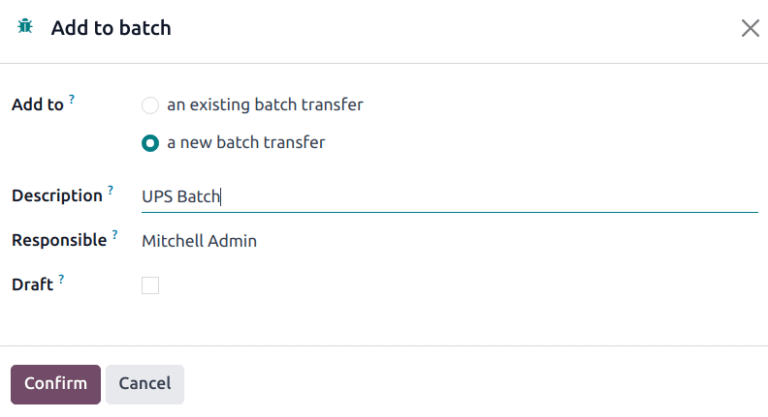
Doing so opens an Add to batch pop-up window, wherein the employee Responsible for the picking can be assigned.
Choose from the two radio options to add to an existing batch transfer or create a new batch transfer.
Add a Description for this batch.
Tip
The Description field can be used to add additional information to help workers identify the source of the batch, where to place the batch, what shipping containers to use, etc.
To create a batch to be processed at a later time, select the Draft checkbox.
Conclude the process by clicking Confirm.
Automatic batches
Batches can be automatically created and assigned based on several criteria. The Automatic Batches option is defined on the operation type level.
Example
In a multi-step delivery process, the picking operation can be grouped by customer, while the shipping operation can be organized by carrier and destination country.
To enable Automatic Batches, navigate to , and select the desired operation type (e.g., Delivery, Pick, etc.). Select the Automatic Batches checkbox. Then, select one or more Batch Grouping criteria by selecting the appropriate checkbox. Even if more than one grouping option is selected, only one batch is created.
Batches can be automatically generated based on the following criteria:
Contact
Carrier
Destination Country
Source Location
Destination Location

Process batch transfer
Handle batch transfers in the page.
Tip
Be certain the batch transfer is complete when the Validate button is highlighted in purple. If the Reserve button is highlighted instead, that means there are items in the batch that are currently not available in-stock.
To view the complete product list, select the desired batch transfer. In the Operations tab, the Quantity column indicates the required quantity for the order. The Reserved column shows the available stock to fulfill the order. Lastly, the Picked column specifies the products that have been picked and are ready for the next step.
To display the Picked column, click the (settings adjust) icon at the top corner of the Operations tab, then select Picked.
Example
The product, Office Lamp, is out of stock (its Quantity is 0.00), and its
Demand cannot be fulfilled.
Click the Reserve button to search the stock again for available products.

Create a back order
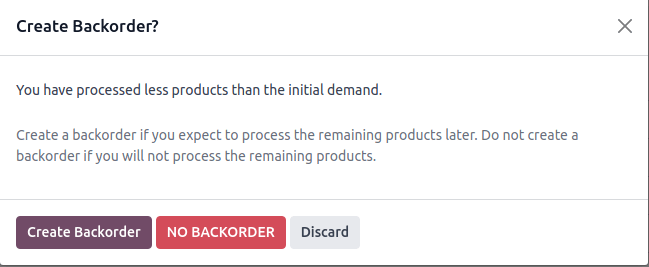
On the batch transfer form, if the Quantity of the product is less than the Reserved quantity, a Create Backorder? pop-up window appears when the Validate button is clicked.
Clicking the Create Backorder button automatically creates a back order for the unfulfilled products.
Note
When creating a new back order, the transfers that have not been validated in the batch will be removed from it.
Click No Backorder to finish the picking without creating a back order.
Click Discard to cancel the validation and return to the batch transfer form.