Google Calendar synchronization
Synchronize Google Calendar with Odoo to see and manage meetings from both platforms (updates go in both directions). This integration helps organize schedules, so a meeting is never missed.
Setup in Google
Select (or create) a project
Create a new Google API project and enable the Google Calendar API. First, go to the Google API Console and log into the Google account.
Note
If this is the first time visiting this page, Google will prompt the user to enter a country and agree to the Terms of Service. Select a country from the drop-down list and agree to the ToS.
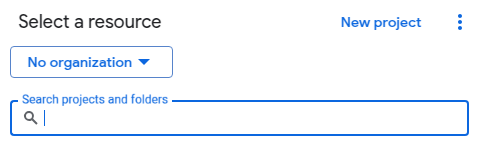
Next, click Select a project and select (or create) an API project to configure OAuth in, and store credentials. Click New Project.
Give the API project a clear name, like Odoo Sync, so it can be identified. Then click the
Create button.
Enable Google calendar API
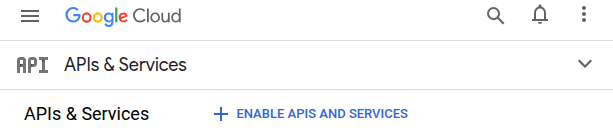
Now, click on Enabled APIs and Services in the left menu. Select Enabled APIs and Services again if the Search bar does not appear.
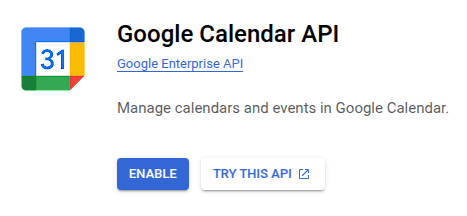
After that, search for Google Calendar API using the search bar and select Google
Calendar API from the search results. Click Enable.
OAuth consent screen
Now that the API project has been created, OAuth should be configured. To do that, click on OAuth consent screen in the left menu, then click the Get started button.
Warning
Personal Gmail Accounts are only allowed to be External User Type, which means Google may require an approval, or for Scopes to be added on. However, using a Google WorkSpace account allows for Internal User Type to be used.
Note, as well, that while the API connection is in the External testing mode, then no approval is necessary from Google. User limits in this testing mode is set to 100 users.
Follow the proceeding steps, in order:
In App Information, type
Odooin the App name field, then enter the email address for the User support email field and click the Next button.In Audience, select External, then click the Next button.
In Contact Information, enter the email again, then click the Next button.
In Finish, tick the checkbox to agree to Google API Services: User Policy. For the last step, click the Create button.
Test users
To give users the ability to sync with personal Gmail accounts, they must be set as a test user. Setup test users by going to Audience in the left-side menu and clicking the Add users button in the Test users section. Enter any desired user emails, and click the Save button.
Create credentials
The Client ID and the Client Secret are both needed to connect Google Calendar to Odoo. This is the last step in the Google console. Begin by clicking Clients in the left menu. Then, click Create Credentials, and select OAuth client ID, Google will open a guide to create credentials.
Under , select Website application for the
Application Type field, and type My Odoo Database for the Name.
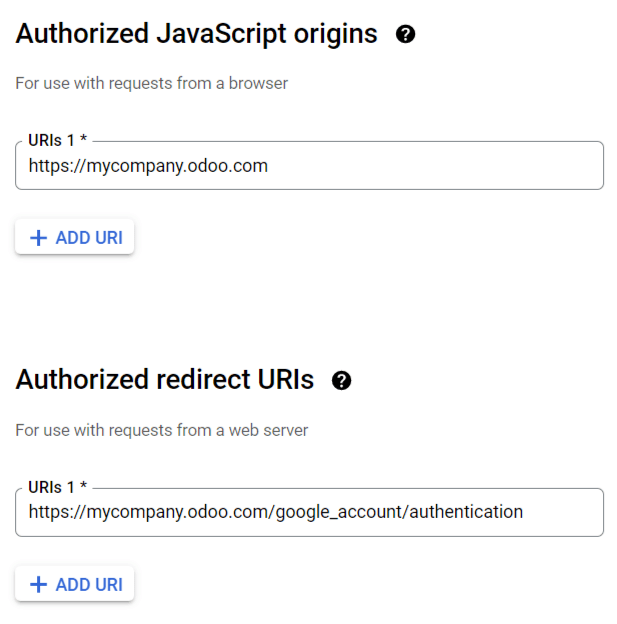
Under the Authorized JavaScript Origins section, click + Add URI and type the company’s Odoo full URL address.
Important
When entering the Authorized JavaScript Origins, the exact URL of the Odoo database must be used.
If the database is accessible through both an .odoo.com subdomain and a custom domain, the
custom domain configured as the primary domain should be used. The .odoo.com subdomain may not
work correctly in all cases and can result in authentication errors.
Under the Authorized redirect URIs section, click + Add URI and type the company’s Odoo URL address followed by
/google_account/authentication. Finally, click Create.
A Client ID and Client Secret will appear, save these somewhere safe.
Setup in Odoo
Once the Client ID and the Client Secret are located, open the Odoo database and go to to find the Google Calendar feature. Tick the checkbox labeled Google Calendar.
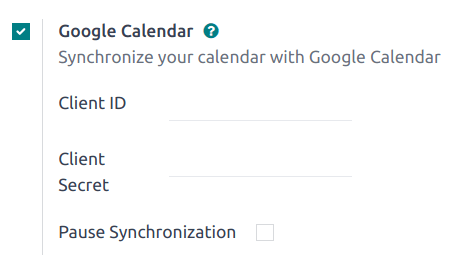
Next, copy and paste the Client ID and the Client Secret from the Google Calendar API credentials page into their respective fields below the Google Calendar checkbox. Then, click Save.
Note
Tick the Pause Synchronization checkbox to temporarily pause events from being updated. This allows for testing and troubleshooting without removing credentials or uninstalling the synchronization. To resume the sync, clear the checkbox and save.
Sync calendar in Odoo
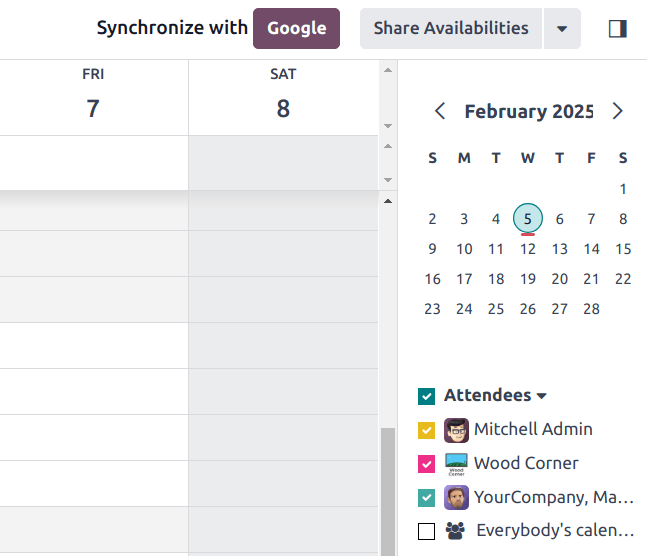
Finally, open the app in Odoo and click the Google sync button to sync Google Calendar with Odoo.
Note
When syncing Google Calendar with Odoo for the first time, the page will redirect to the Google Account. From there, select the Email Account that should have access, then select Continue (should the app be unverified), and finally select Continue (to give permission for the transfer of data).
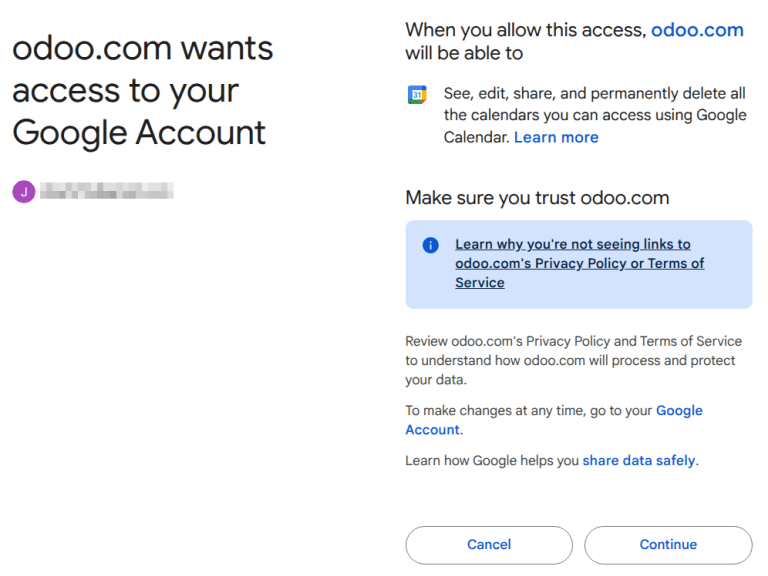
Now, Odoo Calendar is successfully synced with Google Calendar!
Warning
Odoo highly recommends testing the Google calendar synchronization on a test database and a test email address (that is not used for any other purpose) before attempting to sync the desired Google Calendar with the user’s production database.
Once a user synchronizes their Google calendar with the Odoo calendar:
Creating an event in Odoo causes Google to send an invitation to all event attendees.
Deleting an event in Odoo causes Google to send a cancellation to all event attendees.
Adding a contact to an event causes Google to send an invitation to all event attendees.
Removing a contact from an event causes Google to send a cancellation to all event attendees.
Events can be created in Google Calendar without sending a notification by selecting Don’t Send when prompted to send invitation emails.
Troubleshoot sync
There may be times when the Google Calendar account does not sync correctly with Odoo. Sync issues can be seen in the database logs.
In these cases, the account needs troubleshooting. A reset can be performed using the Reset Account button, which can be accessed by navigating to . Then, select the user to modify the calendar, and click the Calendar tab.
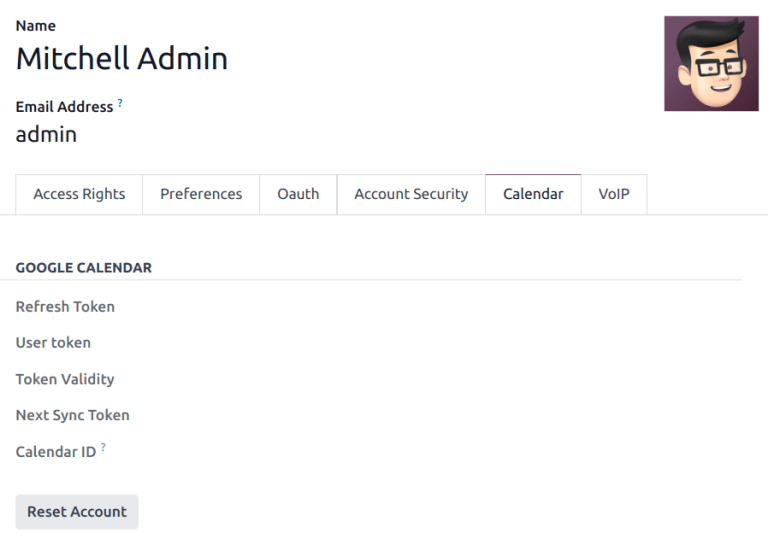
Next, click Reset Account under the correct calendar.
Reset options
The following reset options are available for troubleshooting Google calendar sync with Odoo:
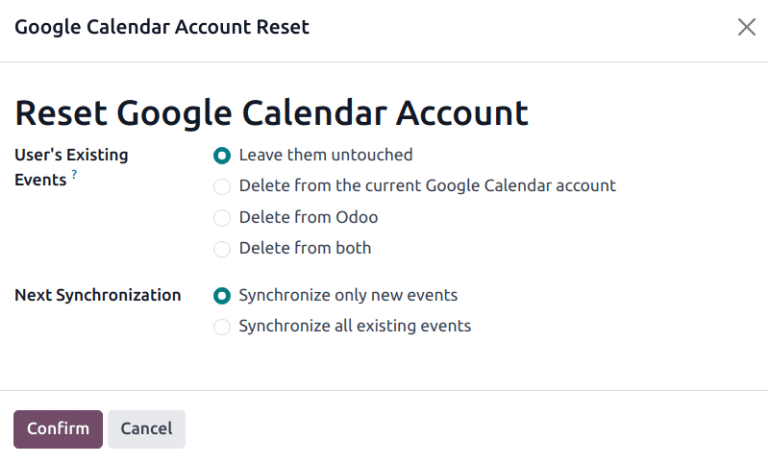
User’s Existing Events:
Leave them untouched: no changes to the events.
Delete from the current Google Calendar account: delete the events from Google Calendar.
Delete from Odoo: delete the events from the Odoo calendar.
Delete from both: delete the events from both Google Calendar and Odoo calendar.
Next Synchronization:
Synchronize only new events: sync new events on Google Calendar and/or Odoo calendar.
Synchronize all existing events: sync all events on Google Calendar and/or Odoo calendar.
Click Confirm after making the selection to modify the user’s events and the calendar synchronization.
Google OAuth FAQ
At times there can be configuration errors that occur, and troubleshooting is needed to resolve the issue. Below are the most common errors that may occur when configuring the Google Calendar for use with Odoo.
Production vs. testing publishing status
Choosing Production as the Publishing Status (instead of Testing) displays the following warning message:
OAuth is limited to 100 sensitive scope logins until the OAuth consent screen is verified. This may
require a verification process that can take several days.
To correct this warning, navigate to the Google API Platform. If the Publishing Status is In Production, click Back to Testing to correct the issue.
No test users added
If no test users are added to the OAuth consent screen, then an Error 403: access_denied populates.
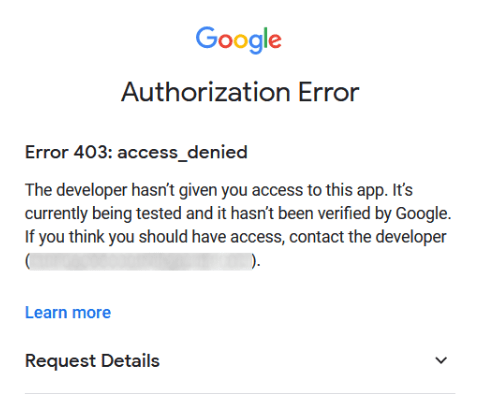
To correct this error, return to the OAuth consent screen, under APIs & Services, and add test users to the app. Add the email to be configured in Odoo.
Application Type
When creating the credentials (OAuth Client ID and Client Secret), if Desktop App is selected for the Application Type, an Authorization Error appears (Error 400:redirect_uri_mismatch).
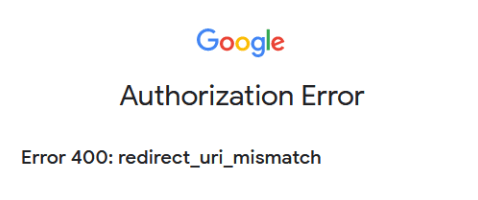
To correct this error, delete the existing credentials, and create new credentials, by selecting Web Application for the Application Type.
Then, under Authorized redirect URIs, click ADD URI, and type:
https://yourdbname.odoo.com/google_account/authentication in the field, being sure to replace
yourdbname in the URL with the real Odoo database name.
Tip
Ensure that the domain (used in the URI:
https://yourdbname.odoo.com/google_account/authentication) is the exact same domain as
configured in the web.base.url system parameter.
Access the web.base.url by activating developer mode, and navigating to
.