Process repair orders
Sometimes, products delivered to customers can break or be damaged in transit, and need to be returned for a refund, delivery of a replacement product, or repairs.
In Odoo, repairs for products returned by customers can be tracked in the Repairs app. Once repaired, products can be redelivered to the customer.
The return and repair process for damaged products typically follows the below steps:
Return order
Returns can be processed in Odoo via reverse transfers, created directly from a sales order (SO) once products have been delivered to a customer.
To create a return, navigate to the , and click into an SO from which a product should be returned. Then, from the SO form, click the Delivery smart button. Doing so opens the delivery order (DO) form.
From this form, click Return. This opens a Reverse Transfer pop-up window.
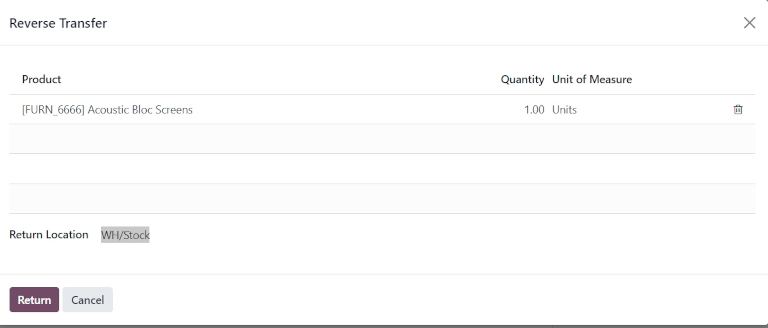
This pop-up lists the Product included in the order, the Quantity delivered to the customer, and the Unit of Measure the product was in.
Click the value in the Quantity field to change the quantity of the product to be returned, if necessary.
Click the 🗑️ (trash) icon at the far-right of the product line to remove it from the return, if necessary.
Once ready, click Return to confirm the return. This creates a new receipt for the returned products.
Once the product has been returned to the warehouse, receipt of the return can be registered in the database by clicking Validate from the reverse transfer form.
Tip
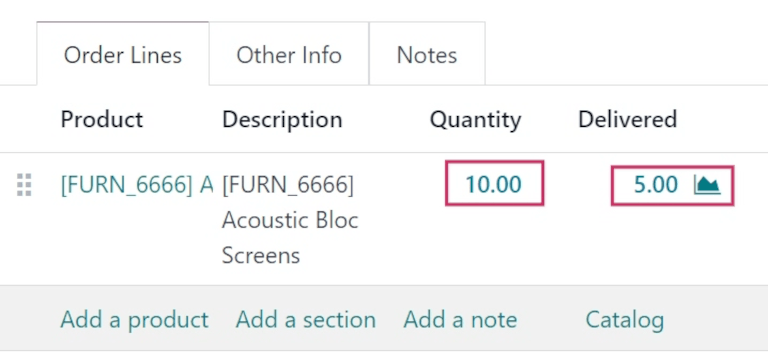
Once a reverse transfer for a return is validated, the value in the Delivered column on the original SO updates to reflect the difference between the original Quantity ordered, and the Quantity returned by the customer.
Create repair order
Once products have been returned, their repairs can be tracked by creating a repair order (RO).
To create a new RO, navigate to , and click New. This opens a blank RO form.
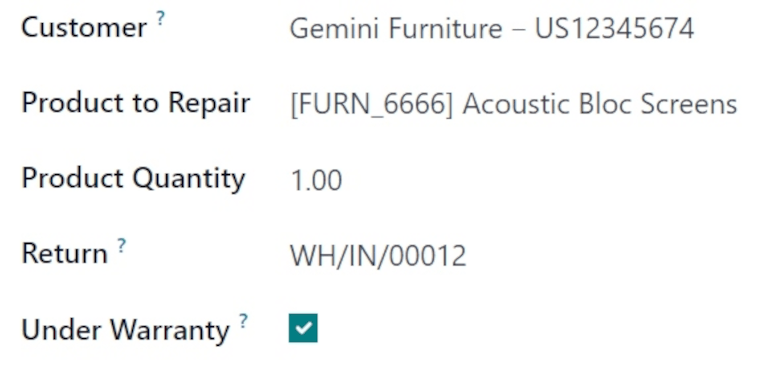
On this form, begin by selecting a Customer. The customer selected should be for whom the order will be invoiced and delivered.
In the Product to Repair field, click the drop-down menu to select the product that needs repair. If necessary, click Search More… to open a Search: Product to Repair pop-up window, and browse all products in the database.
Once a Product to Repair is selected, a new Product Quantity field appears
below it. In that field, enter the quantity (in a 0.00 format) of the product that requires
repair.
To the right of that value, click the drop-down list to select the unit of measure (UoM) for the product.
In the Return field, click the drop-down menu and select the return order from which the product to be repaired comes from.
Tick the Under Warranty checkbox, if the product being repaired is covered by a warranty. If ticked, the Customer is not charged for all the parts used in the repair order.
In the Scheduled Date field, click the date to reveal a calendar popover window. From this calendar, select a date for the repair, and click Apply.
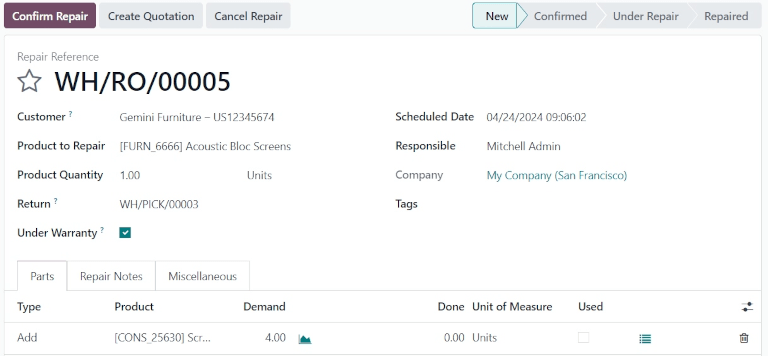
In the Responsible field, click the drop-down menu and select the user who should be responsible for the repair.
In the Company field, if in a multi-company environment, select which company this RO belongs to.
In the Tags field, click the drop-down menu and select which tags should be applied to this RO.
Parts tab
Add, remove, or recycle parts in the Parts tab. To do so, click Add a line at the bottom of the form.
In the Type column, click the box to reveal three options to choose from: Add (selected by default), Remove, and Recycle.
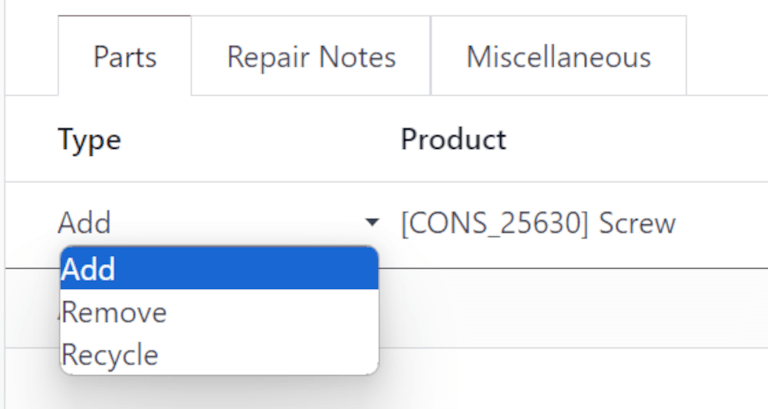
Choosing Add adds this part to the RO. Adding parts lists components for use in the repair. If the components are used, the user completing the repair can record they were used. If they were not used, the user can indicate that, too, and the components can be saved for another use.
Choosing Remove removes this part from the RO. Removing parts lists components that should be removed from the product being repaired during the repair process. If the parts are removed, the user completing the repair can indicate they were removed.
Choosing Recycle recycles this part from the RO, designating it for later use or to be repurposed for another use in the warehouse.
In the Product column, select which product (part) should be added, removed, or recycled. In the Demand column, change the quantity, if necessary, to indicate what quantity of this part should be used in the repair process.
In the Done column, change the value (in a 0.00 format) once the part has been
successfully added, removed, or recycled.
In the Unit of Measure column, select the UoM for the part.
Finally, in the Used column, tick the checkbox once the part has been used in the repair process.
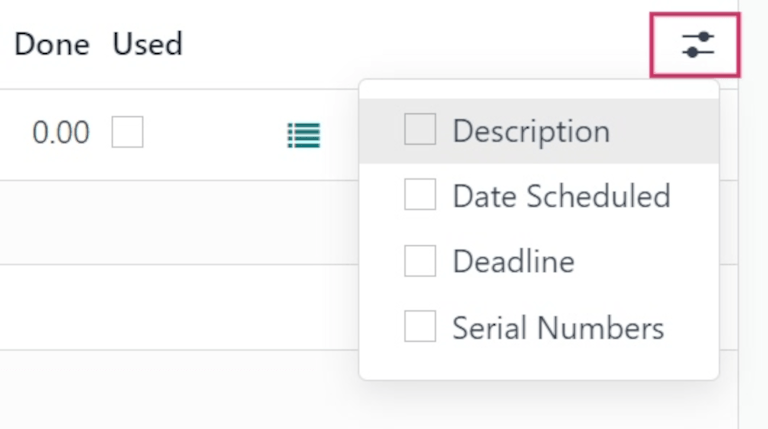
To add additional columns to the line, click the (optional columns drop-down) icon, at the far-right of the header row. Select the desired options to add to the line.
Repair Notes and Miscellaneous tabs
Click the Repair Notes tab to add internal notes about this specific RO, and anything the user performing the repair might need to know.
Click the blank text field to begin writing notes.
Click the Miscellaneous tab to see the Operation Type for this repair. By default, this is set to YourCompany: Repairs, indicating this is a repair type operation.
Once all desired configurations have been made on the RO form, click Confirm Repair. This moves the RO to the Confirmed stage, and reserves the necessary components needed for the repair.
A new Forecasted column appears on the product lines under the Parts tab, displaying the availability of all components needed for the repair.
Once ready, click Start Repair. This moves the RO to the Under Repair stage (in the upper-right corner). If the RO should be cancelled, click Cancel Repair.
Once all products have been successfully repaired, the RO is completed. To register this in the database, click End Repair.
Note
If all parts added to the RO were not used, clicking End Repair causes an Uncomplete Move(s) pop-up window to appear.
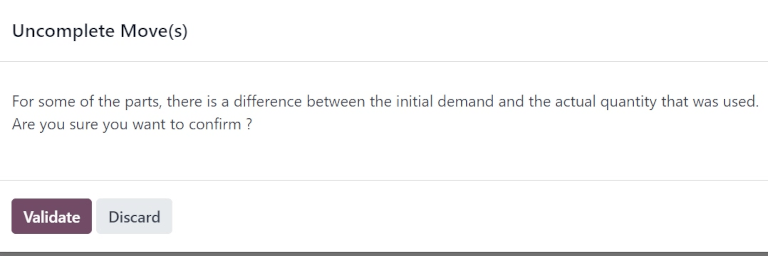
The pop-up window informs the user that there is a difference between the initial demand and the actual quantity used for the order.
If the Used quantity should be changed, click Discard or close the pop-up window. If the order should be confirmed, click Validate.
This moves the RO to the Repaired stage. A Product Moves smart button also appears above the form.
Click the Product Moves smart button to view the product’s moves history during and after the repair process.

Return product to customer
Product is under warranty
Once the product has been successfully repaired, it can be returned to the customer.
Product is not under warranty
If the product is not under warranty, or should the customer bear the repair costs, click Create Quotation. This opens a new SO form, pre-populated with the parts used in the RO, with the total cost of the repair calculated.
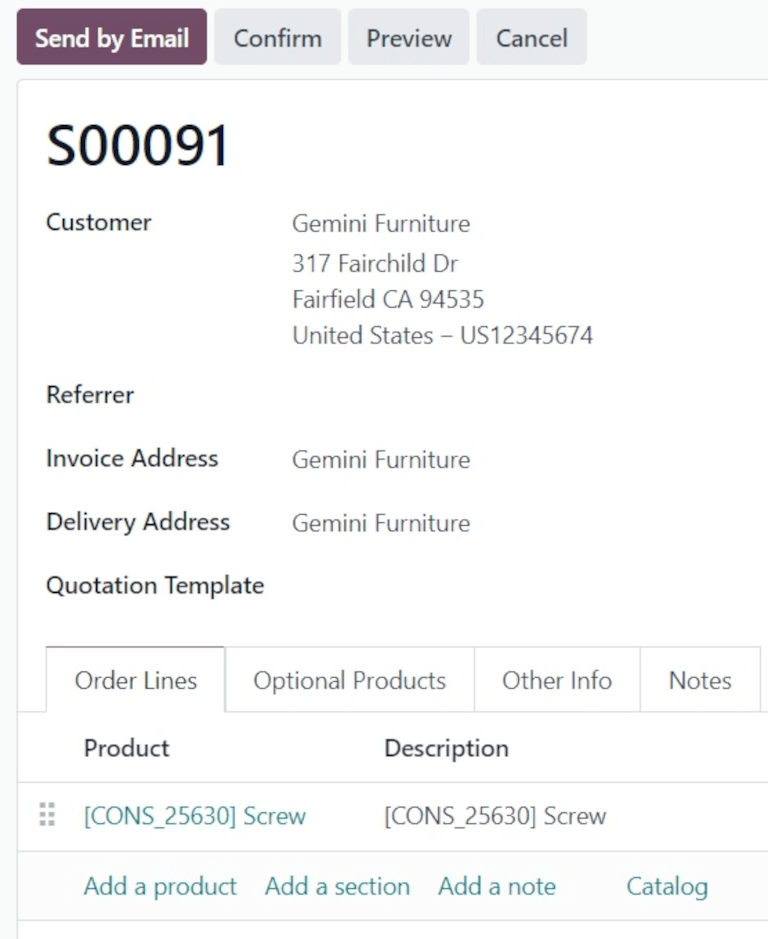
If this SO should be sent to the customer, click Confirm, and proceed to invoice the customer for the repair.
Tip
If the customer should be charged for a repair service, a service type product can be created and added to the SO for a repaired product.
To return the product to the customer, navigate to the , and select the original SO from which the initial return was processed. Then, click the Delivery smart button.
From the resulting list of operations, click the reverse transfer, indicated by the
Source Document, which should read Return of WH/OUT/XXXXX.
This opens the return form. At the top of this form, a Repair Orders smart button now appears, linking this return to the completed RO.
Click Return at the top of the form. This opens a Reverse Transfer pop-up window.

This pop-up lists the Product included in the order, the Quantity delivered to the customer, and the Unit of Measure the product was in.
Click the value in the Quantity field to change the quantity of the product to be returned, if necessary.
Click the 🗑️ (trash) icon at the far-right of the product line to remove it from the return, if necessary.
Once ready, click Return to confirm the return. This creates a new delivery for the returned products.
When the delivery has been processed and the product has been returned to the customer, click Validate to validate the delivery.
See also