Process receipts and deliveries in two steps
Depending on a company’s business processes, multiple steps may be needed before receiving or shipping products. In the two-step receipt process, products are received in an input area, then transferred to stock. Two-step receipts work best when various storage locations are being used, such as locked or secured areas, freezers and refrigerators, or various shelves.
Products can be sorted according to where they are going to be stored, and employees can stock all the products going to a specific location. The products are not available for further processing until they are transferred into stock.
In the two-step delivery process, products that are part of a delivery order are picked from the warehouse according to their removal strategy, and brought to an output location before being shipped.
One situation where this would be useful is when using either a FIFO, LIFO, or FEFO removal strategy, where the products that are being picked need to be selected based on their receipt date or expiration date.
Odoo is configured by default to receive and deliver goods in one step, so the settings need to be changed in order to utilize two-step receipts and deliveries. Incoming and outgoing shipments do not need to be set to have the same steps. For example, products can be received in two steps, but shipped in one step. In the following example, two steps will be used for both receipts and deliveries.
Configure multi-step routes
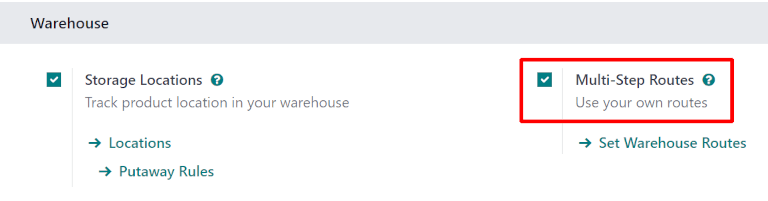
First, make sure the Multi-Step Routes option is enabled in , under the Warehouse heading. After enabling the setting, Save the changes.
Note
Activating the Multi-Step Routes setting will also activate the Storage Locations feature.
Next, the warehouse needs to be configured for two-step receipts and deliveries. Go to , and click on the warehouse to change the warehouse settings.
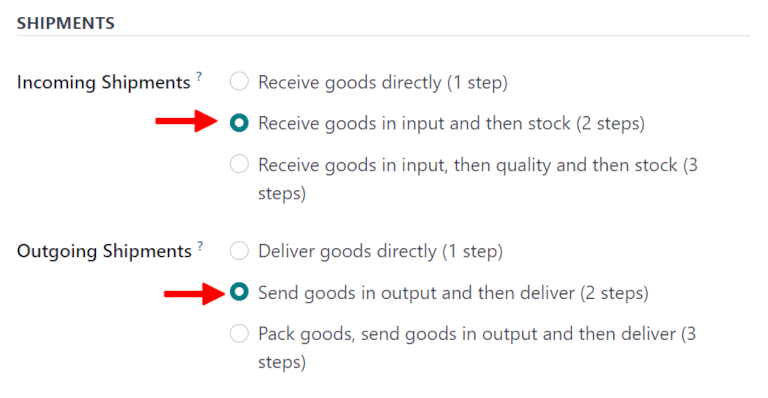
Then, select Receive goods in input and then stock (2 steps) for Incoming Shipments, and Send goods in output and then deliver (2 steps) for Outgoing Shipments.
Tip
Activating two-step receipts and deliveries will create new input and output locations, which by default, are labeled WH/Input and WH/Output, respectively, on the Locations dashboard. To rename these locations, go to , and select the Location to change. On the location form, update the Location Name, and make any other changes (if necessary).
Process a receipt in two steps (input + stock)
Create a purchase order
On the main application dashboard, start by making a new quote by clicking New. Then, select (or create) a Vendor from the drop-down field, add a storable Product to the order lines, and click Confirm Order to finalize the quote as a new purchase order.
Important
For businesses with multiple warehouses that have different step configurations, the
Deliver To field on the PO form may need to be specified as
the correct input location connected to the two-step warehouse, which can be done by selecting
the warehouse from the drop-down selection that includes the Receipts label at the end of the
name.
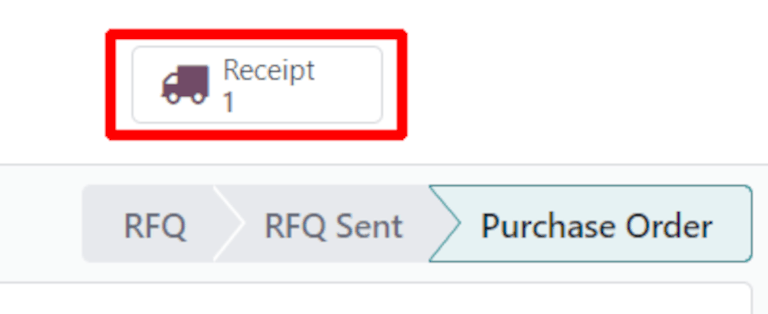
After confirming the PO, a Receipt smart button appears at the top of the PO form. Click it to reveal the new receipt (WH/IN) operation.
Process the receipt
Once the purchase order is confirmed, a receipt is generated and ready to process.
Navigate to the , and locate the Receipts task card on the Inventory Overview dashboard. This reveals a list of all receipts to process.
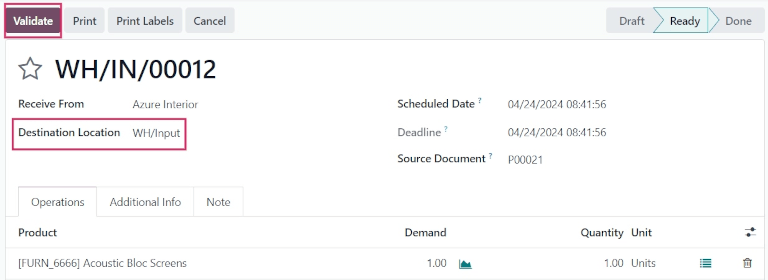
Click on the Receipt associated with the purchase order, then click Validate to complete the receipt and move the product to WH/Input.
Process the internal transfer
Once the receipt is validated, an internal transfer is created and ready to process.
Click back to the Inventory Overview in the breadcrumbs, and locate the Internal Transfers task card.
Click the # To Process button to reveal a list of all internal transfers to process, and select the transfer associated with the previously validated receipt.
Click Validate to complete the transfer and move the product from WH/Input to WH/Stock.
Once the transfer is validated, the product enters inventory and is available for customer deliveries or manufacturing orders.

Process a delivery order in two steps (pick + ship)
Create a sales order
In the application, create a new quote by clicking New. Select (or create) a Customer, add a storable Product to the order lines, and then click Confirm.
After confirming the SO, a Delivery smart button will appear in the top, above the SO form. Click the Delivery smart button to reveal the associated receipt.

Tip
Sales order receipts can also be found in the application. In the Overview dashboard, click the # To Process smart button in the Pick Kanban card.
Process the picking
Once the sales order is confirmed, a picking order is generated and ready to process.
Navigate to the , and locate the Pick task card on the Inventory Overview dashboard. This reveals a list of all pickings to process.
Click on the picking (WH/PICK) operation associated with the sales order to reveal the picking order.
Click Check Availability on the picking order form. If the product is in stock, Odoo automatically reserves the product. Quantities can also be manually set by changing the value in the Quantity column to match the value in the Demand column.
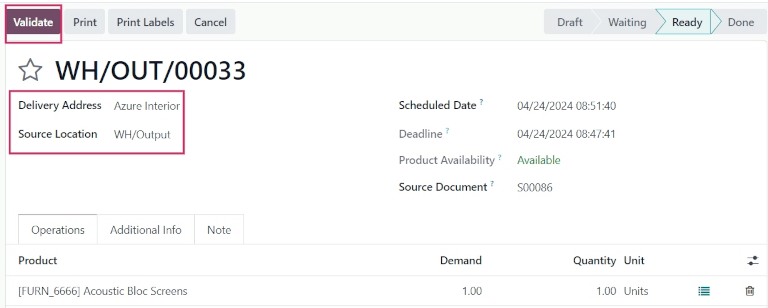
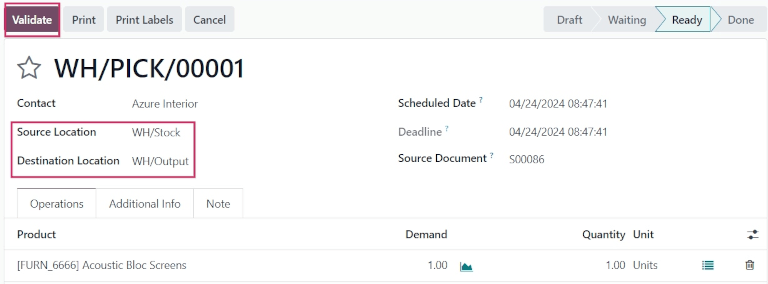
Once ready, click Validate to complete the picking and move the product from WH/Stock to WH/Output.
Process the delivery
Once the picking has been processed, the delivery order is generated, and can be processed.
Navigate back to the original sales order by going to , and selecting the associated sales order.
The Delivery smart button now indicates there are two transfers. Click the Delivery smart button to reveal each transfer tied to this sales order: the completed picking, and the new delivery (WH/OUT) operation. Click the delivery operation to open the delivery order.
Once ready, click Validate to complete the delivery.