IoT box
To start using an IoT box:
Connect your devices to the IoT box.
Network connection
The IoT box can be connected to the network via Ethernet or Wi-Fi.
Note
It is recommended to connect the IoT box to the same network as the devices it connects to.
Important
Never make the IoT box accessible from the public Internet. IoT systems are designed to provide your database with access to devices on your local network. Exposing them to the public Internet would create a security risk.
Ethernet
Plug the Ethernet cable into the IoT box’s Ethernet port and an available port on your router, then connect the IoT box to a power source.
Wi-Fi
Make sure no Ethernet cable is connected to the IoT box and follow these steps:
Connect the IoT box to a power source and wait a few minutes for it to power on.
Access the computer’s Wi-Fi settings and select the IoT box’s network. The network name is in the format
IoTBox-xxxxxxxxxxxx(wherexxxxxxxxxxxxis a unique identifier).Connect to the IoT box’s Wi-Fi network and sign in to it; the browser should automatically open and redirect to the IoT box’s homepage.
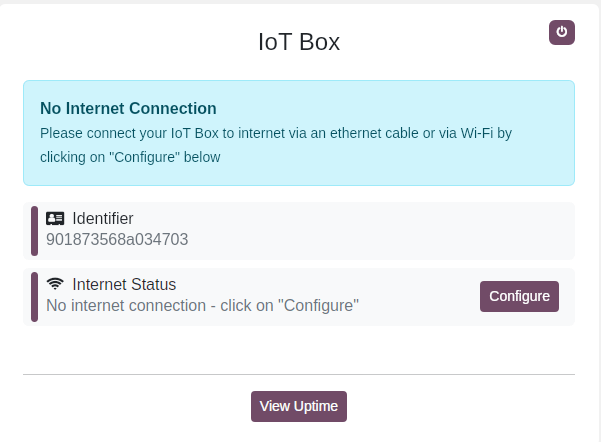
On the IoT box’s homepage, click Configure next to the Internet Status section.
Wait a few minutes for the available networks to be scanned, select the network, enter the Wi-Fi’s password, and click Connect.
Note
Once connected to the Wi-Fi network, the IoT box stops emitting its Wi-Fi signal, and the computer should automatically reconnect to its original network. If it does not, reconnect to it manually.
Depending on the operating system used, the browser might not open and redirect to the IoT box’s homepage. In this case, open the browser manually and navigate to
http://10.11.12.1or any URL starting with http (e.g.,http://odoo.com).
Tip
If the IoT box is connected to an external monitor, scan the first QR code displayed on the screen to connect to the network, then scan the second QR code to access the IoT box’s homepage. On the homepage, click Configure in the Internet Status section, select the relevant Wi-Fi network, enter the password, and click Connect.
LED status
The IoT box features two LEDs, located to the right of the SD card slot, that indicate its status and help with troubleshooting when no display is connected. The LEDs can be interpreted as follows:
Red LED lit: The IoT box is not connected to the Internet. Ensure the Ethernet cable is properly connected, or connect the IoT box via Wi-Fi.
Green LED flashing: The IoT box is waiting to connect to a database.
Green LED constantly lit: The IoT box is connected to a database; no further action is required.
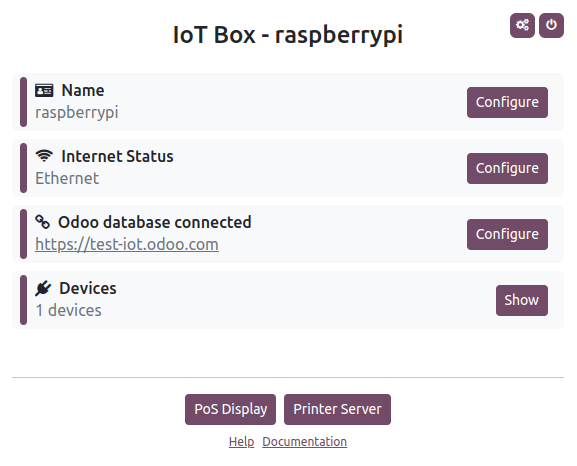
IoT box homepage
To access the IoT box’s homepage on a device, first ensure the device is on the same network as the IoT box. Then, if using the IoT app, click Homepage, or open a browser on the device and navigate to the IoT box’s IP address.
If the IP address is not already known, use any of the following methods to retrieve it:
While connected to the same network as the IoT box, open a web browser and navigate to
http://iotbox.local. The page automatically redirects to the homepage, which displays the IP address.Connect a supported receipt or label printer using a USB cable, which then automatically prints a ticket with the IP address.
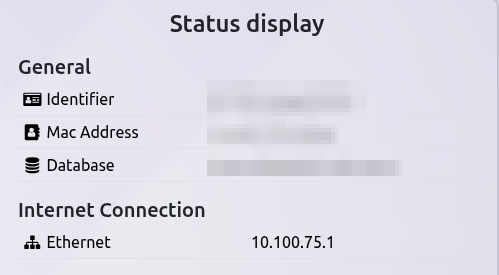
Connect the IoT box to an external monitor, which then displays the IP address on the screen.
On IoT box images
L2026.05.25and later, the IoT box IP address is displayed as a discovered Bluetooth device for 5 minutes after booting.Access the router’s administrator interface, or use third-party software to scan the network.
Tip
To manually restart the IoT box, access the homepage, then click the (power off) button in the top-right corner.
If the IoT box is connected to an external monitor or a printer, its homepage can also be accessed by scanning the displayed or printed QR code with a device connected to the same network as the IoT box.
To fully reboot the IoT box, unplug it and plug it back in.