EasyPost integration
Set up the EasyPost delivery connector in Odoo to manage EasyPost shipments to clients directly within Odoo.
EasyPost is a service that allows users to connect with multiple carriers, like UPS, USPS, FedEx, DHL, and more. Odoo can then connect to EasyPost to purchase labels from those carriers.
To configure it, complete these steps:
Upon completion, it is possible to calculate shipping costs based on package size and weight, have the charges applied directly to an EasyPost business account, and automatically print EasyPost tracking labels in Odoo.
Account setup
To begin, go to the EasyPost website to create or log into the company’s EasyPost business account.
Follow the website’s steps to complete registration and sign up for shipping services. Some shipping services (like USPS and DHL Express) are automatically enabled.
Integrating other carrier accounts
To use a different carrier, it is possible to enable Wallet Carrier Accounts to purchase labels from EasyPost. Alternatively, if a user has their own carrier account, they can enable it on EasyPost. Then, after these accounts are enabled, Odoo can integrate with the EasyPost account and manage labels.
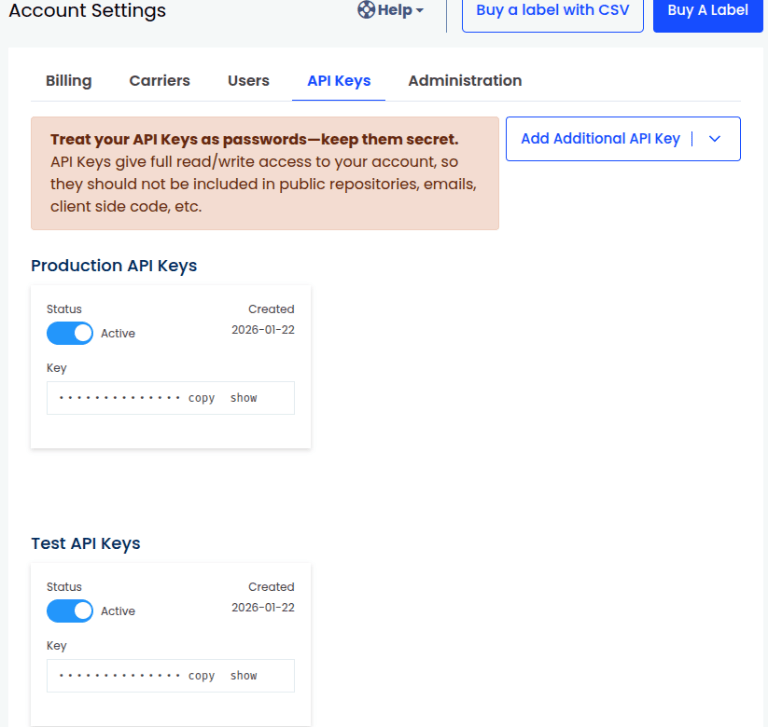
Obtain Test and Production API keys
After completing the setup, create Test and Production API keys. On the EasyPost website, click the Account Settings link, then open the API Keys page.
If these API keys have not yet been created, click Add Additional API Key. Select either Production or Test. The API key is automatically created. Follow the same process to create both keys.
Delivery method configuration
With those necessary credentials, configure the EasyPost delivery method in Odoo by going to .
On the Delivery Methods page, click New.
In the Provider field, select Easypost from the drop-down menu. Doing so reveals the Easypost Configuration tab at the bottom of the form, where the EasyPost API keys should be entered.
For details on configuring the other fields on the delivery method, such as Delivery Product, refer to the Add a new delivery method documentation.
Note
To generate EasyPost shipping labels through Odoo, ensure the Integration Level option is set to Get Rate and Create Shipment.
In the Easypost Configuration tab, complete the following fields:
Test API Key: the Test API key in the EasyPost Account Settings.
Production API Key: the Production API key in the EasyPost Account Settings.
Label Format: Choose PNG, PDF, ZPL, or EPL2 from the drop-down menu.
Generate Return Label: Select to automatically generate a return label when validating the delivery.
Save the delivery method by clicking the (Save manually) icon.
Click the Load your Easypost carrier accounts link under the API keys.

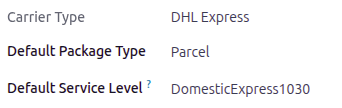
The Select a carrier pop-up window opens. Select a shipping carrier from the drop-down menu, then click Select.
After the carrier type has been selected, complete the Default Package Type and Default Service Level fields.
Turn on the Easypost integration
After the EasyPost connection is set up, use the smart buttons at the top of the form to publish, turn on production mode, or activate debug logging.
Unpublished/Published: determines if this delivery method is available on the user’s eCommerce website.
Test Environment/Production Environment: determines whether label creation is for testing and cancelled immediately (Test) or generating a real shipping label that is charged to the EasyPost account (Production).
No Debug/Debug Requests: determines whether API requests and responses are logged in Odoo (turn on developer mode and go to ).