Translations
Your website can be translated into multiple languages, allowing visitors to view its content in their preferred language.
Configuration
Before translating a website into one or more languages, install them on the database. To do so:
Go to .
Under the General section, click Install new languages.
In the dialog box, select one or more Languages from the dropdown menu, click Add, then Close.
Next, add the installed language(s) to the website by selecting them under the Languages field and clicking Save.
Tip
To remove a language from a website, click the (Delete) icon next to it.
Language selector
Once another language is added to a website, the language selector is displayed in the website’s header and footer, allowing visitors to switch between languages.
Tip
Refresh your browser if the language selector or a language option does not appear.
If the visitor’s browser language is not available, the website will use the website’s default language. To edit it, go to . Under the General section, select the language using the Default field.
To hide or customize the appearance of one of the language selectors, open the website in the default language, click Edit, then select the language selector.
To edit the header’s language selector:
In the sidebar, scroll down to the Language Selector section.
Set the Style to Dropdown or Inline.
Set the Label to Text, Flag, Flag and Text, Code, or Flag and Code.
Click Save.
Tip
To hide the language selector in the header, go to the Show/Hide Elements section and click the (Language selector) button next to the Actions field.
To edit the footer’s language selector:
Set the Language selector field to Dropdown, Inline, or None.
Set the Label to Text, Flag, Flag and Text, Code, or Flag and Code.
Click Save.
Tip
You can display or hide website elements based on the website’s language.
Translate a page
To translate a website page, switch to the language to translate and click in the top-right corner to activate the translation mode.
Note
In this mode, only translatable text can be edited. Any other type of modification with the website builder must be carried out while using the default language.
Depending on the language added, some default content may already be translated. However, the content you added manually should be translated using the Translate feature.
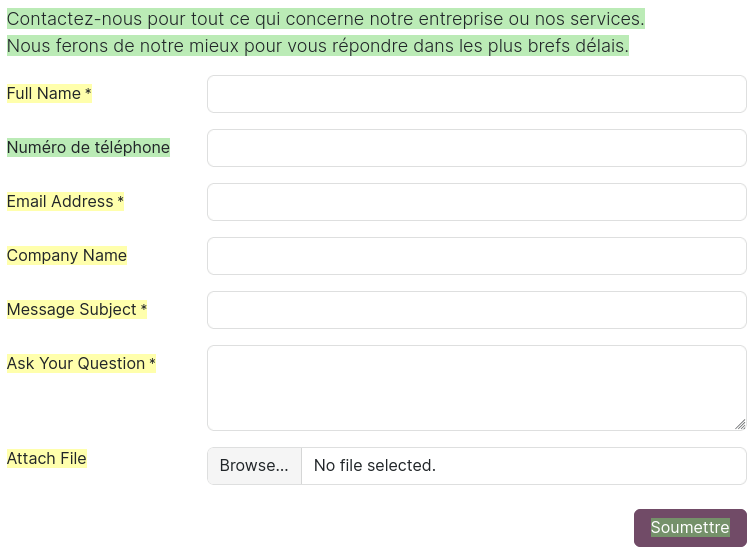
When text is highlighted in green, it indicates that it has already been translated (manually or automatically). When text is highlighted in yellow, it indicates that it has not been translated.
Click the green button next to the Translated to field to automatically translate all text highlighted in yellow. You can also manually translate or adapt text, whether it is highlighted in green or yellow, by selecting it and editing it. Click Save when you are done translating.
Tip
The core URL structure remains consistent across languages, while specific elements like product names or categories are translated. For example,
https://www.mywebsite.com/shop/product/my-product-1is the default version of a product page, whilehttps://www.mywebsite.com/fr/shop/product/mon-produit-1is the translated version of the same product page. The structure (/shop/product/) remains unchanged, but the product name (my-product) is translated (mon-produit).Some elements can also be translated from the backend (e.g., product names).