Contacts
Contacts are created in the Contacts application for all entities that are part of a company’s business, whether as a customer, a vendor, or in some other capacity. A contact record is a repository of vital information for both individuals and companies, facilitating communication and business transactions.
Contact form and basic fields
To create a new contact, navigate to the , and click the New button. A new form appears where various contact information can be added.

Enter the name of the contact in the Name (company or person) field. This field is mandatory.
Tip
Contacts for individuals can be linked to contacts for companies by selecting the associated company contact in the Company Employer field.
In the Email field, enter the email address with the domain. In the
Phone field, enter the contact’s phone number. Enter the
Address of the contact. Finally, enter the Tax Identification Number (TIN)
the contact uses for tax and accounting purposes. If the contact is not subject to taxation, a /
may be entered in this field. If it’s necessary to add the DUNS number to the contact, this can be
added by clicking the (plus) button.
Additional fields
The following fields are also available on the contact form to help create a more complete entry for this individual or company in the database:
Job Position: This field captures the position or title of the contact, if relevant.
Website: This field captures a relevant website address for the contact, starting with
httporhttps.Partner Level: This field is a drop-down menu where the designated partner level for this contact can be selected.
Language: This field captures the language used by the contact. All of the emails and documents generated by the database that are sent to this contact are translated into the selected language.
Tags: This field allows preconfigured and custom tags to be entered to make it easier to search for and identify the contact within the database. Type the tags into the field or click the drop-down menu and select one. To create a new one, type the new tag in the field, and click Create or Create and edit from the resulting drop-down menu.
Contacts tab
On the Contacts tab, additional contacts can be added that are associated with the current contact form and any related addresses. For example, if the current Contact form is meant to cover a vendor company, contacts added through the Contacts tab can be easily identified as employees of that company.
This can also be used to associate multiple addresses with the current contact form. To do so, click Add Related Contacts in the Contacts tab. Doing so brings up the Create Related Contacts form, in which additional addresses can be configured as regular contacts, addressess for invoices and deliveries, and other needs.
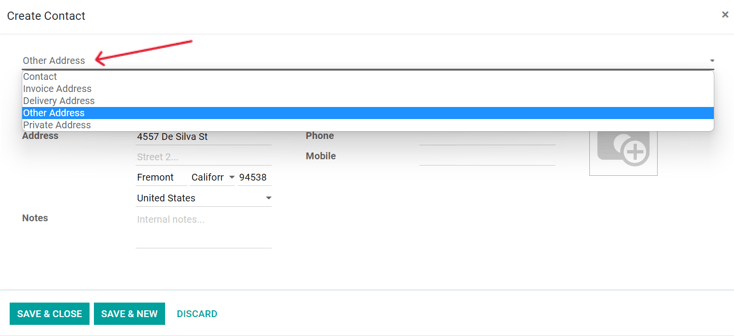
On the Create Related Contacts pop-up form, select one of the following options:
Contact: This option adds another contact to the existing contact form.
Invoice: This option adds a specific invoice address to the existing contact form.
Delivery: This option adds a specific delivery address to the existing contact form.
FACe Center: This option adds a specific delivery address for a FACe Center to the existing contact form.
Other: This option adds an alternate address to the existing contact form.
Once an option is selected, enter the corresponding contact information that should be used for the specified address type. Odoo references invoice and delivery addresses during relevant parts of the sales process.
Sales & Purchase tab
The Sales & Purchase tab only appears when the Sales, Purchase, or Point of Sale applications are installed. Each of these apps adds another section to this tab when installed.
Sales section
Under the Sales heading, a specific Salesperson can be assigned to a work with the contact. To do that, click the Salesperson drop-down field, and select one. Create a new Salesperson by typing the user’s name and inviting them.
A Pricelist or Payment Terms can also be set, if needed. Select the Pricelist drop-down menu to choose the appropriate Pricelist. Click the drop-down menu next to Payment Terms and change it to one of the preselected Payment Terms or Search more to find others or create a new one.
Click into the Payment Method field to select an option from the drop-down menu.
Click into the Delivery Method field to select an option from the drop-down menu.
Other options may appear in this section as well, depending on what apps are installed in the database and what configurations have been enabled.
Point of Sale section
Under the Point Of Sale heading, enter a Barcode that can be used to identify this contact.
Purchase section
Under the Purchase heading, select how Group RFQs (requests for quotations) for this contact should be grouped together:
On Order: This option groups replenishment needs together except for Made to Order (MTO) replenishments.
Daily: This option groups replenishment needs together if their expected arrival is on the same day.
Weekly: This option groups replenishment needs together if the expected arrival is the same week or week day.
Always: This option always groups replenishment needs together.
Select a default Buyer if the RFQs should always be assigned to the same user.
Specify Payment Terms, a preferred Payment Method, and 1099 Box information here. A Receipt Reminder can be set here, as well. Select a Supplier Currency to be used for purchases from the contact.
Fiscal information
To assign a Fiscal Position to this contact, select it from the drop-down menu.
Miscellaneous section
Under the Misc heading, enter a Company ID if applicable. Use the Reference field to add any additional information or notes for this contact.
If this contact should only be accessible for one company in a multi-company database, select it from the Company field drop-down list. Use the Website drop-down menu to restrict the publishing of this contact to one website if working on a database with multiple websites.
Select one or more Website Tags to assist in filtering published customers on the
/customers website page. Select an Industry for this contact from the drop-down menu.
Use the SLA Policies field to assign a Helpdesk SLA policy to this contact.
Accounting tab
The Accounting tab appears when the Accounting application is installed. Here, a user can add any related Bank accounts or set default accounting journals. Trusted business partners may have Auto-post bills enabled, allowing for bills to post automatically, never, or after 3 validations without edits.
Under the Customer Invoices heading, the Peppol ID field is used for relevant tax identification information.
Partner Assignment tab
Next is the Partner Assignment tab, which by default includes a Geolocation section and other partner options, including Partner Activation and Partner Review configurations. These are only present when the Resellers module is installed.
Notes tab
The Notes tab is a field where notes for other users can be left on the contact form. There are no settings that can be configured within this tab.
UBO tab
The UBO (Ultimate Beneficial Owner) tab contains a snapshot of the Holdings information from the Equity app, as well as information for the individual contact. The fields visible here may change depending on the other apps installed in the Odoo database, as well. The UBO tab is only present when the Equity app is installed.
To request the information required for the UBO tab, click the Action icon, then select Request UBO Form to send an email to the contact.
Views
The Contacts app’s dashboard offers five different views to help manage contacts at a glance. These views are:
List: Displays contacts in a detailed list, allowing for easy viewing of detailed individual records, including graphical representations of the smart buttons that appear on each contact’s form. This is the default view upon opening the app.
Kanban: Displays contacts as tiles resembling business cards. This view presents the same information as the list view, but in a more visual format. It also shows any tags associated with a contact, which are not visible in List view.
Map: Displays a map with pins for contacts with address information on their form. All contacts, including those without address information, are displayed in a sidebar. Pins on the map may be moused over to highlight the corresponding contact in the sidebar. The forms of contacts may be opened by clicking them in the sidebar. Addresses associated with more than one contact have a number on them to denote how many contacts have that location on their forms.
Hierarchy: Displays contacts as tiles resembling business cards, similar to the Kanban view. This view adds a # Contacts button to contacts that have other records associated with them. When clicked, this button rearranges the page to showcase the contact information for those associated records, making it easy to view at a glance which contacts are employees or otherwise affiliated with each other.
Activities: Displays a grid of all contacts with associated upcoming activities. Activities can also be scheduled and managed from within this view and are tracked on the contact’s chatter. Please note, this view does not directly interface with apps such as the CRM app, because those apps may be referencing Contact app data, but tracking something separate, such as Opportunities.
Archive contacts
If a user decides they no longer want to have this contact active, the record can be archived. To do that, click into an individual contact in any of the views, or select multiple contacts at once in List view. Click the Actions menu and click Archive. Then, click the Archive button in the resulting Confirmation pop-up window.
Archived contacts can be searched for with the Archived filter in the search bar. Archived contacts have an Archived banner denoting their status.
Tip
To unarchive contacts, just click into the contact or select it and use the Actions menu again and click Unarchive. Upon doing so, the Archived banner is removed and the contact is restored.