Shop features
Quotations and sales orders
When working in retail, you might need to access quotations or sales orders created on the Sales app from the POS register to finalize a sale.
Select a sales order or quotation
From the POS register, click the (vertical ellipsis) icon and Quotation/Order to open the list of quotations and sales orders created from the sales application. When imported, the sales order reference number is displayed under the ordered products, next to the (shopping basket) icon.
Apply a down payment or settle the order
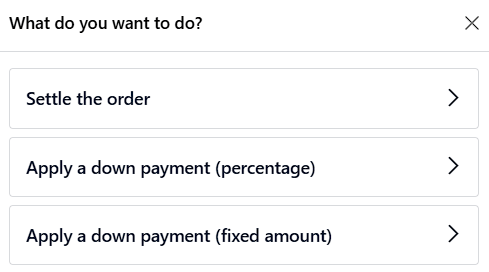
Select a quotation or sales order, and on the pop-up that opens, choose the desired settlement method. The customer can either:
Settle the order completely: Click Settle the order to pay for the total of the quotation or sales order.
Settle the order partially:
Select Apply a down payment (percentage) or Apply a down payment (fixed amount) to make a down payment for the selected quotation or sales order.
Enter the percentage or fixed amount the customer is paying, and click Apply to add the down payment to the cart.
Note
Once a sales order is partially settled, the applied down payment is automatically deducted from the order’s total.
See also
Ship later
The Ship Later feature allows you to sell products and schedule delivery at a later date. It is useful, for example, when a product is out of stock or so voluminous that it requires to be shipped, or when, for any reason, the customer needs their order shipped later, etc.
Configuration
Go to the POS settings, scroll down to the Inventory section, and enable Allow Ship Later.
Once activated, you can:
Choose the location from where the products are shipped by selecting a Warehouse.
Define a Specific route, or leave this field empty to use the default route.
Define the Shipping Policy; select As soon as possible if the products can be delivered separately, or When all products are ready to ship all the products at once.
See also
Practical application
Access the POS register and make a sale.
On the payment screen, set a customer and select Ship Later.
In the pop-up window, set a shipping date and click Confirm to proceed to payment.
The system instantly creates a delivery order from the warehouse to the shipping address.
Note
The selected customer must have referenced an address in the system for products to be shipped.
Barcodes
Using a barcode scanner improves efficiency and provides quicker customer service. In Point of Sale, scanners are used to add products to a cart, apply discounts, or log employees into the POS register.
Once enabled in the Inventory app, you can use the barcode feature with any product that has a barcode assigned.
Assign barcodes
To use this feature, assign a barcode to your products following the default barcode nomenclature. You can also assign barcodes automatically using the barcode lookup feature and database.
Note
Employees can log into the POS by scanning a badge. To configure this feature, open the Employees app, select an employee, then, in the HR Settings tab, fill in the PIN Code or Badge ID.
Barcode nomenclature
Barcode nomenclatures explain how barcodes are identified and classified. When a barcode is scanned, it is linked to the first rule that matches its pattern. This pattern syntax adheres to a standardized method of prefix matching; a barcode is considered a match if its prefix aligns with the pattern.
Patterns also define how numerical values —such as weight, price, or percentage— are encoded into
the barcode. These are indicated by {NNN}, where the N’s define the position of the digits.
To view or edit these rules, go to the POS settings, scroll to the Inventory section, and click the (Internal Link) icon next to Barcode Nomenclature.
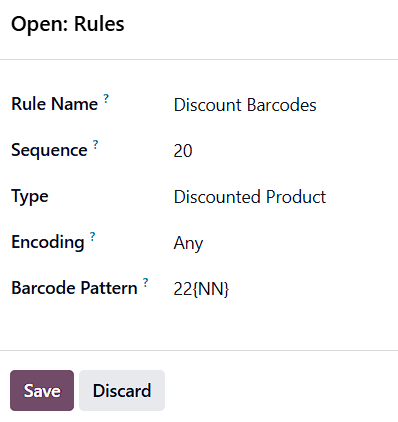
For discount tags, use the Discount Barcodes rule. The default pattern is
22{NN}, meaning the barcode must start with 22, followed by two digits representing
the discount percentage.
Tip
To allow for three-digit discounts (such as 100%), add an extra N to the Barcode
Pattern field (e.g., 22{NNN}).
See also
Use
To use discount tags, scan the product barcode or manually add it to the cart. Then, scan the discount tag. The discount is automatically applied to the last product added to the cart.