Post expenses
Once an expense is approved, the next step is to post the expense to the proper accounting journal.
Important
To post an expense to an accounting journal, the user must have the following access rights:
Accounting: Accountant or Adviser
Expenses: Manager
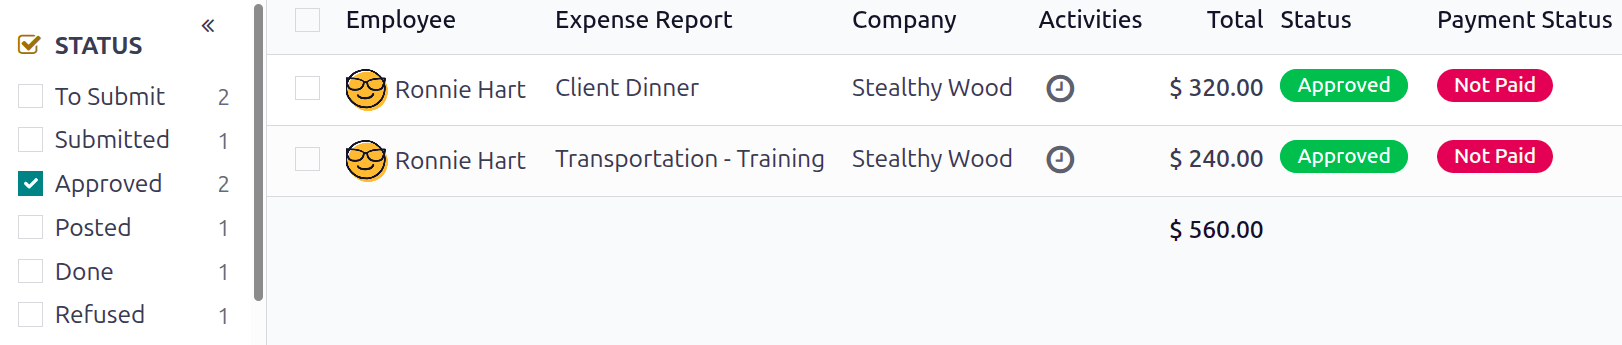
Only expenses with an Approved status can be posted to a journal. To view all expenses ready to be posted, navigate to . Next, to view only approved expenses that need to be posted, adjust the filters on the left side so only the Approved checkbox is ticked.
Expenses can be posted to accounting journals in two ways: individually or in bulk.
Note
The default Expenses to Process dashboard displays all expenses with a status of Submitted.
Post individual expenses
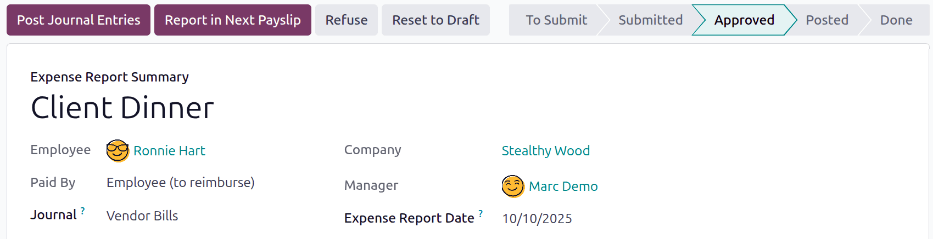
To post an individual expense, navigate to , and click on an individual expense, to view the detailed expense form. In this view, several options are presented: Post Journal Entries, Report In Next Payslip, Refuse, Reset, Split Expense, and Attach Receipt.
Click Post Journal Entries and a Post expenses pop-up window loads. The default accounting journal for the expense category populates the Journal field, but can be modified if needed. The default journal for all expense categories is Purchases. Additionally, the date of the expense populates the Accounting Date field, indicating when the expense was incurred.
Click the Post Expenses button, and the journal entry loads, displaying all the details, and has a status of Posted.
Post multiple expenses
To post multiple expenses at once, navigate to , then adjust the filters on the left side so only the Approved checkbox is ticked. Next, select the expenses to approve by ticking the checkbox next to each expense being approved.
Next, click the Post Entries button. A Post Expenses pop-up window loads, with the default accounting journal Purchases populating the Journal field, and the expense date populating the Accounting date field. Make any necessary modifications, then click Post Expenses.
Once posted, the list changes ot show all the various accounting journal entries created. Click on any entry to view the accounting journal details.
Note
Only expenses with a status of Approved can be posted to an accounting journal. If an expense is selected that cannot be posted, such as an unapproved expense, or the expense has already been posted to a journal, the Post Entries button is not visible.
