Allocation reports
When fulfilling sales orders (SOs), or sourcing components for manufacturing orders (MOs), it is sometimes necessary to prioritize one SO or MO over another. In situations where there is insufficient stock on-hand to fulfill every SO or MO, ensuring that products and components are reserved for priority orders is essential.
In Odoo Manufacturing, allocation reports are used on MOs to assign products to specific sales orders SOs, or components to specific MOs. This ensures the products or components are available for those orders, and are not used by mistake.
Configuration
To use allocation reports, the Allocation Report for Manufacturing Orders feature must be enabled. To do so, navigate to , and tick the checkbox next to Allocation Report for Manufacturing Orders. Then, click Save.
For products that are sold, it is also necessary to configure them so they can be included in SOs. To do so, begin by navigating to , and select a product. Under the Product Name field on the product form, make sure that the Can Be Sold checkbox is ticked.
Allocate products
To allocate products or components from an MO to an SO, or to a different MO, begin by navigating to . Click New to create a new MO.
On the MO form, select a product in the Product field, and specify the quantity to be produced in the Quantity field. Finally, click Confirm to confirm the MO.
The rest of the allocation workflow depends on the current on-hand quantity of the product being manufactured, and whether or not there are any SOs or MOs which require the product, but have not already been allocated units.
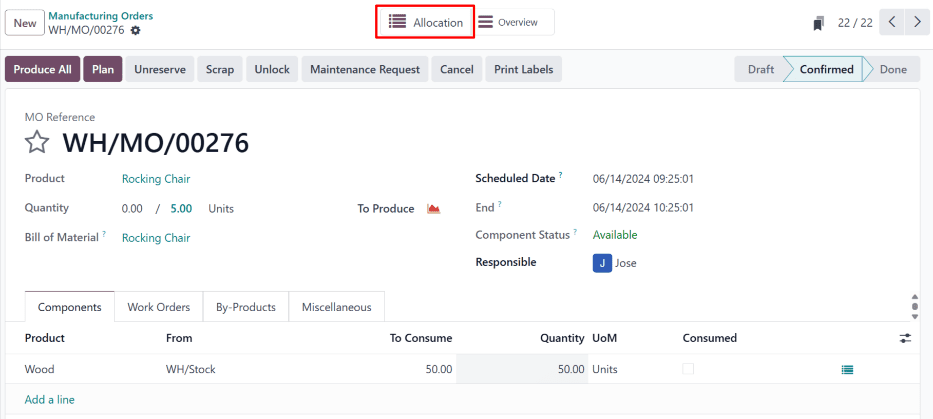
If there are existing SOs and MOs that require the product, and there are too few units of the product on-hand to fulfill those orders, then an Allocation smart button appears at the top of the page as soon as the MO is confirmed.
If there are existing SOs and MOs that require the product, and there are enough units of the product on-hand to fulfill those orders, then the Allocation smart button only appears at the top of the page once the MO has been marked as done, by clicking Produce All.

Note
If there are not any existing SOs and MOs that require the product, the Allocation smart button does not appear, even when the MO has been marked as done.
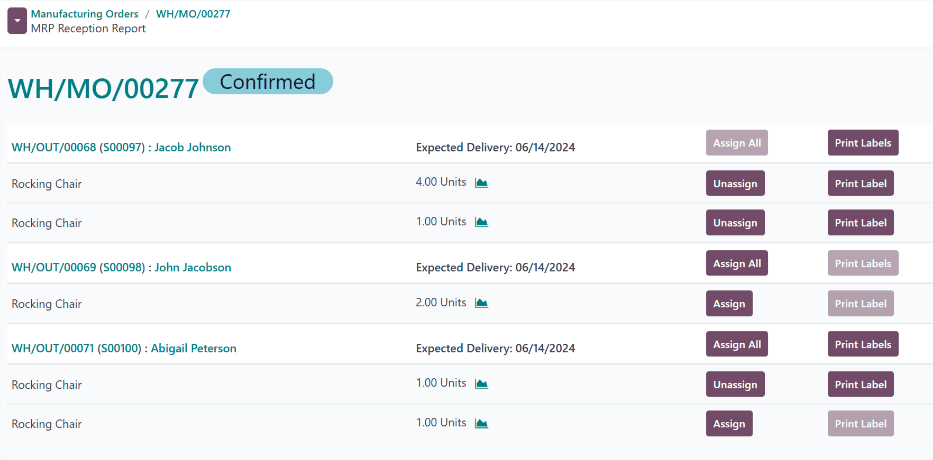
Click the Allocation smart button to open the MRP Reception Report for the MO. This report lists open delivery orders or MOs, depending on the type of product produced in the original MO.
Allocate to delivery order
If the MO contains a finished product, the report lists any open delivery orders for which quantities of the product have yet to be reserved.
Example
An MO is created to produce three units of a rocking chair. Clicking the Allocation smart button on the MO opens an allocation report that lists open delivery orders that require one or more rocking chairs.
Click the Assign All button to the right of a specific order to assign products for each quantity required to fulfill that order.
Example
If an order requires one quantity of four units of the product, and one quantity of one unit of the product, clicking Assign All assigns five units of the product to fulfill both quantities.
Alternatively, click Assign next to a specific quantity to only assign products to that quantity, and not any others in the order.
Example
If an order requires one quantity of four units of the product, and one quantity of one unit of the product, clicking Assign next to the quantity of one unit assigns a product to that quantity, but leaves the quantity of four units without any products assigned.

Allocate to MO
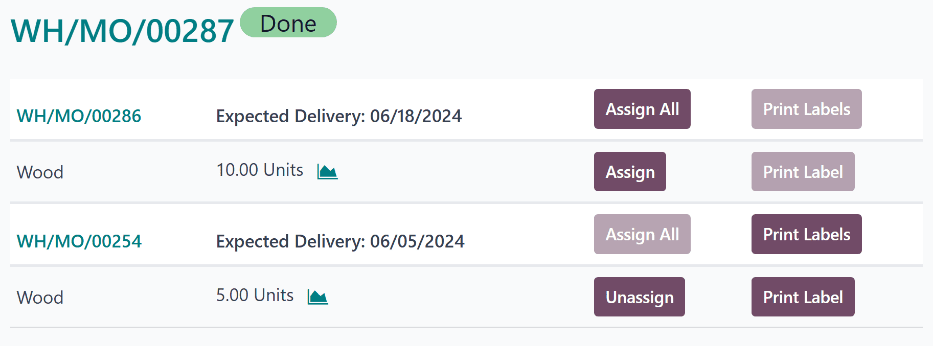
If the MO contains a component, the report lists any open MOs for which quantities of the component have yet to be reserved.
Example
An MO is created to produce three units of wood, which is used as a component for the rocking chair product. Clicking the Allocation smart button on the MO opens an allocation report that lists open rocking chair MOs that require one or more pieces of wood.
Click the Assign All or Assign button to the right of a specific MO to assign components to that MO.

Unassign products
After assigning products to a quantity within a delivery order, or components to an MO, the Assign button turns into an Unassign button. Click Unassign to unreserve the assigned products from that quantity, making them available for other quantities.
Print labels
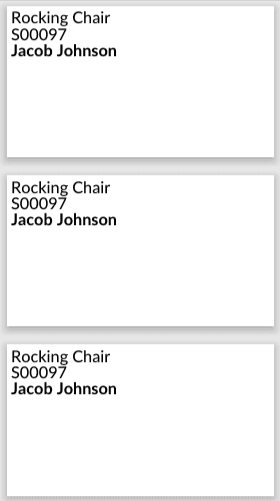
After clicking Assign All or Assign, the Print Labels or Print Label button to the right of either button becomes selectable. Selecting either button generates and downloads a PDF document with one label for each product that was assigned. These labels are used to designate each product as being reserved for that specific order.
