Phone widget
The Phone widget is an add-on made available to Odoo users by installing the Phone app. Instead of managing mobile devices for every salesperson, fumbling through call transfers for upset customers, or needing a meeting room to handle a conference call, utilize the Phone widget to tackle any of these business needs.
Navigate the Phone widget
The Phone widget contains four tabs: Keypad, Recent, Contacts, and Activities, which are used for managing calls and day-to-day activities in Odoo. Use the search bar to find contacts faster.

Keypad tab
Under the Keypad tab of the Phone widget, the user can type a name or number to make a call. There is also a numeric keypad for the user to enter the phone number.
Recent tab
Under the Recent tab of the Phone widget, the call history for the user is available. This includes incoming and outgoing calls. Any number can be clicked to begin a call.
Contacts tab
Under the Contacts tab of the Phone widget, the user can access a contact in the Contacts app.
Any contact that has a saved phone number can be called by clicking into the contact from the Phone widget’s Contacts tab.
A search feature is also available at the top of the widget, represented by a (search) icon. Use this tool to find a specific contact. Scheduled activities will not appear as search results.
Activities tab
Under the Activities tab of the Phone widget, a user can see any calls assigned to them, and which ones are due to be completed for the day.
Click an activity from this tab to perform any of these actions to prepare for and complete (found under the Documents heading):
Contact: opens the contact information for this contact.
Leads/Create Lead: opens the lead information for this contact.
- (Open related record): opens the attached record in Odoo (like
Sales Orders, Invoices, Projects, Events).
When viewing the activity, the user can also manage the activity’s details and status:
(Done): marks the activity as complete.
(Edit): edits the activity (like its due date).
(Cancel): cancels the activity.
To call the customer related to a scheduled activity, click the (Call) icon. Click the (SMS) icon to send a text message.
Add a call
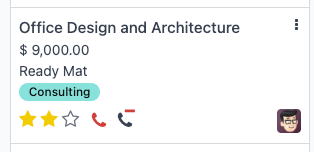
From the database home page, click . On the Pipeline, make sure it is open to the Kanban view. Next, near the top of the screen, click the (Show Softphone) icon and make sure the Phone widget is opened to the Activities tab. After that, hover over the opportunity that should have a call and click the (phone) with the small green (plus) icon.
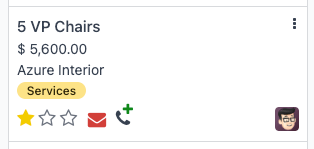
To remove a call from the Activities tab, hover over the opportunity that has a call scheduled, and click the red (phone) icon that appears with the (minus) icon.
Make a VoIP call with the Phone widget
One of the primary purposes of the Odoo Phone app is to make calls without needing a phone. Here are the three ways to make a phone call in the Odoo database. First, click the (Show Softphone) icon, located in the top-right of the navigation bar. From here:
Enter the phone number to be called by clicking the (keyboard) icon, and then entering the phone number.
Click the (phone) icon to redial the last called contact.
Search for a specific contact’s name or go to the Contacts tab. Then, select the contact and click the (phone) icon.
When receiving calls in Odoo, the Phone widget rings, and displays a notification. To close the widget, click the (close) icon in the upper-right of the widget’s screen.
Note
The VoIP number is the one provided by Axivox. It can be accessed by navigating to https://manage.axivox.com/. After logging into the portal, go to (column).
Transfer a phone call
Manually transferring a call only happens when on a call. To transfer a call within the Phone widget, first, answer the call using the green (phone) icon.
Once the incoming call is answered, click the (left-right arrows) icon. Then, enter the extension of the user the call should be forwarded to. Finally, click Transfer to route the call to that phone number.
Tip
To find the extension for a user, consult the Phone administrator. If the user has Administration access rights set to Settings, find extensions by going to and click the Manage Users button. Select the user, and go to the VoIP tab. That user’s extension is their VoIP username.
If the user does not pick up the call or is busy with another call, then calls can be automatically transferred. This gets configured with the VoIP service provider.
Forward a phone call
To forward a call within the VoIP widget, first, answer the call using the green (phone) icon.
Then, click the (left-right arrows) icon. Enter the full phone number of the user the call should be forwarded to. Finally, click Transfer to route the call to that phone number.
Send an email through the Phone widget
Emails can also be sent through the Phone widget. This is helpful for sending follow-up emails to the call participants, emailing a question to a coworker, or reminding a vendor to send over some components during a check-in call.
To send an email through the Phone widget, click the (Show Softphone) icon, located in the top navigation bar. When this is clicked, the Phone widget will appear in the bottom-left corner of the page. Then, search for a contact to email or find them in the Contacts tab of the Phone widget.
Next, click the (envelope) icon, and then select the email recipients, enter the email’s subject line, and write the email. When it is ready to be sent, click Send. To schedule an email to send later, click the (dropdown) icon next to Send, click Send Later, pick the scheduled time, and click Schedule.
Troubleshooting
Each section below goes through common issues with the Phone widget and how to resolve them.
Missing parameter
If a Missing Parameter error message appears in the Phone widget, refresh the window, and try again.
Incorrect number
If an Incorrect Number error message appears in the Phone widget, make sure to use the
international format, leading with the (plus), followed by the
international country code (e.g., +16506913277, where +1 is the international prefix for the
United States.)
The websocket connection with the server has been lost
If a The websocket connection with the server has been lost. Please try to refresh the page. error message appears in the Phone widget, then refresh the page close other browser tabs.
This error is caused by returning to the database after a period of inactivity, like lunch, or if there are too many browser tabs open.
Failed to start the user agent
If a Failed to start the user agent. The URL of the websocket may be wrong. Please have an administrator verify the websocket server URL in the General Settings. error message appears in the Phone widget, then update the browser and computer.
This error is caused by the browser or computer not being up-to-date (and can also cause issues with the microphone).
Grayed-out Phone widget
If the Phone widget is completely grayed out and cannot be interacted with, then update the browser and computer, and delete the Google Chrome extension causing the problem.
Cannot connect to the VoIP phone number
If the user cannot connect to their VoIP phone number, then their Odoo profile is missing their VoIP Secret. To add it, select the user, and click the VoIP tab. Under the Credentials section, enter the user’s Secret. This is the user’s password to their account for their VoIP service provider.