Firma
Odoo Sign allows you to send, sign, and approve documents online, using electronic signatures.
An electronic signature shows a person’s agreement to the content of a document. Just like a handwritten signature, the electronic one represents a legal bounding by the terms of the signed document.
With Sign, you can upload any PDF file and add fields to it. These fields can be automatically filled in with the user’s details present in your database.
Validity of electronic signatures
Documents signed via the Sign app are valid electronic signatures in the European Union and the United States of America. They also meet the requirements for electronic signatures in most countries. The legal validity of electronic signatures generated by Odoo depends on your country’s legislation. Companies doing business abroad should also consider other countries” electronic signature laws.
Importante
The below information has no legal value; it is only provided for general informational purposes. As laws governing electronic signatures rapidly evolve, we cannot guarantee that all information is up-to-date. We advise contacting a local attorney for legal advice regarding electronic signature compliance and validity.
Unione Europea
The eIDAS regulation establishes the framework for electronic signatures in the 27 member states of the European Union. It distinguishes three types of electronic signatures:
Simple electronic signatures
Advanced electronic signatures
Qualified electronic signatures
Odoo generates the first type, simple electronic signatures; these signatures are legally valid in the EU, as stated in the eIDAS regulation.
Electronic signatures may not be automatically recognized as valid. You may need to bring supporting evidence of a signature’s validity. While the Sign app provides a simple electronic signature, some supporting evidence is automatically collected during the signature process, such as:
Email and SMS validation (if enabled)
Strong identity proof through itsme® (available in Belgium and the Netherlands)
Timestamped, IP and geographically traceable access logs to the documents and their associated signatures
Document traceability and inalterability (any alteration made to a signed document is detected by Odoo with the use of cryptographic proofs)
Stati Uniti d’America
The ESIGN Act (Electronic Signatures in Global and National Commerce Act), at the interstate and international levels, and the UETA (Uniform Electronic Transactions Act), at the state level, provide the legal framework for electronic signatures. Note that Illinois and New York have not adopted the UETA, but similar acts instead.
Overall, to be recognized as valid, electronic signatures have to meet five criteria:
The signer must show a clear intent to sign. For example, using a mouse to draw a signature can show intent. The signer must also have the option to opt out of the electronic document.
The signer must first express or imply their consent to conduct business electronically.
The signature must be clearly attributed. In Odoo, metadata, such as the signer’s IP address, is added to the signature, which can be used as supporting evidence.
The signature must be associated with the signed document, for example, by keeping a record detailing how the signature was captured.
Electronically signed documents need to be retained and stored by all parties involved; for example, by providing the signer either a fully-executed copy or the possibility to download a copy.
Other countries
Send a document to sign
One-time signature
You can click Upload a PDF to sign from your dashboard for a one-time signature. Select your document, open it, and drag and drop the required fields in your document. You can modify the role assigned to a field by clicking on it and selecting the one you want.
When ready, click Send, and fill in the required fields. Once sent, your document remains available. Go to to see your document and the status of the signatures.
Modelli
You can create document templates when you have to send the same document several times. From your dashboard, click Upload a PDF template. Select the document and add the required fields. You can modify the role of a field by clicking on it and selecting the one you want.
Click Template Properties to add Tags to your template, define a Signed Document Workspace, add Signed Document Tags, set a Redirect Link that will be available in the signature confirmation message received after the signature, or define Authorized Users if you want to restrict the use of your template to specific authorized users or groups.
Your templates are visible by default on your dashboard. You can click Send to quickly send a document template to a signer or Sign Now if you are ready to sign your document immediately.
Suggerimento
You can create a template from a document that was previously sent. To do so, go to . On the document you want to retrieve, click on ⋮, then Template. Click on ⋮ again, then Restore. Your document now appears on your dashboard next to your other templates.
Ruoli
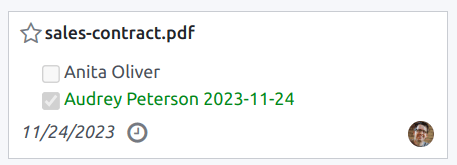
Each field in a Sign document is related to a role corresponding to a specific person. When a document is being signed, the person assigned to the role must fill in their assigned fields and sign it.
Roles are available by going to .
It is possible to update existing roles or to create new roles by clicking on New. Choose a Role Name, add an Extra Authentication Step to confirm the identity of the signing person, and if the document can be reassigned to another contact, select Change Authorized for the role. A Color can also be chosen for the role. This color can help understand which roles are responsible for which field when configuring a template.
Secured identification
As the owner of a document, you may request an Extra Authentication Step through SMS verification or via Itsme® (available in Belgium and the Netherlands). Both authentication options require credits. If you do not have any credits left, the authentication steps will be skipped.
Vedi anche
SMS verification
Go to . Click in the Extra Authentication Step column for the role, and select Unique Code Via SMS.
Nota
Before being able to send SMS Text Messages, you need to register your phone number. To do so, go to and click Buy credits under Authenticate by SMS.
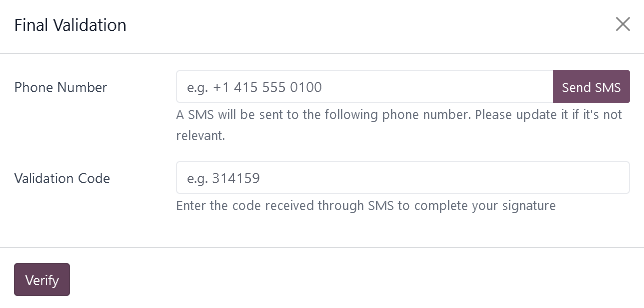
Go to the document to sign, add the field for which the SMS verification is required, for example, the Signature field, and click Send. On the new page, select the customer and click Send.
The person signing the document fills in the Signature field, then Sign, and clicks Validate & Send Completed Document. A Final Validation page pops up where to add their phone number. One-time codes are sent by SMS.
Nota
This feature is enabled by default.
As soon as the Extra Authentication Step applies to a role, this validation step is requested for any field assigned to this role.
Itsme®
Itsme® authentication can be used to allow signatories to provide their identity using itsme®. This feature is only available in Belgium and the Netherlands.
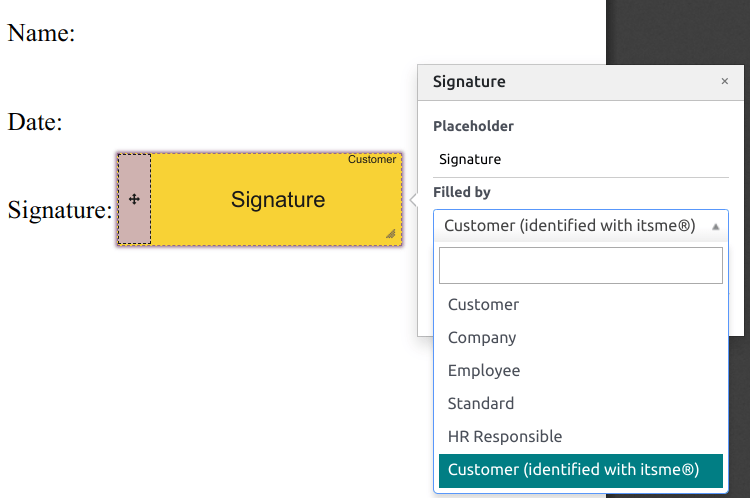
The feature can be enabled in Sign Settings and applies automatically to the Customer (identified with itsme®) role. To enable it for other roles, go to . Click in the Extra Authentication Step column for the role, and select Via itsme®.
Go to the document that needs to be signed and add the Signature field. Switch to any role configured to use the feature, and click Validate and Send.
Upon signing the document, the signer completes the Signature field and proceeds by clicking on Validate & Send Completed Document, triggering a Final verification page where authentication via itsme® is required.
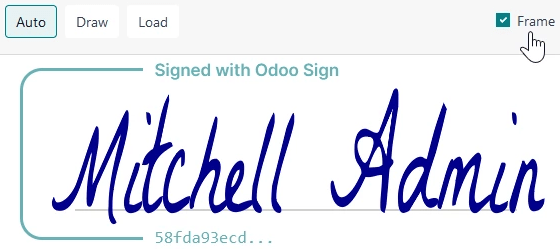
Signatory hash
Each time someone signs a document, a hash - a unique digital signature of the operation - is generated to ensure traceability, integrity, and inalterability. This process guarantees that any changes made after a signature is affixed can be easily detected, maintaining the document’s authenticity and security throughout its lifecycle.
A visual security frame displaying the beginning of the hash is added to the signatures. Internal users can hide or show it by turning the Frame option on or off when signing the document.
Sign order
When a document needs to be signed by different parties, the signing order lets you control the order in which your recipients receive it for signature.
By going to , you can Enable Signing Order. Each recipient receives the signature request notification only once the previous recipient has completed their action.
Add at least two Signature fields with different roles to your document. Click Send, go to the Options tab, and tick the Specify signing order box.
Add the signer’s Name or email information. You can decide on the Sign Order by typing 1 or 2 in the Sign Order column.
Vedi anche
Field types
Fields are used in a document to indicate what information must be completed by the signers. You can add fields to your document simply by dragging and dropping them for the left column into your document.
Various field types can be used to sign documents (placeholder, autocompletion, etc.). By configuring your own field types, also known as signature item types, the signing process can be even faster for your customers, partners, and employees.
To create and edit field types, go to .
You can select an existing field by clicking on it, or you can Create a new one. First, edit the Field Name. Then, select a Field Type:
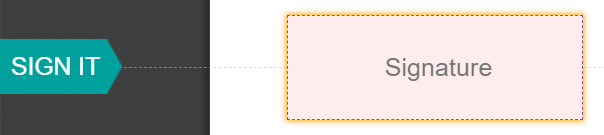
Signature: users are asked to enter their signature either by drawing it, generating an automatic one based on their name, or uploading a local file (usually an image). Each subsequent Signature field type then reuses the data entered in the first field.
Initial: users are asked to enter their initials, in a similar way to the Signature field.
Text: users enter text on a single line.
Multiline Text: users enter text on multiple lines.
Checkbox: users can tick a box (e.g., to mark their approval or consent).
Selection: users choose a single option from a variety of options.
The Auto-fill Partner Field setting is used to automatically fill in a field during the
signature process. It uses the value of one of the fields on the contact (res.partner) model of
the person signing the document. To do so, enter the contact model field’s technical name.
Suggerimento
To know the technical name of a field, enable developer mode and hover your mouse on the question mark next to the field.
Nota
Auto-completed values are suggestions and can be modified as required by the person signing the document.
The size of the fields can also be changed by editing the Default Width and Default Height. Both sizes are defined as a percentage of the full page expressed as a decimal, with 1 equalling the full page’s width or height. By default, the width of new fields you create is set to 15% (0.150) of a full page’s width, while their height is set to 1.5% (0.015) of a full page’s height.
Next, write a Tip. Tips are displayed inside arrows on the left-hand side of the user’s screen during the signing process to help them understand what the step entails (e.g., «Sign here» or “Fill in your birthdate”). You can also use a Placeholder text to be displayed inside the field before it is completed.