Sign
Odoo Sign vă permite să trimiteți, să semnați și să aprobați documente online, folosind semnături electronice.
Un electronic signature confirma acordul unei persoane privind conținutul unui document. La fel ca o semnătură scrisă, și semnatura electronică reprezintă un act legal prin termenii documentului semnat.
Cu Sign, puteți încărca orice fișier PDF și puteți adăuga câmpuri la acesta. Aceste câmpuri pot fi completate automat cu detaliile utilizatorului prezente în baza ta de date.
Valabilitatea semnăturilor electronice
Documentele semnate prin intermediul aplicației Sign sunt semnături electronice valabile în Uniunea Europeană și Statele Unite ale Americii. Ele îndeplinesc și cerințele pentru semnături electronice în majoritatea țărilor. Valabilitatea legala a semnăturilor electronice generate de Odoo depind de legislația țării dvs. Companiile care fac afaceri în străinătate ar trebui să ia în considerare și alte legislații privind semnăturile electronice ale țărilor respective.
Important
The below information has no legal value; it is only provided for general informational purposes. As laws governing electronic signatures rapidly evolve, we cannot guarantee that all information is up-to-date. We advise contacting a local attorney for legal advice regarding electronic signature compliance and validity.
Uniunea Europeană
eIDAS regulation stabilește cadrul pentru semnături electronice în `27 de state membre a Uniunii Europene <https://europa.eu/european-union/about-
Semnaturile electronice simple
Semnaturile electronice avansate
Semnatrile electronice calificate
Odoo generează primul tip, simple electronic signatures; aceste semnături sunt valabile legal în UE, conform reglementării eIDAS.
Semnatrile electronice nu pot fi recunoscute automat ca valabile. Poate trebuie să aduceți si alte acte care pot dovedi valabilitatea semnăturii. În timp ce aplicația Sign oferă o semnătură electronică simplă, unele dovezi ale valabilitatii se colectează automat în timpul procesului de semnare, cum ar fi:
Email și SMS de validare (dacă este activat)
Identitate puternică prin itsme® (disponibil în Belgia și Țările de Jos)Olanda)
Timestamped, IP și trasabilitate geografica dau acces la documente și semnăturile asociate
Trasaabilitatea documentelor și inalterabilitatea (orice modificare făcută unui document semnat este detectată de Odoo cu ajutorul dovezilor criptografice)
Statele Unite ale Americii
ESIGN Act (Electronic Signatures in Global and National Commerce Act), la nivel interstat și internațional, și UETA (Uniform Electronic Transactions Act), la nivel de stat, oferă cadrul legal pentru semnaturile electronice. Rețineți că Illinois și New York nu au adoptat UETA, ci acte similare.
Per ansamblu, pentru a fi recunoscute ca valabile, semnaturile electronice trebuie să îndeplinească cinci criterii:
Semnatarul trebuie să arate un intent to sign. De exemplu, folosind cursorul pentru a desena o semnătură. Semnatarul trebuie de asemenea să aibă opțiunea de a renunța la documentul electronic.
Semnatarul trebuie să exprime sau să implice consent to conduct business electronically.
Semnatura trebuie să fie clearly attributed. În Odoo, metadate, cum ar fi adresa IP a semnatarului, este adăugată la semnătură, care poate fi folosită ca dovadă a valabilitatii
The signature must be associated with the signed document, de exemplu, prin păstrarea unei înregistrari care detaliază cum a fost capturată semnătura.
Documentele semnate electronic trebuie să fie retained and stored de toate părțile implicate; de exemplu, prin furnizarea semnatarului fie cu o copie completă, fie cu posibilitatea de a descărca o copie.
Other countries
Trimite un document pentru a semna
Semnătură unică
Puteți face clic pe Încărcați un PDF pentru a semna din tabloul de bord pentru o semnătură unică. Selectați documentul, deschideți-l și trageți și plasați câmpurile necesare în documentul dvs. Puteți modifica rolul atribuit unui câmp făcând clic pe acesta și selectând pe cel dorit.
Când este gata, faceți clic pe Trimite și completați câmpurile obligatorii. Odată trimis, documentul dvs. rămâne disponibil. Accesați pentru a vedea documentul dvs. și starea semnăturilor.
Șabloane
Puteți crea șabloane de documente atunci când trebuie să trimiteți același document de mai multe ori. Din tabloul de bord, faceți clic pe Încărcați un șablon PDF. Selectați documentul și adăugați câmpurile obligatorii. Puteți modifica rolul unui câmp făcând clic pe el și selectând pe cel dorit.
Faceți clic pe Proprietăți șablon pentru a adăuga Etichete la șablonul dvs., definiți un Spațiu de lucru pentru documente semnate, adăugați Etichete pentru documente semnate, setați un Legătură de redirecționare care vor fi disponibile în mesajul de confirmare a semnăturii primit după semnătură sau definiți Utilizatori autorizați dacă doriți să restricționați utilizarea șablonului dvs. la anumiți utilizatori sau grupuri autorizate.
Șabloanele dvs. sunt vizibile în mod implicit pe tabloul de bord. Puteți face clic pe Trimite pentru a trimite rapid un șablon de document unui semnatar sau pe Semnați acum dacă sunteți gata să semnați documentul imediat.
Sfat
You can create a template from a document that was previously sent. To do so, go to . On the document you want to retrieve, click on ⋮, then Template. Click on ⋮ again, then Restore. Your document now appears on your dashboard next to your other templates.
Roluri
Fiecare câmp dintr-un document Sign este legat de un rol corespunzător unei anumite persoane. Atunci când un document este semnat, persoana atribuită rolului trebuie să completeze câmpurile atribuite și să-l semneze.
Roluile sunt disponibile accesând
Este posibil să actualizați roluri existente sau să creați roluri noi făcând clic pe Nou. Alegeți un Nume rol, adăugați un Pas suplimentar de autentificare pentru a confirma identitatea persoanei semnatare și, dacă documentul poate fi reatribuit unei alte persoane de contact, selectați Modificare autorizată pentru rol. A Color poate fi, de asemenea, aleasă pentru rol. Această culoare poate ajuta la înțelegerea rolurilor responsabile pentru ce câmp atunci când configurați un șablon.
Identificare securizată
În calitate de proprietar al unui document, puteți solicita un Pas suplimentar de autentificare prin Verificare SMS sau prin Itsme® (disponibil în Belgia și Țările de Jos). Ambele opțiuni de autentificare necesită credite. Dacă nu vă mai rămâne niciun credit, pașii de autentificare vor fi omisi.
Vedeți și
Verificare prin SMS
Accesați . Faceți clic în coloana Pas suplimentar de autentificare pentru rol și selectați Cod unic prin SMS.
Notă
Înainte de a putea trimite mesaje text SMS, trebuie să vă înregistrați numărul de telefon. Pentru a face acest lucru, accesați și faceți clic pe Cumpărați credite sub Autentificare prin SMS.
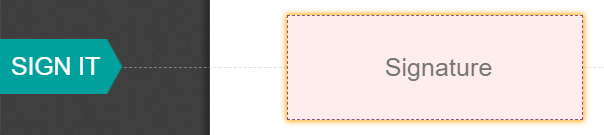
Accesați documentul pentru a semna, adăugați câmpul pentru care este necesară verificarea prin SMS, de exemplu, câmpul Semnătură și faceți clic pe Trimite. Pe noua pagină, selectați client și faceți clic pe Trimite.
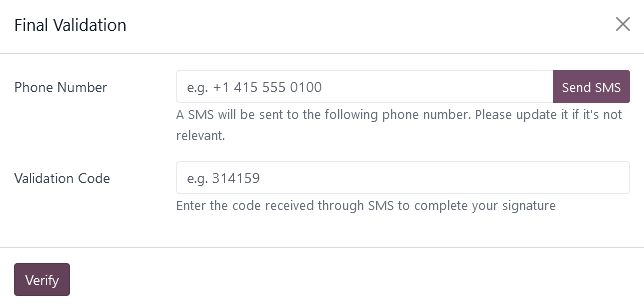
Persoana care semnează documentul completează câmpul Semnătură, apoi Semnați și dă clic pe Validați și trimiteți documentul completat. Apare o pagină Validare finală unde să-și adauge numărul de telefon. Codurile unice sunt trimise prin SMS.
Notă
Această caracteristică este activată în mod implicit.
De îndată ce Pasul de autentificare suplimentar se aplică unui rol, acest pas de validare este solicitat pentru orice câmp atribuit acestui rol.
Itsme®
Autentificarea Itsme® poate fi utilizată pentru a permite semnatarilor să-și furnizeze identitatea folosind itsme®. Această funcție este disponibilă numai în Belgia și Țările de Jos.
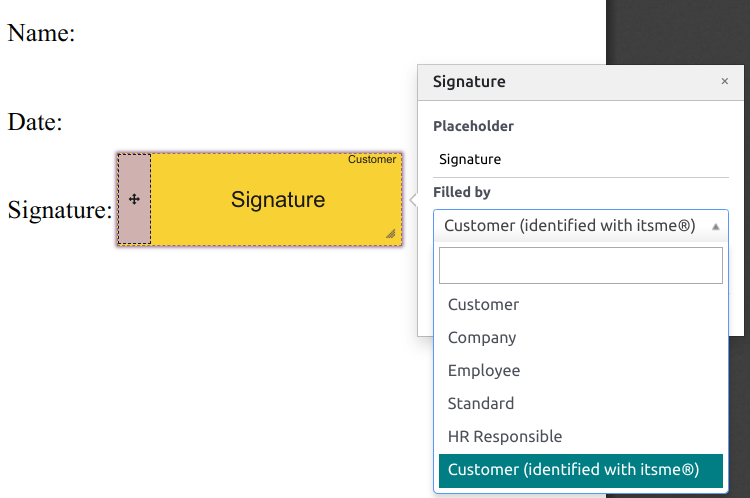
Funcția poate fi activată în Setări de semnătură și se aplică automat rolului Client (identificat cu itsme®). Pentru a-l activa pentru alte roluri, accesați . Faceți clic în coloana Pas de autentificare suplimentar pentru rol și selectați Prin itsme®.
Accesați documentul care trebuie semnat și adăugați câmpul Semnătură. Comutați la orice rol configurat pentru a utiliza caracteristica și faceți clic pe Validare și Trimite.
La semnarea documentului, semnatarul completează câmpul Semnătură și continuă făcând clic pe Validați și trimiteți documentul completat, declanșând o pagină Verificare finală unde este necesară autentificarea prin itsme®.
Semnatarul hash
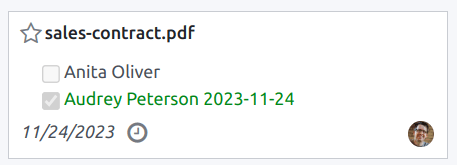
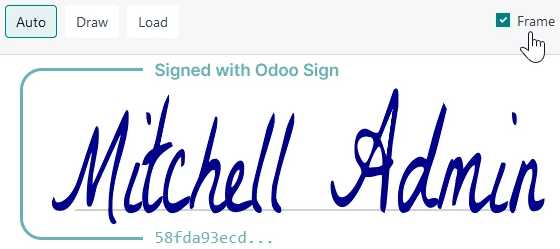
De fiecare dată când cineva semnează un document, un hash - o semnătură digitală unică a operațiunii - este generat pentru a asigura trasabilitatea, integritatea și inalterabilitatea. Acest proces garantează că orice modificări efectuate după aplicarea unei semnături pot fi detectate cu ușurință, menținând autenticitatea și securitatea documentului pe tot parcursul ciclului său de viață.
Un cadru de securitate vizuală care afișează începutul hash-ului este adăugat la semnături. Utilizatorii interni îl pot ascunde sau arăta activând sau dezactivând opțiunea Frame atunci când semnează documentul.
Semnează comanda
Atunci când un document trebuie semnat de către diferite părți, ordinul de semnare vă permite să controlați ordinea în care destinatarii dvs. îl primesc pentru semnare.
By going to , you can Enable Signing Order. Each recipient receives the signature request notification only once the previous recipient has completed their action.
Add at least two Signature fields with different roles to your document. Click Send, go to the Options tab, and tick the Specify signing order box.
Add the signer’s Name or email information. You can decide on the Sign Order by typing 1 or 2 in the Sign Order column.
Tipuri de câmpuri
Câmpurile sunt folosite într-un document pentru a indica ce informații trebuie completate de către semnatari. Puteți adăuga câmpuri în documentul dvs. pur și simplu trăgându-le și plasându-le pentru coloana din stânga în document.
Pentru a semna documente pot fi utilizate diferite tipuri de câmpuri (substituent, completare automată etc.). Prin configurarea propriilor tipuri de câmpuri, cunoscute și ca tipuri de elemente de semnătură, procesul de semnare poate fi și mai rapid pentru clienții, partenerii și angajații dvs.
Pentru a crea si edita tipurile de câmpuri, accesați .
Puteți selecta un câmp existent făcând clic pe el sau puteți Creați unul nou. Mai întâi, editați Numele câmpului. Apoi, selectați un Tip de câmp:
Signature: utilizatorii sunt rugați să introducă semnătura lor ori prin desenarea ei, generarea unei semnaturi automate bazate pe numele lor, sau încărcarea unui fișier local (de obicei o imagine). Fiecare Signature următor va utiliza datele introduse în primul câmp.
Initial: utilizatorii sunt rugați să introducă inițialele lor, în mod similar cu câmpul Signature.
Text: utilizatorii introduc text pe o singură linie.
Multiline Text: utilizatorii introduc text pe mai multe linii.
Checkbox: utilizatorii pot bifa o casetă (de exemplu, pentru a marca aprobarea sau consimțământul).
Selection: utilizatorii aleg o singură opțiune dintr-o varietate de opțiuni.
Setarea Auto-fill Partner Field este utilizată pentru a completa automat un câmp în timpul procesului de semnare. Aceasta utilizează valoarea unui câmp din modelul de contact (res.partner) al persoanei care semnează documentul. Pentru a face acest lucru, introduceți numele tehnic al campului din modelul de contact.
Sfat
Pentru a afla numele tehnic al unui câmp, activați modul de dezvoltator și plasați cursorul deasupra semnului întrebării din dreptul câmpului.
Notă
Completează automat valorile sunt sugestii și pot fi modificate după cum este necesar de către persoana care semnează documentul.
Mărimea câmpurilor poate fi modificată și prin editarea Lățimea implicită și Înălțimea implicită. Ambele dimensiuni sunt definite ca un procent din întreaga pagină exprimat ca zecimală, cu 1 echivalând cu lățimea sau înălțimea întregii pagini. În mod implicit, lățimea noilor câmpuri pe care le creați este setată la 15% (0,150) din lățimea unei pagini întregi, în timp ce înălțimea lor este setată la 1,5% (0,015) din înălțimea unei pagini întregi.
In continuare, scrieți un Tip. Sfaturile sunt afișate în interiorul săgeților din partea stângă a ecranului utilizatorului în timpul procesului de semnare pentru a-l ajuta să înțeleagă ce implică această etapă (de exemplu, „Semnează aici” sau „Completează data nașterii”). De asemenea, puteți utiliza un text Placeholder pentru a fi afișat în interiorul câmpului înainte de a fi completat.