Multiple websites
Odoo allows you to create multiple websites from the same database. This can be useful, for example, if you have multiple brands operating under your organization, or to create separate websites for different products/services, or different audiences. In these cases, having different websites can help avoid confusion and make it easier to tailor your digital outreach strategies and reach your target audience.
Each website can be designed and configured independently with its own domain name, theme, pages, menus, languages, products, assigned sales team, etc. They can also share content and pages.
Suggerimento
Duplicate content (i.e., pages and content shared between multiple websites) can have a negative impact on Search Engine Optimization (SEO).
Website creation
To create a new website, proceed as follows:
Go to .
Click + New Website.

Specify the Website Name and Website domain. Each website must be published under its own domain.
Adapt the Company name, Languages and Default language if needed.
Click the Create button.
You can then start building your new website.
Nota
By default, all website-related apps that you have installed (e.g. eCommerce, Forum, Blog, etc.) and their related website pages are also available on the new website. You can remove them by amending the website’s menu.
Switching websites
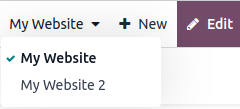
To switch from one website to another, click the menu next to the +New button in the top right corner and select the website you want to switch to.
Nota
When you switch websites, you are redirected to the other website, to the same page (URL) as the current one. If the page you are currently viewing does not exist on the other website, you are redirected to a 404 error page. Once redirected, click Create page to create the page.

Website-specific configuration
Most website settings are website-specific, which means they can be enabled/disabled per website. To adapt the settings for a website, go to . Select the desired website in the field Settings of Website at the top of the Settings page, in the yellow banner. Then, adapt the options for that specific website.
Nota
Websites are created with the default settings; the settings are not copied from one website to the other.
In a multi-company environment, each website can be linked to a specific company in your database so that only company-related data (e.g., products, jobs, events, etc.) is displayed on the website. To display company-specific data, set the desired company in the Company field.
Content availability
By default, pages, products, events, etc. created from the frontend (using the +New button) are only available on the website from which it was created. Records created from the backend, however, are made available on all websites by default. The content’s availability can be changed in the backend, in the Website field. For example, for products, go to , then select the product and go to the Sales tab. For forums, go to , then select the forum.

Records and features can be made available:
On all websites: leave the Website field empty;
Only on one website: set the Website field accordingly;
On some websites: in this case, you should duplicate the item and set the Website field.
Website pages
To modify the website on which a page is to be published, proceed as follows:
Go to .
Select the website on which the page is currently published.
Tick the check box next to the page(s) you want to change.
Click the Website field and select the website, or empty it to publish the page on all websites.
Nota
Each website must have its own homepage; you may not use the same homepage for several websites.
eCommerce features
eCommerce features such as products, eCommerce categories, pricelists, discounts, payment providers, etc. can be restricted to a specific website.
Customer accounts
You can allow your customers to use the same account on all of your websites by enabling the Shared Customer Accounts check box in the website settings.
Definizione prezzi
Products can be priced differently based on the website using pricelists. The following configuration is required:
Go to .
Scroll down to the Shop - Products section and select the Pricelists option Multiple prices per product.
Click Pricelists to define new pricelists or edit existing ones.
Select the pricelist or click New to create a new one, then select the Configuration tab and set the Website field.
Resoconti
Analitiche
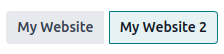
Each website has its own analytics. To switch between websites, click the buttons in the upper right corner.
Other reporting data
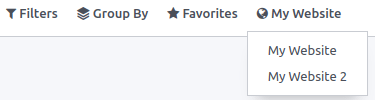
Other reporting data such as eCommerce dashboard data, online sales analyses and visitors can be grouped by website if necessary. Click Group by –> Website.