Branches
La vue Branches fournit un aperçu des différentes branches de votre dépôt.
Étapes
Odoo.sh propose trois étapes de branche différentes :
Vous pouvez changer l’étape d’une branche en la faisant glisser et en la déposant sous l’étape souhaitée.

Note
Les branches de développement peuvent être déplacées sous Intermédiaire. Si vous essayez de déplacer une branche de développement sous Production, un message d’avertissement s’affichera expliquant que vous ne pouvez avoir qu’une seule branche de production par projet.
Les branches intermédiaires peuvent être déplacées sous Développement, mais il n’est pas possible de les déplacer sous Production.
La branche de production ne peut être déplacée que sous Développement. Si vous essayez de la déplacer sous Intermédiaire, vous ne pouvez effectuer qu’une fusion. Consultez la section fusion pour une explication détaillée de ce processus.
Production
La branche de production contient le code utilisé pour exécuter la base de données de production. Il ne peut y avoir qu’une seule branche de production.
Lorsque vous poussez un nouveau commit vers cette branche, le serveur de production est mis à jour avec le code révisé et redémarré.
Si les modifications nécessitent une mise à jour de module, comme modifier une vue formulaire, et que vous souhaitez que la mise à jour soit effectuée automatiquement, vous pouvez augmenter le numéro de version du module dans son fichier manifeste (__manifest__.py). La plateforme effectue alors la mise à jour, durant laquelle l’instance sera temporairement indisponible pour des raisons de maintenance.
Cette méthode équivaut à mettre à jour le module via le menu Apps ou le paramètre -u en ligne de commande.
Note
Si les modifications empêchent le serveur de redémarrer ou si la mise à jour du module échoue, le serveur est automatiquement rétabli à la révision de code précédente réussie, et la base de données est restaurée à son état précédent. Accédez au journal de la mise à jour échouée pour le dépanner.
Les données de démonstration ne sont pas chargées, car elles ne sont pas destinées à être utilisées sur une base de données de production. Les tests unitaires ne sont pas effectués, car cela augmenterait le temps d’indisponibilité de la base de données de production pendant la mise à jour.
Odoo.sh sauvegarde automatiquement la base de données de production. Il conserve sept sauvegardes quotidiennes, quatre hebdomadaires et trois mensuelles. Chaque sauvegarde inclut le dump de la base de données, le filestore (pièces jointes et champs binaires), les journaux et les sessions.
Avertissement
Lors de l’utilisation de projets d’essai, la branche de production et toutes les branches intermédiaires sont automatiquement rétablies à l’étape de développement après 30 jours.
Simulation
Les branches intermédiaires permettent de tester de nouvelles fonctionnalités en utilisant les données de production sans compromettre la base de données de production réelle avec des enregistrements de test. Elles créent des duplicatas neutralisés de la base de données de production.
La neutralisation désactive :
Actions planifiées
Note
Pour les tester, déclenchez-les manuellement ou réactivez-les. Notez que la plateforme les déclenchera moins souvent si personne n’utilise la base de données afin d’économiser les ressources.
Courriels sortants
Note
Ils sont plutôt interceptés à l’aide d’un capteur de courriels. Une interface pour visualiser les courriels envoyés par la base de données est fournie dans votre projet Odoo.sh. Ainsi, aucun courriel n’est envoyé à vos contacts.
Services IAP
Fournisseurs de paiement et connecteurs d’expédition
Note
Ils sont mis en mode test.
Si vous configurez ou visualisez des modifications dans une base de données de préproduction, assurez-vous de les enregistrer (en les notant étape par étape, en les reproduisant en production, etc.) ou de les écrire directement dans les modules de la branche, en utilisant des fichiers de données XML pour remplacer la configuration ou les vues par défaut. Consultez la documentation du premier module pour voir des exemples.
Note
Les tests unitaires ne sont pas effectués. Ils reposent sur les données de démonstration, qui ne sont pas chargées dans les bases de données de production et de préproduction. Si Odoo prend en charge l’exécution des tests unitaires sans données de démonstration, Odoo.sh envisagera alors d’exécuter les tests sur les bases de données de préproduction.
Les bases de données de staging ne sont pas sauvegardées automatiquement. Néanmoins, vous pouvez restaurer une sauvegarde de la base de données de production dans une branche de staging à des fins de test ou pour récupérer manuellement des données qui ont été accidentellement supprimées de la base de données de production. Il est possible de créer des sauvegardes manuelles des bases de données de staging.
Avertissement
Les bases de données créées pour les branches de staging sont automatiquement supprimées après un mois. Pour utiliser à nouveau la branche, vous devez la reconstruire.
Développement
Les branches de développement créent de nouvelles bases de données utilisant les données de démonstration pour exécuter les tests unitaires. Les modules installés sont ceux inclus dans la branche. Vous pouvez modifier cette liste de modules à installer dans les paramètres du projet.
Lors du push d’un commit vers une branche de développement, un nouveau serveur est démarré, avec une base de données créée de zéro, et la branche est mise à jour. Les données de démonstration sont chargées, et les tests unitaires sont effectués par défaut pour vérifier que les modifications ne cassent aucune des fonctionnalités testées. Vous pouvez désactiver les tests ou autoriser l’exécution de tests spécifiques avec des balises personnalisées en accédant aux paramètres de la branche.
De même que pour les branches de préproduction, les e-mails ne sont pas envoyés mais sont interceptés par un mail catcher, et les actions planifiées ne sont pas déclenchées tant que la base de données n’est pas utilisée.
Les bases de données de développement ne sont pas sauvegardées automatiquement, et les sauvegardes manuelles ne sont pas possibles.
Avertissement
Les bases de données créées pour les branches de développement sont destinées à durer environ trois jours. Après cela, elles peuvent être automatiquement supprimées pour libérer de l’espace pour de nouvelles bases de données sans préavis.
Fusionner les branches
Vous pouvez fusionner vos branches en les glissant-déposant les unes dans les autres.

Pour tester les modifications des branches de développement avec les données de production, vous pouvez soit :
Fusionner la branche de développement dans une branche de préproduction en la glissant-déposant sur la branche souhaitée ; soit
Glisser-déposer la branche de développement sous la section Préproduction pour en faire une branche de préproduction.

Lorsque les modifications sont prêtes pour la production, glissez-déposez la branche de préproduction dans la branche de production pour les fusionner et les déployer.
Note
Vous pouvez fusionner des branches de développement directement dans la branche de production. Cependant, les modifications ne seront pas validées par rapport aux données de production via une branche de préproduction, il y a donc un risque plus élevé de rencontrer des problèmes dans la base de données de production.
Vous pouvez fusionner des branches de développement entre elles, et des branches de préproduction entre elles.
Vous pouvez également utiliser
git mergedirectement sur votre poste de travail pour fusionner vos branches. Odoo.sh est notifié lorsque de nouvelles révisions sont poussées vers vos branches.
Fusionner une branche de staging dans la branche de production ne fusionne que le code source. Les modifications apportées à la base de données de staging ne sont pas transférées vers la base de données de production. Cependant, si vous modifiez le code dans le dépôt, il sera transféré vers la branche de production lors de la fusion.
Si vous testez des changements de configuration dans des branches de staging et souhaitez qu’ils soient appliqués à la branche de production, vous devez soit :
Écrire les changements de configuration dans des fichiers de données XML pour remplacer la configuration par défaut ou les vues dans la branche, puis augmenter la version du module dans son manifeste (
__manifest__.py) pour déclencher la mise à jour du module lors de la fusion de la branche de staging dans la branche de production.Note
Cette méthode est recommandée pour une meilleure évolutivité de vos développements, car vous utiliserez les fonctionnalités de versionnage Git pour tous les changements de configuration, garantissant ainsi la traçabilité de vos modifications.
Les transférer manuellement de la base de données de staging vers celle de production en les copiant et les collant.
Onglets
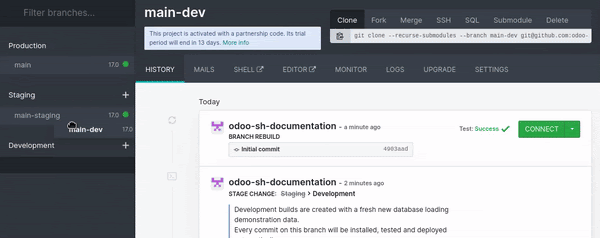
Historique
L’onglet Historique donne un aperçu de l’historique de la branche :
Les messages de commit et leurs auteurs
Les divers événements liés à la plateforme, tels que les changements d’étape, les imports de base de données et les restaurations de sauvegarde

Un statut dans le coin supérieur droit de chaque événement indique l’opération en cours sur la base de données (par ex., installation, mise à jour, import de sauvegarde) ou son résultat (par ex., retour de test, import de sauvegarde réussi). Si une opération réussit, un bouton Connecter apparaît, permettant d’accéder à la base de données.
Emails
L’onglet Mails contient le collecteur de mails, qui fournit un aperçu des emails envoyés par la base de données.
Note
Le collecteur de mails est disponible pour les branches de développement et de staging. Les emails de la base de données de production sont réellement envoyés et ne sont pas interceptés par le collecteur de mails.

Shell
L’onglet Shell fournit un accès shell au conteneur.
Cliquer sur Shell ouvre un nouvel onglet de navigateur où vous pouvez exécuter des commandes Linux de base (ls, top). Vous pouvez ouvrir un shell sur la base de données en exécutant psql.

Astuce
Vous pouvez ouvrir plusieurs onglets shell simultanément et organiser leur disposition en les faisant glisser-déposer.
Note
Les shells d’instance de production sont surlignés en rouge pour souligner le danger de manipuler directement les instances de production, tandis que les shells d’instance de staging/développement sont surlignés en jaune.
Les instances de shell de longue durée/sessions shell inactives peuvent être terminées à tout moment pour libérer des ressources.
Commandes
Voici un aperçu des commandes utiles que vous pouvez exécuter dans un terminal de base de données Odoo.sh :
odoo-bin shell: ouvrir un shell Odooodoo-update: mettre à jour les modules dans la base de donnéesodoosh-restart: redémarrer les services Odoo.sh (http ou cron)odoosh-storage: vérifier l’utilisation du stockage du système de fichiers du conteneur de votre instancepsql: ouvrir un shell de base de donnéesmutt: vérifier l’apparence des e-mails sur les clients texte (instances de staging et de développement)lnav ~/logs/odoo.log: naviguer dans le fichierodoo.logde votre instancencdu: lancer l’analyseur d’utilisation du disque avec une interface interactivegrep: filtrer et trouver des informations dans les fichiers de log ou de configuration
Éditeur
Cliquer sur Éditeur ouvre un nouvel onglet de navigateur pour accéder à un environnement de développement intégré (IDE) en ligne permettant de modifier le code source. Vous pouvez également ouvrir des terminaux, des consoles Python et des consoles de shell Odoo.

Vous pouvez ouvrir plusieurs onglets et les glisser-déposer pour organiser la disposition comme vous le souhaitez.
Voir également
Monitor
L’onglet Monitor affiche diverses métriques de surveillance des performances du build actuel.
Zoomer avec votre curseur pour ajuster la plage horaire ou la sélectionner manuellement depuis le sélecteur de plage horaire. Il est également possible de modifier le fuseau horaire.

Note
Les logs techniques utilisent toujours le temps universel coordonné. Pour analyser ces logs conjointement avec vos métriques de surveillance, assurez-vous que temps universel coordonné est sélectionné dans l’outil de surveillance.
De même, lors de l’envoi d’un ticket de support, assurez-vous que les informations que vous partagez sont basées sur le temps universel coordonné, car Odoo utilise ce fuseau horaire pour enquêter sur les problèmes de performance.
Les informations sont agrégées périodiquement. Lorsque c’est le cas, une ligne pointillée bleue s’affiche, accompagnée de l’étiquette Date d’agrégation. Cela signifie que les données antérieures à cette date apparaîtront aplaties par rapport aux données postérieures. Par conséquent, lors de l’utilisation de l’outil de surveillance, il est recommandé de se concentrer sur les événements récents pour obtenir les informations les plus détaillées possible.
Note
Les lignes pointillées d’autres couleurs permettent de relier d’autres modifications sur la build (importation de base de données, git push, etc.).

Astuce
Sur chaque graphique, une icône 𝕚 (information) s’affiche dans le coin supérieur gauche. Survoler avec la souris pour obtenir plus de détails sur ce que représente le graphique.
Métriques
Système
Le graphique Mémoire affiche des informations sur la consommation de mémoire :
Conteneur mémoire représente les workers Odoo et les processus conteneur.
Mémoire postgresql représente la base de données.

Le graphique CPU affiche des informations sur la consommation CPU :
CPU http représente les workers Odoo.
CPU cron/mail représente les actions planifiées et les e-mails entrants.
CPU postgresql (processus de base de données)
CPU autre représente les webshells, l’éditeur, etc.

Le graphique Stockage affiche des informations sur le stockage utilisé :
Conteneur représente le filestore, les fichiers de log et les fichiers utilisateur.
Postgresql représente la base de données et les index.

HTTP
Le graphique Requêtes affiche des informations sur le nombre de requêtes HTTP par seconde :
Succès HTTP représente les requêtes réussies.
Erreurs HTTP représente les requêtes échouées (vérifier
odoo.log).Limitation du débit HTTP représente les requêtes refusées, éventuellement en raison d’un manque de workers.

Le graphique Requêtes simultanées (max) affiche le nombre maximum de requêtes HTTP simultanées par seconde.

Note
Les workers de base de données déterminent le nombre de requêtes simultanées pouvant être gérées en même temps. Il est essentiel de disposer de suffisamment de workers pour traiter toutes les requêtes entrantes au fur et à mesure qu’elles arrivent. Cependant, avoir des workers supplémentaires au-delà de ce nombre n’améliore pas la vitesse à laquelle les requêtes sont traitées.
Le graphique Temps de réponse moyen affiche le temps de réponse moyen aux requêtes HTTP (en millisecondes).

Emails
Le graphique Entrants affiche des données sur le nombre quotidien d’e-mails entrants :
E-mails reçus représente les e-mails reçus avec succès.
E-mails reçus rejetés représente les e-mails reçus sans succès.

Le graphique Sortants affiche des données sur le nombre quotidien d’e-mails sortants :
E-mails envoyés représente les e-mails envoyés avec succès.
E-mails envoyés rejetés représente les e-mails envoyés sans succès.

Journaux
L’onglet Logs offre une vue en temps réel des logs de votre serveur.

Plusieurs journaux sont disponibles :
pip.log: l’installation des dépendances Pythoninstall.log: l’installation de la base de données (pour les branches de développement, les tests sont inclus)odoosh-import-database.log: le dernier processus d’importation de dumpodoo.log: le serveur en cours d’exécutionupdate.log: les mises à jour de la base de donnéespg_slow_queries.log: les requêtes psql qui prennent un temps inhabituelsh_webshell.log: les actions effectuées dans le webshellsh_editor.log: les actions effectuées dans l’éditeurneutralize.log: la neutralisation de la base de données (staging uniquement)

Lorsque de nouvelles lignes sont ajoutées aux journaux, elles s’affichent automatiquement. Si vous faites défiler jusqu’en bas, le navigateur défile automatiquement à chaque ajout de nouvelle ligne.
Mettre en pause le processus de récupération des journaux en cliquant sur le bouton (pause) dans le coin supérieur droit. Sinon, le processus s’arrête après cinq minutes. Le redémarrer en cliquant sur le bouton (play).
Sauvegardes
L’onglet Backups liste les sauvegardes disponibles à télécharger et restaurer, permet d’effectuer une sauvegarde manuelle et d’importer une base de données.

La base de données de production est automatiquement sauvegardée quotidiennement. Sept sauvegardes quotidiennes, quatre hebdomadaires et trois mensuelles sont conservées. Chaque sauvegarde inclut le dump de la base de données, le filestore (pièces jointes et champs binaires), les journaux et les sessions.
Note
Se référer à la planification estimée des sauvegardes automatiques pour mieux comprendre le fonctionnement du système. Ce fichier est mis à jour quotidiennement, en prenant le jour actuel comme point de départ.
Les bases de données de staging et de développement ne sont pas sauvegardées automatiquement. Cependant, restaurer une sauvegarde de la base de données de production dans les branches de staging, à des fins de test, ou récupérer manuellement des données qui ont été supprimées accidentellement de la base de données de production.
La liste contient les sauvegardes conservées sur le serveur de votre base de données de production. Ce serveur ne conserve qu’un mois de sauvegardes : sept sauvegardes quotidiennes et quatre hebdomadaires.
Des serveurs de sauvegarde dédiés conservent les mêmes sauvegardes, ainsi que trois sauvegardes mensuelles supplémentaires. Pour restaurer ou télécharger l’une de ces sauvegardes mensuelles, contacter le support Odoo.
Lors de la fusion d’un commit mettant à jour la version d’un ou plusieurs modules (dans __manifest__.py), ou leurs dépendances Python liées (dans requirements.txt), Odoo.sh effectue une sauvegarde automatique (marquée avec le type Update dans la liste), car soit le conteneur sera modifié par l’installation de nouveaux packages pip, soit la base de données elle-même sera modifiée avec la mise à jour du module déclenchée par la suite. Dans ces deux cas, une sauvegarde est déclenchée car cela peut casser quelque chose.
Si le commit fusionné ne met pas à jour la version d’un module ou les dépendances liées, aucune sauvegarde n’est déclenchée par Odoo.sh, car ni le conteneur ni la base de données ne sont modifiés ; la plateforme considère donc cela suffisamment sûr. Par précaution supplémentaire, vous pouvez effectuer une sauvegarde manuelle avant de modifier les sources de production.
Les sauvegardes manuelles ont pour but de créer un instantané spécifique des bases de données de production ou de staging (non disponibles pour le développement). Elles restent disponibles pendant sept jours. Cependant, il existe une limite de cinq sauvegardes manuelles quotidiennes.
Étape |
Sauvegarde automatique |
Sauvegarde manuelle |
|---|---|---|
Production |
Oui (jusqu’à 3 mois) |
Oui (3 jours) |
Simulation |
Non |
Oui (3 jours) |
Développement |
Non |
Non |
La fonctionnalité Importer une base de données accepte les archives de bases de données provenant de :
le gestionnaire de bases de données Odoo standard (disponible pour les serveurs Odoo on-premise sous
/web/database/manager)le gestionnaire de bases de données Odoo Online
l’onglet Sauvegardes d’Odoo.sh (en utilisant le bouton (Options de téléchargement))
la vue Builds d’Odoo.sh (en cliquant sur Télécharger le dump de la BD)
Mettre à niveau
L’onglet Upgrade peut être utilisé pour mettre à niveau les branches de production et de staging des projets valides. Pour plus d’informations sur le processus de mise à niveau, consultez la documentation Upgrade.

Outils
L’onglet Outils contient le profileur de code. Il sert à démarrer une session de profilage, enregistrant les activités des workers Odoo exécutés dans l’instance pendant un maximum de cinq minutes. Vous pouvez choisir de terminer la session plus tôt, car exécuter l’outil pendant une durée plus courte réduit la quantité de bruit dans le rapport.

Après chaque session, un graphique en flammes interactif est créé pour vous aider à visualiser comment les workers Odoo allouent leur temps.
Avertissement
L’exécution du profileur consomme beaucoup de ressources serveur, donc éviter de le laisser fonctionner trop longtemps. L’objectif est d’enregistrer une action spécifique dans votre base de données.
Paramètres
L’onglet Paramètres répertorie les options de configuration disponibles pour la branche actuellement sélectionnée. Les options varient pour chaque étape.

Comportement lors de nouveaux commits
Vous pouvez modifier le comportement de la branche lors de la réception d’un nouveau commit pour les branches de développement et de préproduction.
Par défaut, une branche de développement crée une nouvelle build et une branche de préproduction met à jour la build précédente. Ceci est utile si la fonctionnalité sur laquelle vous travaillez nécessite une configuration spécifique, car vous n’auriez pas besoin de la configurer manuellement à nouveau après chaque commit.
Si vous sélectionnez Nouvelle build pour une branche de préproduction, une copie fraîche de la build de production est créée à chaque fois qu’un commit est poussé.
Une branche qui est déplacée de préproduction à développement est automatiquement définie sur Ne rien faire.
Installation de modules
Vous pouvez choisir quels modules doivent être installés automatiquement pour les branches de développement.

Pour modifier le comportement par défaut, décocher l’option Utiliser par défaut sous Comportement de build de développement et sélectionner l’une des options suivantes sous Installation de modules :
Installer uniquement mes modules (n’inclut pas les sous-modules) : installe uniquement les modules de la branche, à l’exclusion des sous-modules. Ceci est l’option par défaut.
Installation complète (sans suite de tests) : installe les modules de la branche, les sous-modules et tous les modules Odoo standard. Lors de l’exécution de l’installation complète, la suite de tests est désactivée.
Installer une liste de modules : installe les modules spécifiés. Pour ce faire, entrer leur nom technique et les séparer par des virgules (par exemple,
sale_management,website,accountant).
Note
Si la suite de tests est activée, l’installation de tous les modules Odoo standard peut prendre jusqu’à une heure.
Suite de tests
Par défaut, la suite de tests pour les branches de développement est activée. Vous pouvez restreindre les tests exécutés en saisissant des balises de test et en les séparant par des virgules (par exemple, custom_tags,at_install,post_install).
Pour désactiver entièrement la suite de tests, décocher Valider la suite de tests sur les nouvelles builds.
Version d’Odoo
Vous pouvez modifier la version d’Odoo pour les branches de développement, par exemple pour tester du code mis à niveau ou développer des fonctionnalités pendant que votre base de données de production est en cours de mise à niveau vers une version plus récente, en sélectionnant une autre Version.
Par défaut, Dernière est sélectionné comme Révision, et les sources de votre serveur Odoo sont mises à jour automatiquement chaque semaine pour bénéficier des derniers correctifs de bugs, de sécurité et de performance.
Pour choisir une révision spécifique, sélectionnez-la à l’aide du champ Révision.
Avertissement
Les révisions expirent après trois mois. Vous serez averti par e-mail lorsque la date d’expiration de la révision approche. Si vous n’avez pris aucune mesure à son expiration, le champ Révision est automatiquement réinitialisé à Dernière.

Domaines personnalisés
Vous pouvez configurer des domaines supplémentaires <nom>.odoo.com ou vos propres domaines personnalisés pour tous les types de branches.
Pour utiliser votre propre domaine personnalisé, il est nécessaire de :
Posséder ou acheter le nom de domaine.
Saisir le nom de domaine sous Domaines personnalisés (par exemple,
www.monentreprise.com), puis cliquer sur Ajouter un domaine.Configurer le nom de domaine (par exemple,
www.monentreprise.com) via le gestionnaire de noms de domaine de votre registraire avec un enregistrement CNAME défini sur le nom de domaine de votre base de données de production (par exemple,monentreprise.odoo.com).
Important
Les domaines nus (par exemple, monentreprise.com) ne sont pas acceptés. Ils ne peuvent être configurés qu’à l’aide d’enregistrements A, qui n’acceptent que des adresses IP comme valeur. Par conséquent, un domaine nu pourrait soudainement cesser de fonctionner, car l’adresse IP d’une base de données peut changer (par exemple, suite à une mise à niveau, une panne matérielle, un changement de lieu d’hébergement de la base de données).
Pour que votre domaine nu (par exemple, monentreprise.com) et votre domaine www (par exemple, www.monentreprise.com) fonctionnent tous les deux, il est nécessaire de rediriger le domaine nu vers le domaine www. La plupart des gestionnaires de domaines offrent un moyen de configurer cette redirection, couramment appelée redirection web.
HTTPS/SSL
Si la redirection est correctement configurée, un certificat SSL est automatiquement généré à l’aide de Let’s Encrypt dans l’heure, ce qui signifie que votre domaine sera accessible via HTTPS.
Conformité SPF et DKIM
Si le domaine de vos adresses e-mail utilise le protocole d’authentification SPF ou DKIM, il est nécessaire d’autoriser Odoo en tant qu’hôte d’envoi dans les paramètres du nom de domaine pour augmenter la délivrabilité des e-mails sortants. Pour plus d’informations, consultez la documentation Configurer les enregistrements DNS pour envoyer des e-mails dans Odoo.
Important
Si Odoo n’est pas autorisé en tant qu’hôte d’envoi, vos e-mails sortants peuvent être signalés comme spam.
Commandes shell
Dans le coin supérieur droit de la vue, plusieurs commandes shell sont affichées. Les commandes peuvent être copiées à l’aide du bouton presse-papiers puis utilisées dans un terminal. De plus, certaines d’entre elles peuvent être utilisées directement depuis l’interface d’Odoo.sh.

Clone
La commande clone est utilisée pour créer une copie locale de votre dépôt Git.
Example
git clone --recurse-submodules --branch development git@github.com:my-organization/my-repository.git
--recurse-submodulespour télécharger les sous-modules de votre dépôt--branch mainpour basculer vers une branche spécifique du dépôt (par exemple,development)
Note
Le bouton d’exécution n’est pas disponible car la commande est utilisée pour créer une copie locale sur votre machine.
Fork
La commande fork est utilisée pour créer une nouvelle branche basée sur la branche actuelle.
Example
git checkout -b main-1 development && git push -u origin development-1
git checkout -b main-1 mainune commande pour créer une nouvelle branche (par exemple,development-1) basée sur la branche actuelle (par exemple,development)git push -u origin development-1une commande pour téléverser la nouvelle branche (par exemple,development-1) vers le dépôt distant
Fusionner
La commande merge est utilisée pour combiner les modifications d’une branche dans une autre branche.
Example
git merge staging-1 && git push -u origin staging
git merge staging-1une commande pour fusionner les modifications de la branche actuelle dans une autre branche (par exemple,staging-1)git push -u origin stagingune commande pour téléverser les modifications fusionnées vers la branche du dépôt distant (par exemple,staging)
SSH
La commande SSH est utilisée pour se connecter à un build via SSH.
Pour utiliser la commande SSH, il est nécessaire de configurer d’abord une clé SSH. Pour ce faire :
Sur Odoo.sh, cliquer sur votre utilisateur GitHub dans le coin supérieur droit et sélectionner Profile.

Coller la clé SSH dans le champ Add a key manually et cliquer sur Add.

Example
ssh 25004381@my-user-my-repository-staging-25004381.dev.odoo.com
25004381l’ID du buildmy-user-my-repository-staging-25004381.dev.odoo.comle domaine utilisé pour se connecter au build
À condition d’avoir les droits d’accès nécessaires sur le projet, vous aurez accès SSH au build.
Note
Les connexions SSH de longue durée ne sont pas garanties. Les connexions inactives peuvent être déconnectées pour libérer des ressources.
Sous-module
La commande submodule est utilisée pour ajouter une branche d’un autre dépôt à votre branche actuelle en tant que sous-module.
Voir également
Example
git submodule add -b master <URL> <PATH> && git commit -a && git push -u origin staging
git submodule add -b master <URL> <PATH>une commande pour ajouter une branche spécifique (par exemple,master) d’un dépôt (<URL>) en tant que sous-module sous le chemin spécifié (<PATH>) dans votre branche actuelle.git commit -aune commande pour valider toutes les modifications actuellesgit push -u origin stagingune commande pour téléverser les modifications de la branche actuelle (par exemple,staging) vers le dépôt distant.
Supprimer
La commande delete est utilisée pour supprimer une branche de votre dépôt.
Note
Une fois qu’une branche est supprimée, il n’y a aucun moyen de la récupérer sauf si une sauvegarde existe. Les branches de staging ne sont pas sauvegardées automatiquement, mais peuvent l’être manuellement. Les branches de développement ne peuvent pas être sauvegardées.
Example
git push origin :staging && git branch -D staging
git push origin :stagingune commande pour supprimer une branche spécifique (par exemple,staging) sur le dépôt distantgit branch -D stagingune commande pour supprimer la branche spécifique sur votre copie locale du dépôt
Avertissement
Avant de supprimer une branche, consultez la section Sauvegardes pour mieux comprendre comment elles fonctionnent et quand créer une sauvegarde manuelle.