Een printer aansluiten
De printer installeren kan in een paar eenvoudige stappen. De printer kan worden gebruikt voor het afdrukken van bonnen, etiketten, bestellingen of zelfs rapporten vanuit de verschillende Odoo apps. Bovendien kunnen printeracties worden toegewezen als een actie op een trigger tijdens het productieproces, of worden toegevoegd aan een kwaliteitscontrolepunt of een kwaliteitscontrole.
Waarschuwing
De enige manier om een printer rechtstreeks te verbinden met een Odoo-database is door gebruik te maken van een IoT-systeem. Zonder IoT-systeem kan er nog steeds worden afgedrukt, maar dit wordt beheerd via de printer zelf, wat niet het aanbevolen proces is.
Connectie
IoT-systemen ondersteunen printers die verbonden zijn via USB of een netwerkverbinding. Ondersteunde printers worden automatisch gedetecteerd en verschijnen in de Apparaten-lijst van de IoT-app.

Notitie
Printers kunnen tot twee minuten duren voordat ze verschijnen in de IoT-app Apparaten-lijst.
Printer koppelen
Werkorders aan een printer koppelen
Werkorders kunnen via een kwaliteitscontrolepunt aan printers worden gekoppeld om labels af te drukken voor gefabriceerde producten.
In de kwaliteit-app kan een apparaat worden ingesteld op een kwaliteitscontrolepunt. Ga hiervoor naar en open het gewenste controlepunt.
Belangrijk
Een productiebewerking en werkorderbewerking moeten aan een kwaliteitscontrolepunt worden gekoppeld voordat het veld type de optie label afdrukken kan selecteren.
Bewerk vanaf hier het controlepunt door het veld type te selecteren en label afdrukken te selecteren uit het vervolgkeuzemenu met opties. Hierdoor wordt het veld apparaat zichtbaar, waar het gekoppelde apparaat kan worden geselecteerd.
De printer kan nu worden gebruikt met het geselecteerde kwaliteitscontrolepunt. Als het kwaliteitscontrolepunt tijdens het productieproces wordt bereikt, biedt de database de optie om etiketten voor een specifiek product af te drukken.
Tip
Kwaliteitscontrolepunten zijn ook toegankelijk door te navigeren naar en vervolgens het apparaat te selecteren. Ga naar het tabblad kwaliteitscontrolepunten om ze aan het apparaat toe te voegen.
Notitie
Op een kwaliteitscontroleformulier kan het Type controle ook worden ingesteld op Label afdrukken.
Zie ook
/applicaties/inventaris_en_mrp/kwaliteit/kwaliteit_beheer/kwaliteit_controle_punten
/applicaties/inventaris_en_mrp/kwaliteit/kwaliteit_beheer/kwaliteit_waarschuwingen
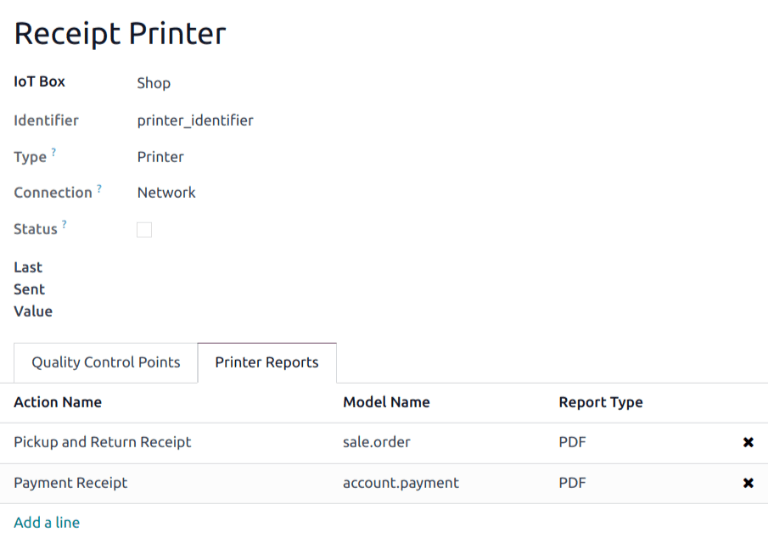
Rapporten aan een printer koppelen.
Het is mogelijk om rapporttypes aan een specifieke printer te koppelen. Ga daarvoor als volgt te werk:
Ga naar en selecteer de gewenste printer.
Ga naar het tabblad Printerrapporten en klik op Voeg een regel toe.
Selecteer in de pop-up die verschijnt de typen rapporten die aan de printer moeten worden gekoppeld en klik op Selecteer.
Tip
Rapporten kunnen ook worden geconfigureerd door de ontwikkelaarsmodus in te schakelen en naar te gaan. Selecteer het gewenste rapport uit de lijst en stel een IoT-apparaat in.
De eerste keer dat je een gekoppeld rapport selecteert om af te drukken, verschijnt er een pop-upvenster Selecteer printers. Schakel het selectievakje naast de juiste printer voor het rapport in en klik op Afdrukken. Het rapport is nu gekoppeld aan de printer.
Printercache van apparaat wissen
Nadat een printer is gekoppeld om een rapport af te drukken, wordt de instelling opgeslagen in de cache van een browser. Dit betekent dat een gebruiker verschillende apparaten in zijn cache kan hebben voor verschillende rapporten, gebaseerd op het apparaat waarmee hij Odoo benadert. Het betekent ook dat verschillende gebruikers een rapport automatisch kunnen laten afdrukken vanaf verschillende printers, gebaseerd op hun voorkeuren.
Ontkoppel een rapport van een printer door naar te gaan. Dit genereert een lijst met rapporten die op het huidige apparaat aan een printer zijn gekoppeld. Klik op de knop Ontkoppelen naast elk rapport om de koppeling te verwijderen.
Belangrijk
Deze stap voorkomt alleen dat het rapport automatisch wordt afgedrukt naar de vermelde printer vanuit de huidige browser. Het rapport is nog steeds gelinkt op het apparaat, onder het Printerrapporten tabblad.

Zie ook
Mogelijke problemen.
De printer is niet gedetecteerd
Als een printer niet in de apparatenlijst verschijnt, ga dan naar de homepage van de IoT Box of virtuele Windows IoT, klik op Toon in de sectie Apparaten en controleer of de printer wordt vermeld.
Als de printer niet op de homepage van het IoT-systeem verschijnt, klik dan op Printerserver, vervolgens op Beheer en op Printer toevoegen. Als de printer niet in de lijst staat, is deze waarschijnlijk niet correct aangesloten.
De printer voert willekeurige tekst uit
Voor de meeste printers wordt het juiste stuurprogramma automatisch gedetecteerd en geselecteerd. In sommige gevallen is het automatische detectiemechanisme echter niet voldoende en als er geen stuurprogramma wordt gevonden, kan de printer willekeurige tekens afdrukken.
De oplossing is om het bijbehorende stuurprogramma handmatig te selecteren. Klik op de homepage van het IoT-systeem op Printerserver, vervolgens op Printers en selecteer de printer in de lijst. Klik in het vervolgkeuzemenu Beheer op Printer wijzigen. Volg de stappen en selecteer het merk en model van de printer.

Notitie
Epson-bonnenprinters en Zebra-labelprinters hebben geen stuurprogramma nodig om te werken. Zorg ervoor dat er geen stuurprogramma is geselecteerd voor deze printers.
De printer is gedetecteerd maar wordt niet goed herkend
Als Odoo en het IoT-systeem de printer niet correct herkennen, ga dan naar , klik op de kaart van het apparaat om het formulier te openen en stel het veld Subtype in op de juiste optie: Bonnenprinter, Labelprinter of Kantoorprinter.
Epson configuratie speciaal geval
De meeste Epson-printers ondersteunen het afdrukken van bonnen in Odoo Kassa met behulp van de opdracht GS v 0. De volgende Epson-printermodellen ondersteunen deze opdracht echter niet:
TM-U220
TM-U230
TM-P60
TMP-P60II
Je kunt dit probleem omzeilen door de printer te configureren voor gebruik van de opdracht ESC *.
Controleer eerst de website van Epson op compatibiliteit voor zowel de opdrachten GS v 0 als ESC *.
Als de printer niet compatibel is met GS v 0 maar wel ESC * ondersteunt, configureer dan het IoT-systeem als volgt om de opdracht ESC * te gebruiken:
Ga naar de startpagina van de IoT Box of de virtuele Windows IoT.
Klik op de knop Printer server en klik vervolgens op Administration op de CUPS-pagina.
Klik op Add Printer in het gedeelte Printers, selecteer de printer en klik op Continue.
Tip
Als de naam van de printer nog steeds onzeker is, volg dan de volgende stappen:
Noteer de printers die op de CUPS-pagina worden vermeld.
Zet de printer uit en vernieuw de pagina.
Vergelijk het verschil met de eerste lijst om te zien welke printer is verdwenen.
Zet de printer weer aan en vernieuw de pagina opnieuw.
Controleer de lijst nogmaals om te zien of de printer weer verschijnt.
De printer die verdween en opnieuw verschijnt in de lijst met printers is de naam van de printer in kwestie. Deze kan Unknown zijn onder Local printers.
Specificeer op de pagina Add Printer de Name van de printer met de volgende conventie:
<printer_name>__IMC_<param_1>_<param_2>_..._<param_n>__, waarbij:printer_namede naam van de printer is. Deze kan elk teken bevatten behalve_,/,#of ` ` (spatieteken).IMC: Dit staat voor Image Mode Column (de vereenvoudigde naam voorESC *).param_1: Dit staat voor de specifieke parameter:SCALE<X>: Schaal van de afbeelding (met dezelfde beeldverhouding).Xmoet een geheel getal zijn dat het schaalpercentage beschrijft dat gebruikt moet worden. Bijvoorbeeld,100is de originele grootte,50is de helft van de grootte en200is twee keer de grootte.LDV: Lage Dichtheid Verticaal (wordt ingesteld op Hoge Dichtheid Verticaal als dit niet wordt opgegeven).LDH: Lage dichtheid horizontaal (wordt ingesteld op Hoge dichtheid horizontaal als dit niet wordt opgegeven).
Notitie
Density-parameters moeten mogelijk op een bepaalde manier worden geconfigureerd, afhankelijk van het printermodel.
Raadpleeg Epson’s ESC * documentation om te bepalen of de printer vereist dat deze parameters worden ingesteld.
Example
Hieronder staan voorbeelden van juiste en onjuiste naamopmaak:
Eigennaamopmaak:
EPSONTM30II__IMC__EPSON_TM_U220__IMC_LDV_LDH_SCALE80__
Onjuiste naamopmaak (dit verhindert het afdrukken niet, maar het resultaat is mogelijk niet de verwachte afgedrukte uitvoer):
Epson TMm 30II: De naam mag geen spaties bevatten.EPSONTMm30II: De naam zelf is correct, maar gebruikt geenESC *.EPSONTMm30II__IMC: Deze naam mist de afsluitende__.EPSONTMm30II__IMC_XDV__: De parameterXDVkomt niet overeen met bestaande parameters.EPSONTMm30II__IMC_SCALE__: Bij de parameterSCALEontbreekt de schaalwaarde.
Zodra de naam van de printer is gedefinieerd volgens de juiste naamgevingsconventie, klik je op Continue.
Stel de waarde Make in op Raw en de waarde Model op Raw Queue (en).
Klik op Add Printer. Als alles correct is uitgevoerd, moet de pagina doorverwijzen naar de pagina Banners.
Wacht een paar minuten tot het IoT-systeem de printer detecteert en synchroniseert met de Odoo-server.
Open de kassa-instellingen en selecteer je kassa, of klik op de verticale beletselteken-knop (⋮) op een kassa-kaart en klik op Bewerken. Scroll naar beneden naar het gedeelte Verbonden apparaten, schakel IoT Box in en selecteer de printer in het veld Bonnenprinter. Klik op Opslaan.
Notitie
Als de printer verkeerd is ingesteld (bv. hij blijft willekeurige tekst printen, of het afgedrukte bonnetje is te groot of te klein), kan dit niet worden aangepast via de printernaam in CUPS. Stel in plaats daarvan een nieuwe printer vanaf nul in met aangepaste parameters, volgens de bovenstaande stappen.
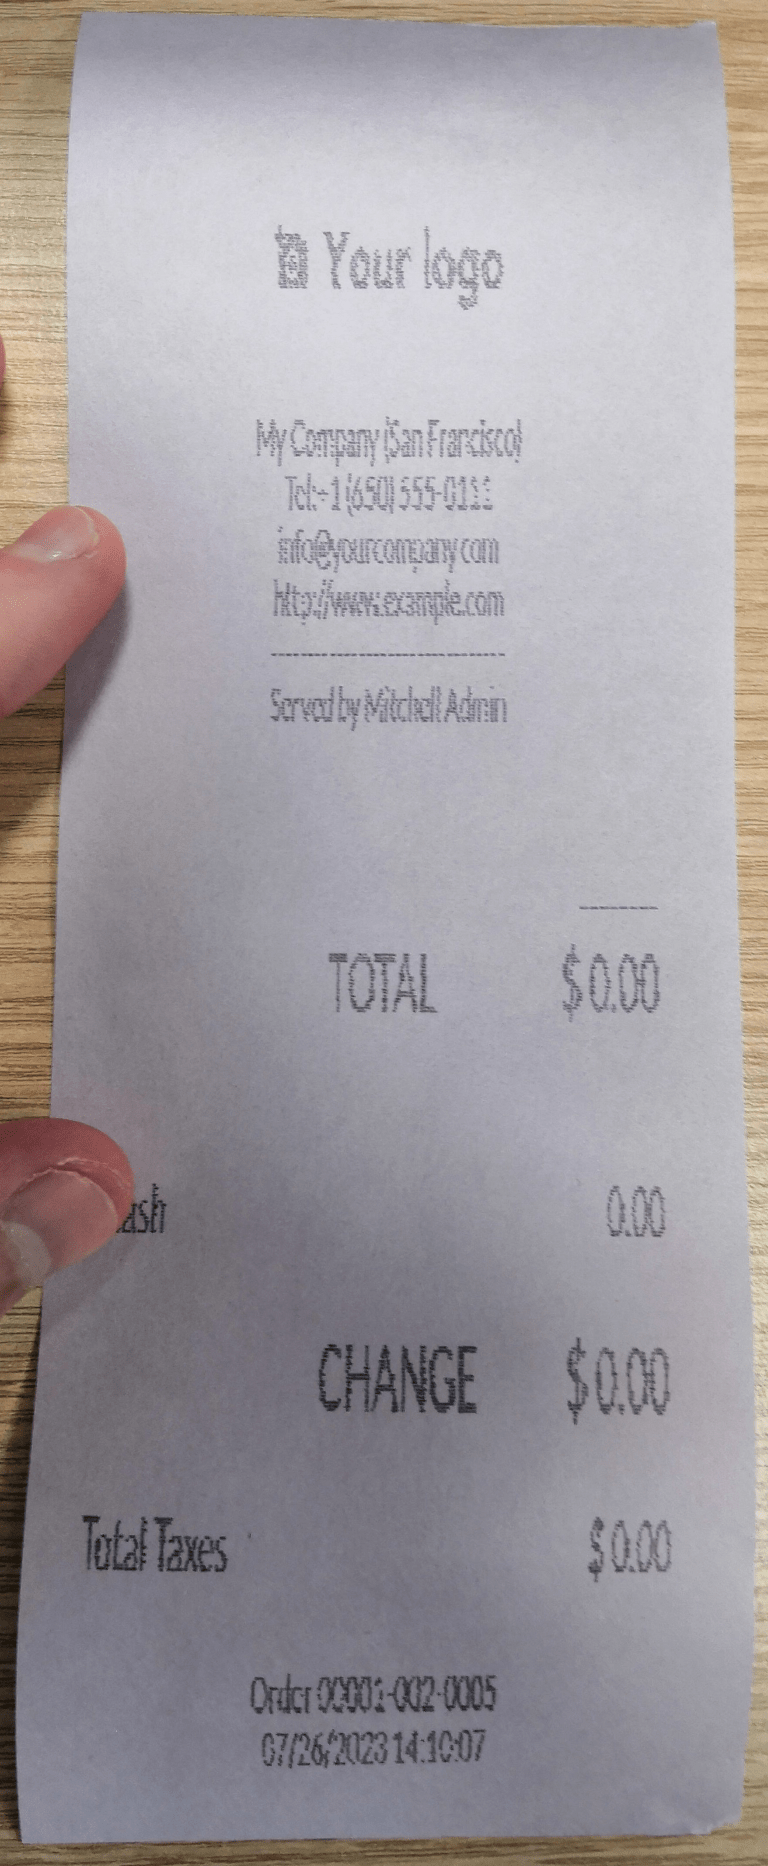
Hieronder volgt een voorbeeld van het probleemoplossingsproces voor een TM-U220B printermodel met behulp van de opdracht ESC *. De bon hieronder is een voorbeeld van een bon die correct wordt afgedrukt dankzij de juiste opmaak (in theorie):

Dit bonnetje direct afdrukken zonder goede opmaak werkt niet, aangezien het TM-U220B printermodel het GS v 0 commando niet ondersteunt. In plaats daarvan worden willekeurige tekens afgedrukt:

Volg deze stappen om de opmaak goed te configureren voor het Epson TM-U220B printermodel:
Na controle op de website van Epson voor compatibiliteit met zowel de GS v 0 als ESC * commando’s, is de TM-U220B printer inderdaad incompatibel met
GS v 0maar ondersteuntESC *.
Bij het toevoegen van de printer toont CUPS de lijst met beschikbare printers:

In dit geval is de printer via USB verbonden, dus maakt hij geen deel uit van de Ontdekte netwerkprinters. In plaats daarvan maakt hij waarschijnlijk deel uit van de Onbekend selectie onder Lokale printers. Door de USB-kabel van de printer uit het IoT-systeem te halen en de pagina te vernieuwen, verdwijnt de Onbekend printer. Door hem terug te pluggen, verschijnt de printer weer.
Voor de naamgevingsconventie is het, aangezien de printer met het
ESC *commando moet printen, absoluut noodzakelijk om__IMCtoe te voegen.
Voor dit specifieke model (TM-U220) moet
mgelijk zijn aan 0 of 1. Bij raadpleging van de Beschrijving tabel op Epson’s ESC * website, kunnen demwaarden 0, 1, 32 of 33 zijn. Dus in dit geval kan demwaarde niet 32 of 33 zijn (anders worden willekeurige tekens afgedrukt).De tabel bevat de numerieke waarden 32 en 33; deze komen beide voor als het Aantal bits voor verticale gegevens is ingesteld op 24, dus een Hoge verticale dichtheid heeft. Bij het configureren van de Epson TM-U220 moet de Lage verticale dichtheid worden geforceerd, omdat dit printermodel geen Hoge verticale dichtheid ondersteunt voor dit commando
ESC *.Om een Lage Verticale Dichtheid toe te voegen, voeg je de
LDVparameter toe aan de naamgevingsconventie.
Klik op Doorgaan om verder te gaan. Stel vervolgens de Merk waarde in op Raw en de Model waarde op Raw Queue (en).

Echter, bij het printen met de naamgevingsconventie
EpsonTMU220B__IMC_LDV__wordt het bonnetje afgedrukt, maar is het te groot en buiten de marge. Los dit op door een nieuwe printer (en naamgevingsconventie) toe te voegen met deSCALE<X>parameter om aan te passen aan de grootte van het bonnetje.Hier zijn enkele voorbeelden:
Conventie voor printernamen
EpsonTMU220B__IMC_LDV__EpsonTMU220B__IMC_LDV_SCALE75__EpsonTMU220B__IMC_LDV_LDH__EpsonTMU220B__IMC_LDV_LDH_SCALE35__


DYMO LabelWriter afdrukprobleem
De DYMO LabelWriter heeft een bekend probleem bij het printen met IoT-systemen. De OpenPrinting CUPS server installeert de printer met Local RAW Printer stuurprogramma’s. Om iets te kunnen printen, moet het juiste Merk en model worden ingesteld om naar het juiste stuurprogramma te verwijzen bij het gebruiken van het apparaat.
Bovendien moet een nieuwe printer worden toegevoegd om de wachttijd bij het printen te verminderen die optreedt na het bijwerken van het stuurprogramma.
Belangrijk
De DYMO LabelWriter 450 DUO printer is de aanbevolen DYMO printer voor gebruik met Odoo en IoT-systemen. Dit apparaat combineert twee printers: een labelprinter en een tapeprinter. Bij het configureren van de volgende processen is het essentieel om het juiste model te selecteren (DYMO LabelWriter 450 DUO Label (en) of DYMO LabelWriter 450 DUO Tape (en)). Voor consistentie beschrijven de volgende processen de configuratiestappen voor het DYMO LabelWriter 450 DUO Label (en) model. Pas de modelselecties indien nodig aan.
DYMO Series 5 printers are not compatible with the IoT box and require pairing with a Windows virtual IoT.
DYMO LabelWriter drukt niet af
Als de DYMO LabelWriter niet print, installeer dan een nieuw stuurprogramma:
Open de homepage van het IoT-systeem en klik op om de OpenPrinting CUPS console te openen.
Klik op in het bovenste menu en klik vervolgens op de printer in de lijst.
Selecteer Onderhoud in het eerste vervolgkeuzemenu.
Selecteer Printer wijzigen in het tweede vervolgkeuzemenu.

Selecteer de specifieke netwerkverbinding/printer waarop de wijziging moet worden toegepast en klik op Doorgaan.
Klik op de volgende pagina op Doorgaan en selecteer vervolgens DYMO uit de vervolgkeuzelijst Fabrikant.
Klik op Doorgaan en stel het Model in op DYMO LabelWriter 450 DUO Label (en) (of het DYMO-printermodel dat wordt gebruikt).
Klik op Printer wijzigen om het nieuwe stuurprogramma in te stellen; er verschijnt een bevestigingspagina.
Klik op in het bovenste menu; alle printers die op de OpenPrinting CUPS-server zijn geïnstalleerd verschijnen, inclusief de zojuist bijgewerkte DYMO LabelWriter 450 DUO Label (of het DYMO-printermodel dat wordt gebruikt).
Klik op de zojuist bijgewerkte printer, klik vervolgens op het vervolgkeuzemenu Onderhoud en selecteer Testpagina afdrukken om een testetiket af te drukken. Het testetiket wordt na een paar seconden afgedrukt als het bijwerken van het stuurprogramma is geslaagd.
Voeg een nieuwe printer toe met onderstaande stappen om deze vertraging te verkorten.
DYMO LabelWriter afdrukvertraging
Tip
Als de DYMO LabelWriter 450 DUO-printer helemaal niet afdrukt of niet wordt herkend (d.w.z. het heeft een RAW-stuurprogrammatype), werk dan de stuurprogramma’s op het apparaat bij.
Installeer de printer opnieuw om het vertragingsprobleem na het wijzigen van het stuurprogramma op te lossen:
Open de homepage van het IoT-systeem en klik op om de OpenPrinting CUPS console te openen.
Klik op in het bovenste menu en klik vervolgens op Printer toevoegen.
Selecteer op de volgende pagina in de sectie Lokale printers de vooraf geïnstalleerde printer DYMO LabelWriter 450 DUO Label (DYMO LabelWriter 450 DUO Label) (of het DYMO-printermodel dat wordt gebruikt). Klik op Doorgaan.

Werk op het volgende scherm de Naam bij naar iets gemakkelijk herkenbaars, aangezien de oorspronkelijke printer in de lijst blijft staan. Klik vervolgens op Doorgaan.

Stel het veld Model in op DYMO LabelWriter 450 DUO Label (en) (of het DYMO-printermodel dat wordt gebruikt) en klik vervolgens op Printer toevoegen om de installatie te voltooien.

Klik op in het bovenste menu en klik op de zojuist geïnstalleerde printer DYMO LabelWriter 450 DUO Label (of het DYMO-printermodel dat wordt gebruikt) in de lijst.

Klik op de vervolgkeuzelijst Onderhoud en selecteer Testpagina afdrukken om een testetiket af te drukken. Het testetiket wordt onmiddellijk of na één of twee seconden afgedrukt.
De Zebra printer drukt niets af
Zebra-printers zijn behoorlijk gevoelig voor het formaat van de afgedrukte Zebra Programming Language (ZPL)-code. Als er niets uit de printer komt of er lege etiketten worden afgedrukt, probeer dan het formaat van het rapport dat naar de printer wordt gestuurd te wijzigen. Activeer hiervoor de ontwikkelaarsmodus, ga naar en zoek het bijbehorende sjabloon.
De printer verschijnt meerdere keren
Als de printer meerdere keren verschijnt op de startpagina van de IoT Box of virtuele Windows IoT en/of in de lijst met Apparaten op het formulier van het IoT-systeem, is de oorzaak meestal de CUPS-autodetectiefunctie. Deze functie maakt het mogelijk om alle gedetecteerde printers samen met alle beschikbare stuurprogramma’s weer te geven, waarbij voor elk printer-stuurprogrammapaar één item wordt aangemaakt.
Selecteer gewoon het item dat het beste werkt en negeer de andere.
Notitie
Er bestaan tijdelijke oplossingen om de CUPS-autodetectiefunctie uit te schakelen.
Problemen met barcodescanner
De door de barcodescanner gelezen tekens komen niet overeen met de barcode
Standaard zijn de meeste barcodescanners geconfigureerd in het US QWERTY-formaat. Als de barcodescanner een andere lay-out gebruikt, ga dan naar en klik op de kaart van het barcodeapparaat. Selecteer vervolgens de juiste taal in het veld Toetsenbordindeling.
Notitie
De Keyboard Layout is taalspecifiek, waarbij de beschikbare opties variëren op basis van het apparaat en de taal van de database (bv. English (UK), English (US), enz.).
Er gebeurt niets wanneer een barcode wordt gescand
Zorg ervoor dat het juiste apparaat is geselecteerd in de Kassa-instellingen (indien van toepassing) en dat de barcode is geconfigureerd om een ENTER-teken (keycode 28) aan het einde van elke barcode te verzenden.
De barcodescanner wordt gedetecteerd als een toetsenbord
Belangrijk
Sommige barcodescanners worden geïdentificeerd als USB-toetsenborden in plaats van barcodescanners en worden niet herkend door IoT-systemen.
Om het apparaattype handmatig te wijzigen, ga je naar en klik je op de kaart van het barcodeapparaat. Schakel vervolgens Is scanner in.
De barcodescanner verwerkt barcodekarakters afzonderlijk
Bij toegang tot de mobiele versie van Odoo vanaf een mobiel apparaat of tablet die is gekoppeld met een barcodescanner via het IoT-systeem, kan de scanner elk karakter in een barcode interpreteren als een afzonderlijke scan. Om dit op te lossen, ga je naar en klik je op de kaart van het barcodeapparaat. Selecteer vervolgens de juiste taal in het veld Keyboard Layout.
Notitie
De Keyboard Layout is taalspecifiek, waarbij de beschikbare opties variëren op basis van het apparaat en de taal van de database (bv. English (UK), English (US), enz.).