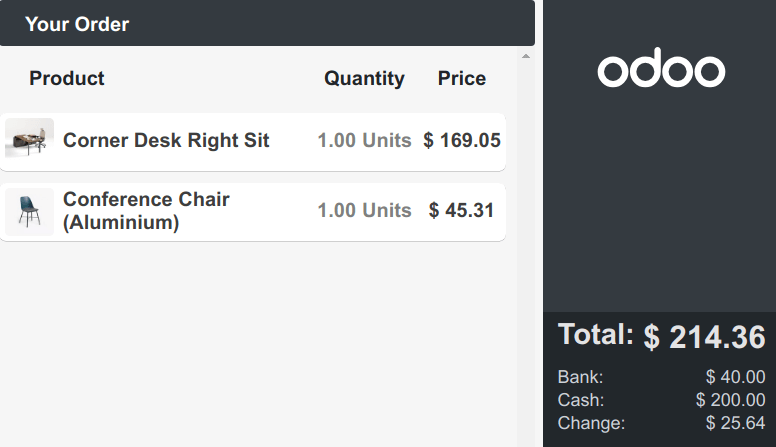
고객 디스플레이
고객 표시 기능은 보조 디스플레이를 통해 고객이 실시간 결제 상황을 확인할 수 있는 기능입니다.
설정
Depending on your POS setup, the feature can be displayed locally on a secondary screen or on another monitor connected to an IoT Box.
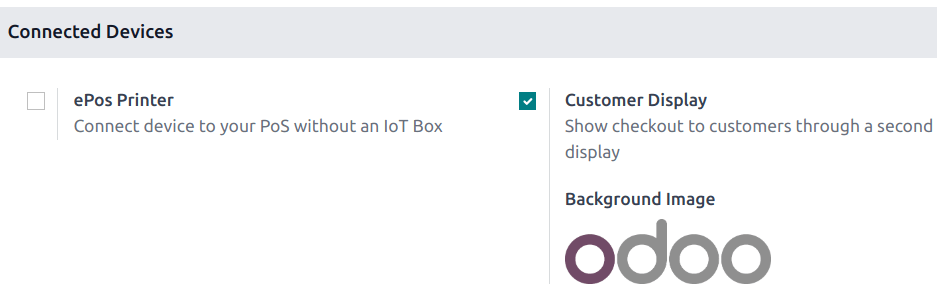
To activate the feature, go to the POS settings, scroll down to the Connected Devices section, and tick the Customer Display checkbox.
로컬
두 번째 화면을 POS에 연결하고 POS 세션 열기 를 실행합니다. 그런 다음 고객 화면 을 클릭하여 새 창이 열리면 두 번째 화면으로 끌어다 놓습니다.
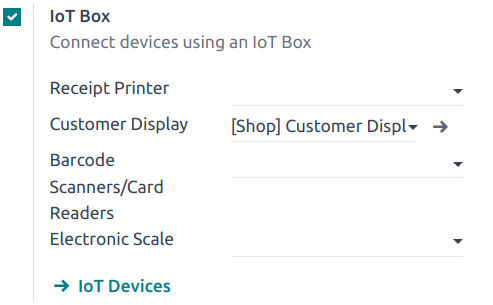
IoT 시스템
IoT 박스를 데이터베이스에 연결한 후 두 번째 화면을 IoT 박스에 연결합니다. 그런 다음 으로 이동하여 연결된 장치 섹션까지 아래로 스크롤을 이동하여 IoT 박스 확인란을 선택한 다음 고객 디스플레이 필드에 있는 두 번째 모니터를 선택합니다.
참고
두 장치 모두 동일한 로컬 네트워크에 연결되어 있어야 합니다.
더 보기