Assign serial numbers
Assigning serial numbers to individual products allows the for tracking of properties, expiration dates, and location throughout the supply chain, which particularly benefits manufacturers providing after-sales services.
In Odoo, serial numbers are assigned to products:
in the Detailed Operations page on a receipt
by clicking the Assign Serial Numbers button on a receipt
in the Open: Stock move window on a receipt
during a manufacturing order for a product tracked by lot/serial numbers
when making an inventory adjustment

Display the Detailed Operations smart button and bulleted list icon on a receipt.
설정
To assign serial numbers to products, activate the Lots and Serial Numbers feature in .
Then, in the Inventory tab of an item’s product form, set the Tracking field to By Unique Serial Number.
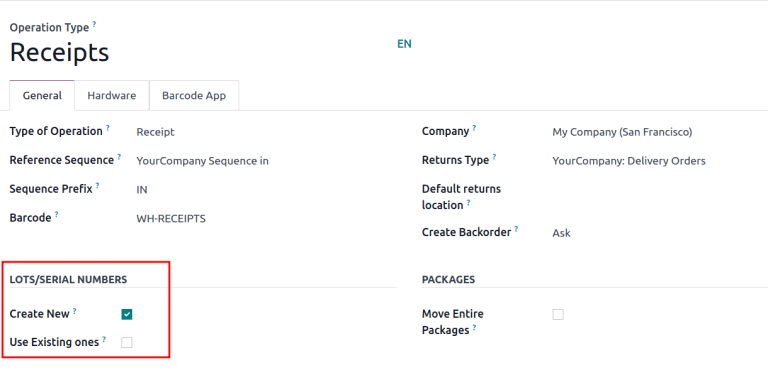
Next, enable creating new serial numbers by going to .
From the Operations Types page, select the desired operation type (e.g. Receipts, Delivery Orders, or Manufacturing), and select the Create New option in the Lots/Serial Numbers section of the operation type’s configuration page.
세부 작업
Serial numbers can be assigned to products when entering stock for the first time, from the Detailed Operations page on the receipt. Receipts can be accessed by navigating to .
중요
Serial numbers can not be assigned to products on a request for quotation (RfQ) or purchase order (PO) — only on a receipt.

Screenshot of a 《Purchase Order》 with the 《Receipt》 smart button at the top.
To record an item’s serial number before receiving the item, follow the steps in the next sections to assign serial numbers, but do not click the receipt’s Validate button, until the products are received from the vendor.
Assign a single serial number to a product by clicking the Detailed Operations smart button on a receipt.
In the Lot/Serial Number Name column, manually type in the serial number for a single product.
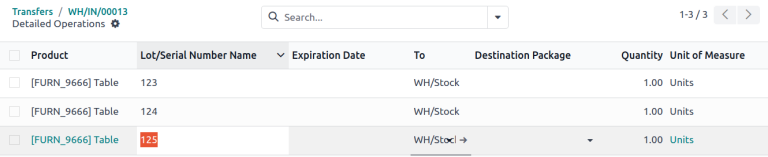
When finished, click the receipt’s breadcrumbs, and the assigned serial numbers are automatically saved.
Assign serial numbers
To generate new serial numbers in a sequence, click the + (plus) icon in the product line.
중요
If the icon is not visible, ensure the Create New option is selected in the receipt’s configuration page.
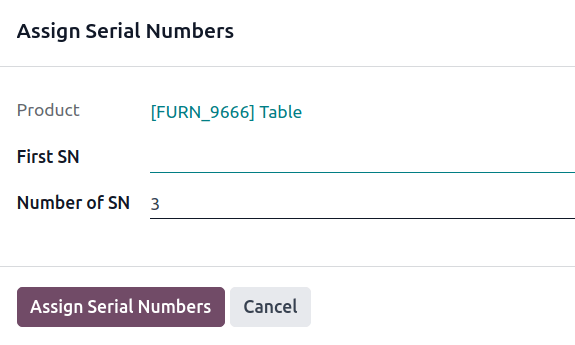
Doing so opens the Assign Serial Numbers pop-up window. The Number of SN field is auto-filled based on the product quantity requiring serial numbers. Manually input the first serial number in the First SN field, and click Assign Serial Numbers to generate a sequence of serial numbers based on the first serial number entered.
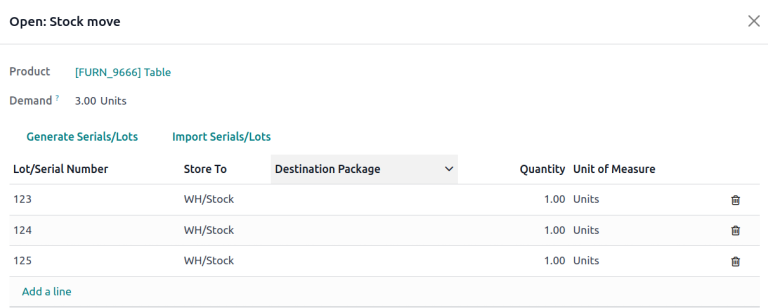
Stock move pop-up window
For various methods of assigning serial numbers in bulk, click the ⦙≣ (bulleted list) icon in the product line of a receipt.
항목 추가
In the Open: Stock move pop-up window that appears, manually input the serial numbers in the Lot/Serial Number column.
일련번호 생성
Assign multiple serial numbers at once by clicking the Generate Serials/Lots button in the Open: Stock move pop-up window.
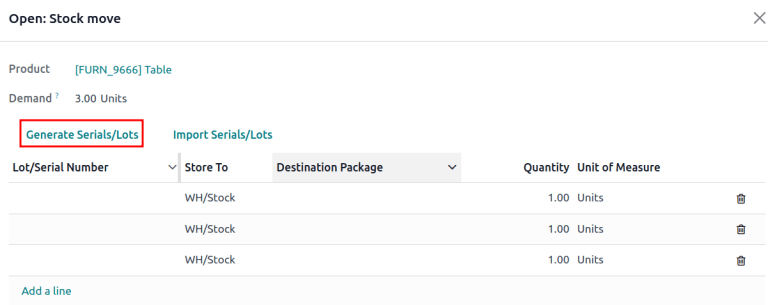
Doing so opens the Generate Serial numbers pop-up window, where the first serial number is entered in the First SN field to generate a sequence of serial numbers, based on the first serial number entered.
For more details on how to fill in this pop-up window, refer to this section.
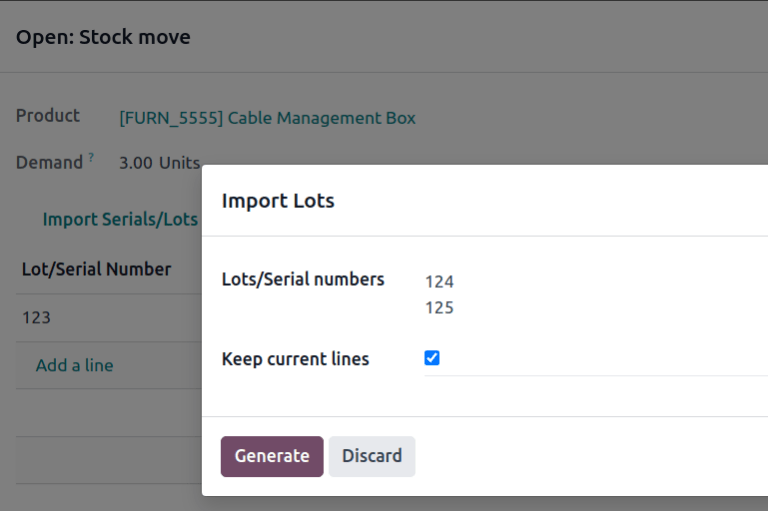
Import Serials
Assign multiple serial numbers at once by clicking the Import Serials/Lots button in the Open: Stock move pop-up window.
중요
If the button is not visible, ensure the Create New option is selected in the receipt’s configuration page.
Doing so opens the Import Lots pop-up window. Enter each serial number on a separate line in the Lots/Serial numbers text field.
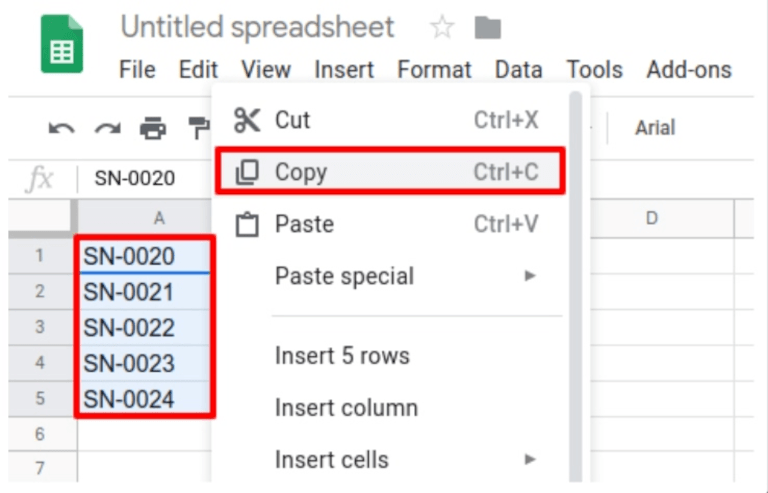
팁
Copy/paste serial numbers from an existing excel spreadsheet and add them to the Lots/Serial numbers text field.
Tick the Keep current lines checkbox to add serial numbers to the list of products, and serial numbers in the Lot/Serial Number table, in the Open: Stock move pop-up window. To replace the serial numbers in the list, leave the Keep current lines option unchecked.
Finally, click Generate.
Example
For a receipt with a Demand of 3.00 products, one product has already been assigned
a serial number in the Open: Stock move pop-up window.
So, in the Import Lots pop-up window, two serial numbers, 124 and 125 are
assigned to the remaining products by entering the following in the Lots/Serial
numbers input field:
124
125
The Keep current lines option is selected to add these two serial numbers in
addition to the serial number, 123, that has already been assigned.