
Allocation reports
In Odoo Manufacturing, users can use allocation reports to reserve units of manufactured products from manufacturing orders (MOs) for outgoing demands, such as sales orders (SOs) or components on other MOs.
While Odoo normally automatically reserves existing stock for outgoing demands, users may sometimes need to manually prioritize specific outgoing orders over competing demands, especially when existing stock for a product does not adequately fulfill those demands.
The following documentation covers the process of using an allocation report to manually assign planned units of a product from a confirmed MO to fulfill either an SO containing the purchased product or an MO with the product as a component.
Configuration
To use allocation reports, the Allocation Report for Manufacturing Orders feature must be enabled. To do so, navigate to , and select the checkbox next to Allocation Report for Manufacturing Orders. Then, click Save.
Enabling this feature automatically displays the option to view an allocation report on a confirmed MO.
Workflow
To use allocation reports, users must first confirm customer demand from existing SOs or component demand from existing MOs, then replenish the necessary stock through an MO. After confirming this replenishment order, users can access the allocation report and reserve units from the MO to fulfill those demands.
Important
SOs/MOs with products that can be fulfilled with existing on-hand stock do not appear in reception reports.
The following process outlines the necessary steps for allocating units of a manufactured product using allocation reports:
Verify that demand exists for the product in one or more originating SOs/MOs. If not, create them.
If existing stock cannot fulfill the demand, create and confirm an MO for the demand products.
Open the confirmed MO and use the allocation report to allocate units.
Validate the replenished units into stock.
Validate the outgoing units to fulfill the original demand.
The process begins by ensuring that an outstanding demand for the product exists. Confirming an MO manufactures the stock necessary to meet the demand in the originating SO/MO.
On the confirmed MO, users can open the allocation report, which displays the incoming product. Next to the product is a list of all applicable outgoing transfers (i.e., originating SOs/MOs containing the product) to which the manufactured units can be assigned. Assigning these units does not move any inventory but instead allows the user to flexibly choose which demands to prioritize before fulfilling them.
Note
If multiple products are manufactured through the MO, the allocation report lists all products with originating SOs/MOs available for reservation.
Create and confirm demand
Manufactured stock can only be reserved through an allocation report for previously confirmed SOs or MOs where the product is used as a component. If no such record exists, create it.
Important
To ensure that Odoo can properly create allocations, verify that the product has the Track Inventory option enabled on the product form as well as a bill of materials configured.
Create SOs
If no confirmed SO exists for the product, create it by opening a new sales quotation form. In the order lines, ensure that the requested Product and its Quantity are specified. Then, confirm the quotation by clicking Confirm Order. This turns the quotation into a confirmed SO and generates a delivery order, accessible via the Delivery smart button.
Repeat this process if there are multiple customers demanding the product.
Create MOs
If there is no confirmed MO with the product as a component, create it by opening a new MO form. In the component lines, add the requested Product and the quantity To Consume, then confirm the MO by clicking Confirm.
Repeat this process if there are multiple MOs requiring the component.
Create and confirm MO
After confirming existing demand for the product, replenish the necessary stock by manufacturing it through an MO.
To do so, navigate to . Then, click New to open a new MO form. Select the Product, the Quantity to replenish, and the Bill of Materials.
Finally, Confirm the MO.
Allocate using the report
After confirming the MO for the product, open the allocation report to assign the replenishment to any available originating SOs/MOs requiring the product.
The Allocation smart button appears directly at the top of the MO.
Note
The Allocation smart button also appears on an unconfirmed MO. However, units cannot be assigned unless the MO is confirmed.
Allocation report dashboard
The MRP Reception Report page displays a list of products to which the units on this MO can be allocated, grouped by the SOs/MOs on which they appear. A link to each SO/MO is included, along with its Expected Delivery, and an option to assign all units to it. Under each SO/MO header is a list of its products, including its name, quantity, and the option to assign the quantity of units to this specific product.
Note
SOs/MOs in the allocation report are listed in chronological order of their associated delivery or scheduled date (i.e., the SO with the oldest delivery order or the MO with the oldest scheduled date appears first).

Allocate units
To allocate units for a product in an SO/MO, click Assign in the product’s corresponding row. To undo allocation, click Unassign.
Alternatively, to allocate all available units for all products in an SO/MO, click Assign All in the corresponding row of the SO/MO. To assign all available units across all SOs/MOs, click Assign All at the top.
The quantity of reservable units for each product is automatically calculated in order, starting from the oldest SO/MO. This allows users to allocate as many units as available on the MO to fulfill the quantity specified on the SO/MO.
After allocation, originating SOs with allocated units are automatically linked to the replenishing MO. Users can access this directly from the SO via the Manufacturing smart button. Similarly, the linked SO can also be accessed from the MO via the Sale smart button.
Validate replenished units
After allocating the desired units, navigate to the replenishing MO and click Produce All to produce the finished product.
Finished products from completed MOs become directly available in stock in the case of one-step or two-step manufacturing. For three-step manufacturing, however, additional transfer moves must be made to transfer the product from the manufacturing location to inventory.
To validate the incoming transfer on the MO, click the Transfers smart button at the top. Then, open the relevant order and click Validate to receive the product into stock.
Validate outgoing move
After validating the incoming stock (if applicable), fulfill the original SO/MO demand.
Fulfill SO order
To fulfill the demand on an SO, navigate to the SO, then click Delivery to open the delivery order. Note that the Operations tab is populated with a line showing the allocated Product and its allocated Quantity.
Finally, click Validate to confirm that the products have been delivered to the customer.
Fulfill MO order
To fulfill a component demand on an MO, navigate to the MO. The replenished components in the previous step are now marked as Available for production on this MO. Click Produce to manufacture the final product.
Example
The following example demonstrates how an allocation report is used to assign stock for a customer SO of higher priority.
Two SOs are created for separate customers. Customer A orders 75 units of a Chair. Customer B also orders 75 units of the same product but needs them as soon as possible.
No stock exists for the Chair, so the company creates and confirms MO A to manufacture the product. Only 100 units of the Chair can be produced this week. So, another MO B is created to replenish the remaining 50 units next week.
After confirming the MOs, the company uses the allocation reports for each MO. MO A’s report lists the SO for Customer A with 75 reservable units, then Customer B’s SO with 25 reservable units. MO B’s report lists the SO for Customer A with 50 reservable units.
Because the company wants to prioritize Customer B’s order, they want to ensure Customer B receives 75 units from MO A, which can guarantee faster delivery. To do so, they first open MO B’s allocation report and assign 50 units to Customer A’s SO. Odoo then recalculates MO A’s allocation report, updating Customer A’s previous quantity of 75 units to 25 units and Customer B’s quantity to 75 units.
The user can now assign all 75 units from MO A to fulfill Customer B’s delivery.
Print labels
Users can print labels for allocated products to ensure that they are correctly designated to the appropriate customer.
After allocating the desired units, click Print at the top to download a PDF of the allocation report for the allocated units. The report includes a scannable barcode at the top for the receipt or MO.
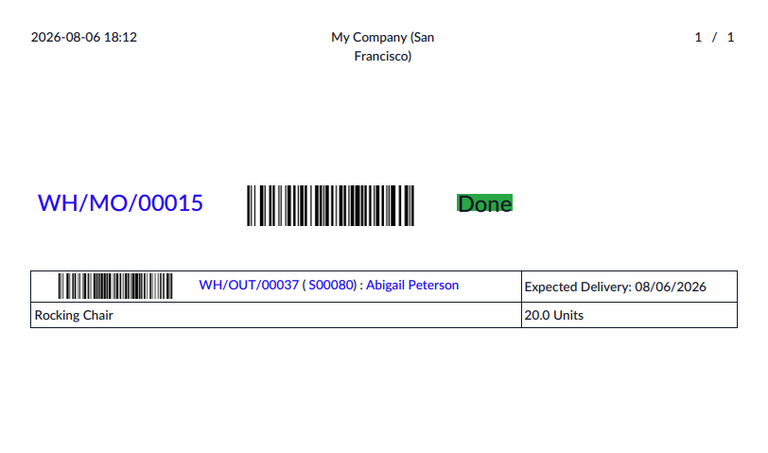
If products are allocated to specific orders, users can also click Print Labels to print an individual label for each unit of the allocated products. Each label displays the name of the product, its associated SO/MO number, and its customer (for SOs).
