Floors and tables
The Floor plan view enables you to manage restaurant floors and table arrangements and monitor table status in real time, including occupancy, reservations, and kitchen orders.
Example

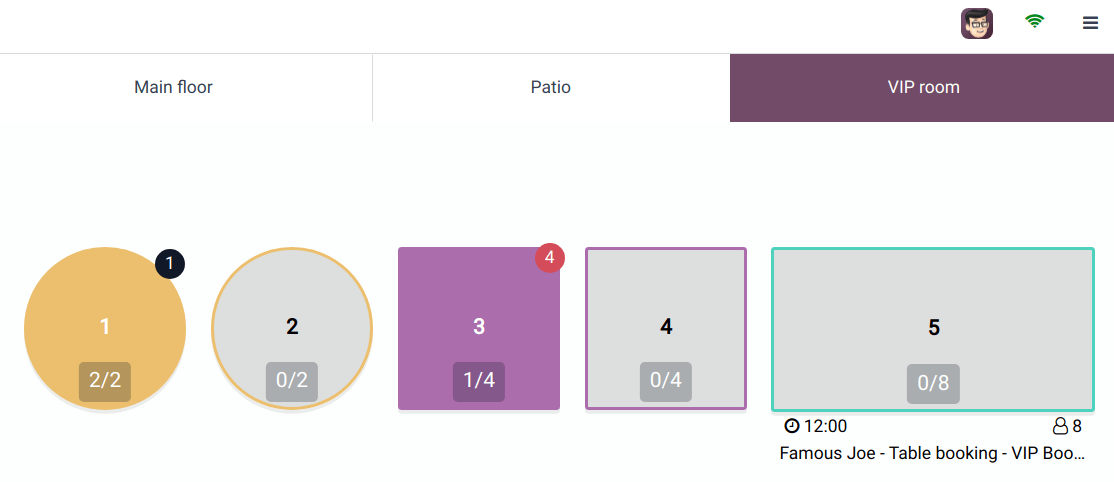
Table 1: An order has been placed and sent to the kitchen.
Table 3: An order of four items has been placed and needs to be sent to the kitchen.
Tables 2, 4, and 5: These tables are available.
Tables 2, 4, and 5: These tables' total capacity is, respectively, 2, 4, and 8 people.
Table 1: The table of two is full.
Table 3: The table of four is taken by one person.
Table 5: "Famous Joe" has a reservation for 8 people at 12:00.
การกำหนดค่า
From the POS backend
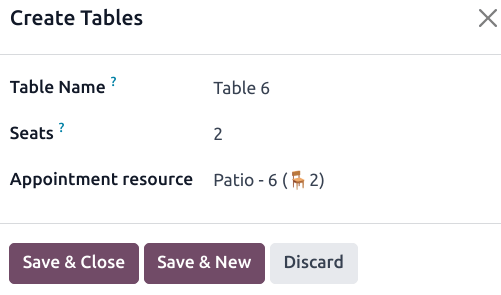
หากต้องการสร้างพื้นที่และโต๊ะจากแบ็กเอนด์ ให้ไปที่ และคลิก สร้าง เพื่อสร้างพื้นที่ ตั้งชื่อ เลือกจุดขายที่เกี่ยวข้อง แล้วคลิก เพิ่มบรรทัด เพื่อสร้างโต๊ะ ตั้งชื่อโต๊ะและกำหนดจำนวนที่นั่ง คุณยังสามารถเชื่อมโยงไปยังทรัพยากรการนัดหมายเพื่อให้สามารถจองโต๊ะได้ เมื่อเสร็จแล้ว คลิก บันทึกและปิด หรือ บันทึกและสร้าง เพื่อยืนยัน

Note
The POS must be opened and edited from the frontend to create a map of your restaurant or bar reflecting your actual floor plan.
Tip
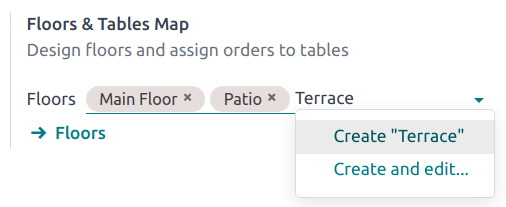
Create floors on the spot: access your POS settings, type your floor name in the Floor field of the Floors & Tables Map category, and press enter.

From the POS frontend
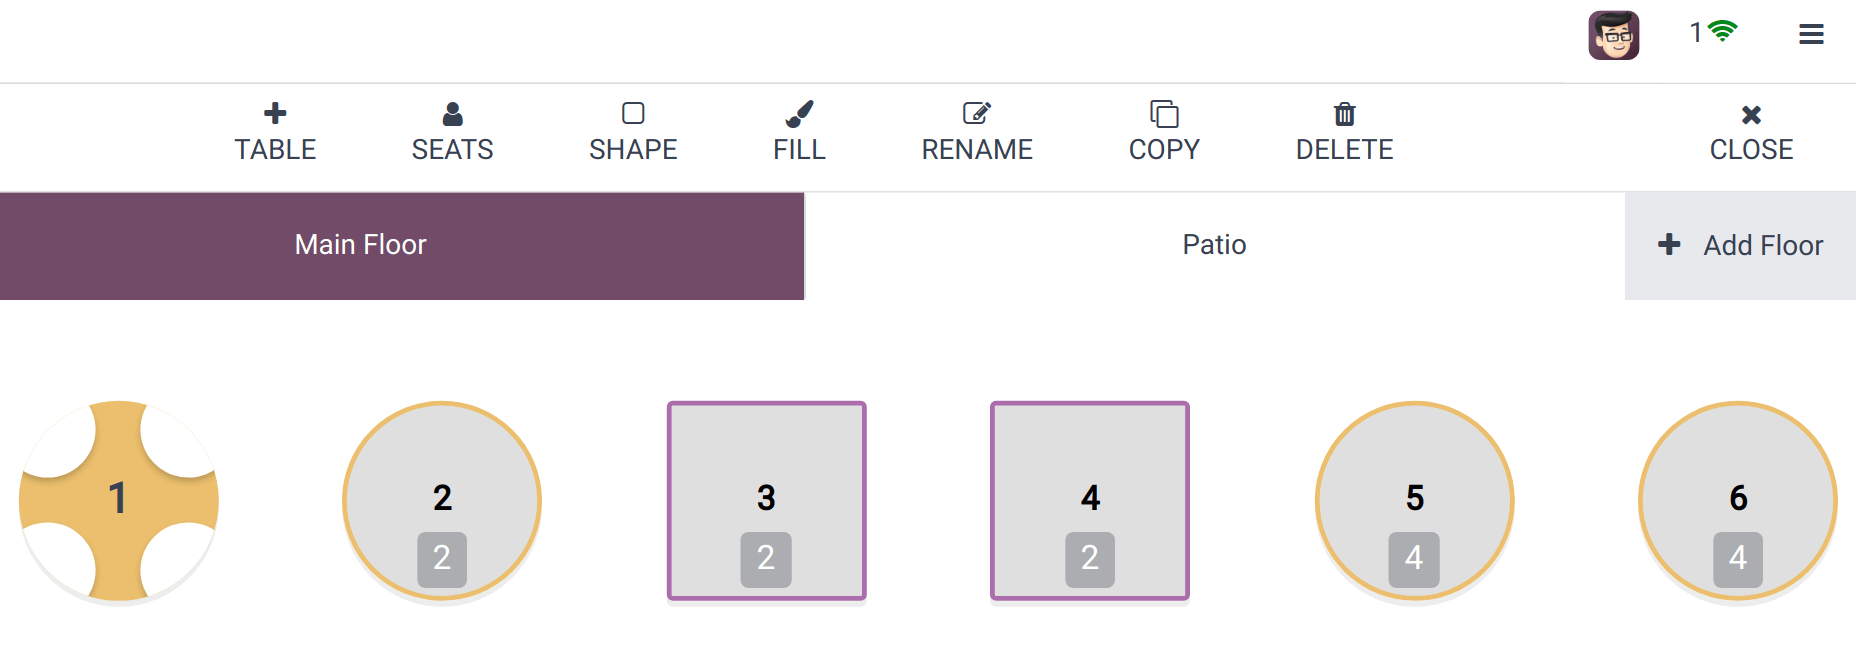
To create floors and tables from the frontend, open a POS session, click the hamburger menu icon ≡ in the upper right corner, then Edit Plan to enter the edit mode.
Click + Add Floor to add a floor, then enter a name in the pop-up window.
เมื่อสร้างพื้นที่แล้ว ให้เพิ่มตารางโดยคลิก + โต๊ะ หากต้องการย้าย ให้เลือกแล้วลากและวางตามต้องการ คุณยังสามารถแก้ไขแอตทริบิวต์ของตารางที่เลือกได้ เช่น จำนวนที่นั่งโดยการคลิก ที่นั่ง รูปร่างของตารางโดยใช้ รูปร่าง สีของตารางโดยใช้ เติม หรือ ชื่อตารางโดยคลิก เปลี่ยนชื่อ หากต้องการทำซ้ำตารางที่มีอยู่ ให้เลือกตารางแล้วคลิก คัดลอก คุณยังสามารถลบตารางได้โดยคลิก ลบ
After making all the necessary modifications, click CLOSE to save.

Note
If no table is selected, the modifications are applied to the floor.
Warning
Removing a table or a floor cannot be undone.
Table transfer
To move customers from one table to another, select a table and click → Transfer on the POS interface. This redirects you to the floor plan view, where you can choose the new table to which you want to transfer the customers.
When you transfer customers, all of the orders they have placed and that are linked to the original table are also transferred.