Service level agreements (SLAs)
A service level agreement (SLA) defines the level of service a customer can expect from a supplier. SLAs provide a timeline that tells customers when they can expect results, and keeps the support team on target.
Note
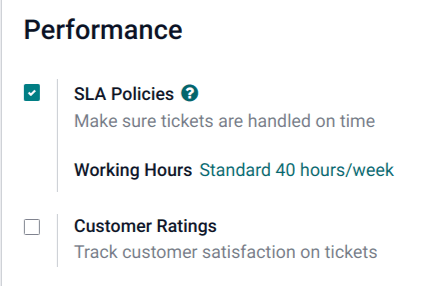
The SLA Policies feature must be enabled on newly-created Helpdesk teams.
To enable the feature, navigate to . Click on a team to open that team’s configuration page.
From here, scroll to the Performance section. To turn on the SLAs feature for the team, tick the SLA Policies checkbox. Click Save to save the changes. The page may need to be refreshed.
Create SLA policy
To create a new policy, go to , and click Create.
Alternatively, go to , and click on a team. Then, click the SLA Policies smart button at the top of the team’s settings page, and click Create.
On the blank SLA Policies form, enter a name on the blank line at the top of the form, and a description in the Description of the policy… field. Then, proceed to fill out the form using the steps below.
Define SLA policy criteria
The Criteria section is used to identify which tickets this policy is applied to.
Fill out the following fields to adjust the selection criteria:
Note
Unless otherwise indicated, multiple selections can be made for each field.
Helpdesk Team: a policy can only be applied to one team. This field is required.
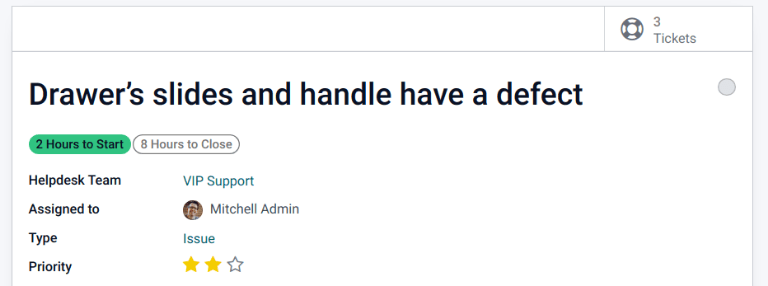
Minimum Priority: the priority level for a ticket is identified by selecting one, two, or three of the ⭐ (star) icons, representing the priority level on the Kanban card, or on the ticket itself. The SLA is only applied after the priority level has been updated on the ticket to match the SLA criteria. If no selection is made in this field, this policy applies to all priority levels.
Type: ticket types can be helpful when indicating when a ticket is a customer question that can be solved with a quick response, or an issue that may require additional investigation. Multiple ticket types can be selected for this field. If no selection is made, this policy applies to all ticket types.
Tags: tags are used to indicate what the ticket is about. Multiple tags can be applied to a single ticket.
Clients : ce champ permet de sélectionner des contacts individuels ou des entreprises.
Sales Order Items: this field is available only if a team has the Timesheets feature enabled. This allows the ticket to link directly to a specific line on a sales order, which must be indicated on the ticket in the Sales Order Items field.
Establish an SLA policy target
The Target section of an SLA policy form, identifies the stage a ticket needs to reach, and the time allotted to reach that stage, to satisfy the SLA policy. Any stage assigned to a team may be selected for the Reach Stage field.
Example
An SLA titled 8 Hours to Close tracks the working time before
a ticket is completed, and would have Solved as the Reach Stage. Simultaneously, an
SLA titled 2 Days to Start tracks the working time before
work on a ticket has begun, and would have In Progress as the Reach Stage.
Time spent in stages selected in the Excluding Stages field are not included in the calculation of the SLA deadline.
Meet SLA deadlines
As soon as it is determined that a ticket fits the criteria of an SLA policy, a deadline is calculated. The deadline is based on the creation date of the ticket, and the targeted working hours.
Note
The value indicated next to the Working Hours field of an SLA policy is used to determine the deadline. By default, this is determined by the value set in the Company Working Hours field. To view, or update, this setting, first enable developer mode. Then, navigate to .
The deadline is then added to the ticket, as well as a tag indicating the name of the SLA applied.
When a ticket satisfies an SLA policy, the SLA tag turns green, and the deadline disappears from view on the ticket.
This Helpdesk ticket has two SLA policies applied to it. One of the policies has been satisfied, so the tag has turned green. The other policy is in progress.
Important
If a ticket fits the criteria for more than one SLA, the earliest occurring deadline is displayed on the ticket. After that deadline has passed, the next deadline is displayed.
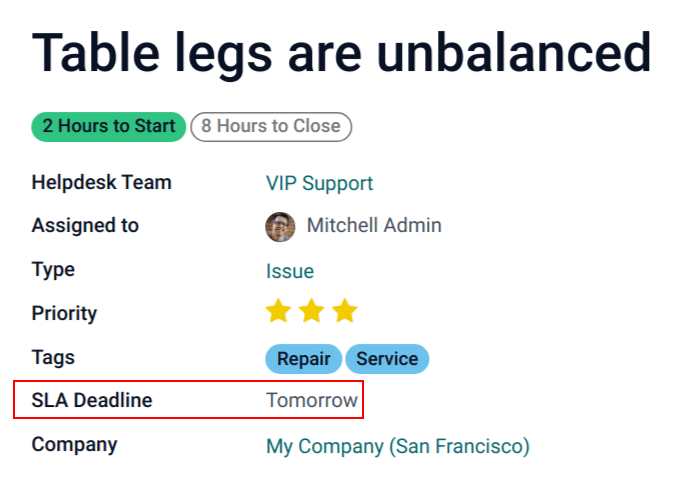
If the SLA deadline passes and the ticket has not moved to the Reach Stage, the SLA tag turns red. After the SLA has failed, the red tag stays on the ticket, even after the ticket is moved to the Reach Stage.
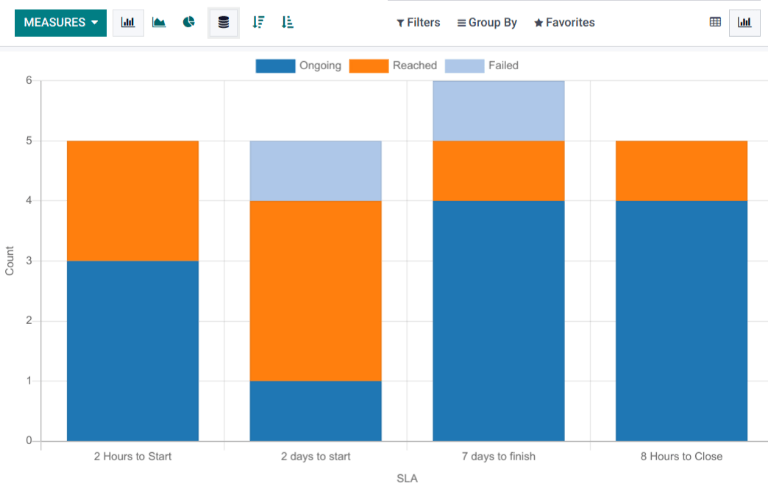
Analyze SLA performance
The SLA Status Analysis report tracks how quickly an SLA is fulfilled, as well as the performance of individual team members. Navigate to the report, and corresponding pivot table, by going to .
Vue tableau croisé dynamique
By default, the report displays in a Pivot view. Any SLA policies in the database with tickets that failed to fulfill a policy, are in progress, or have satisfied a policy are listed.
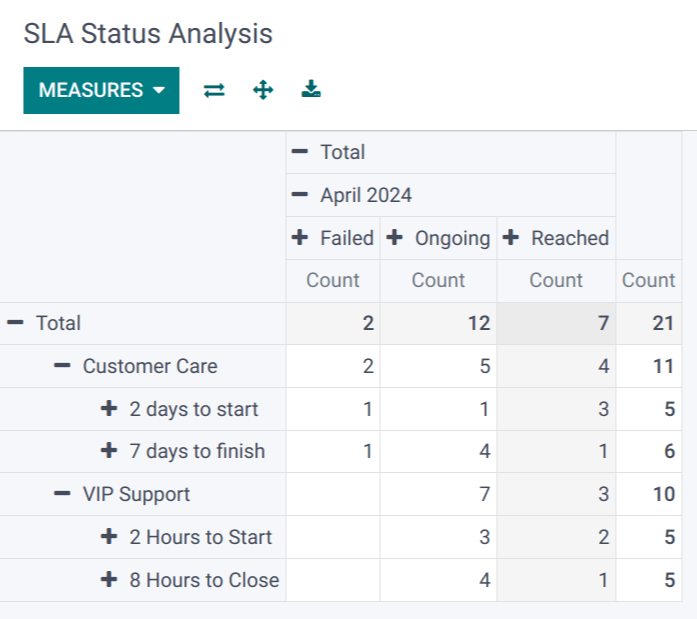
To change the display, or add additional measurements, click the Measures button to reveal a drop-down menu of reporting criteria, and choose from the options available.
Whenever a measurement is picked, a ✔️ (checkmark) icon appears in the drop-down menu to indicate that the measurement is included, and a corresponding new column emerges in the pivot table to show the relevant calculations.
To add a group to a row or column, click the ➕ (plus) icon next to the policy name and then select one of the groups. To remove one, click the ➖ (minus) icon next to the policy name.
Vue graphique
The SLA Status Analysis report can also be viewed as a Bar Chart, Line Chart, or Pie Chart. Toggle between these views by first selecting the Graph button at the top-right of the dashboard. Then, select the appropriate chart icon at the top-left of the graph.
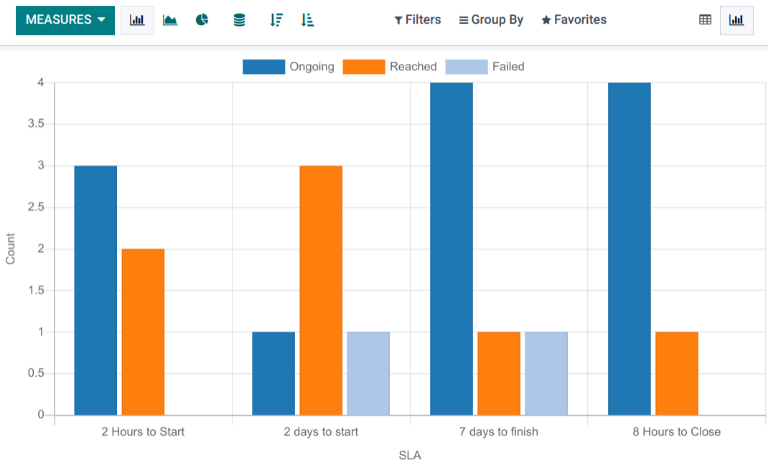
A bar chart can deal with larger data sets, and compare data across several categories.
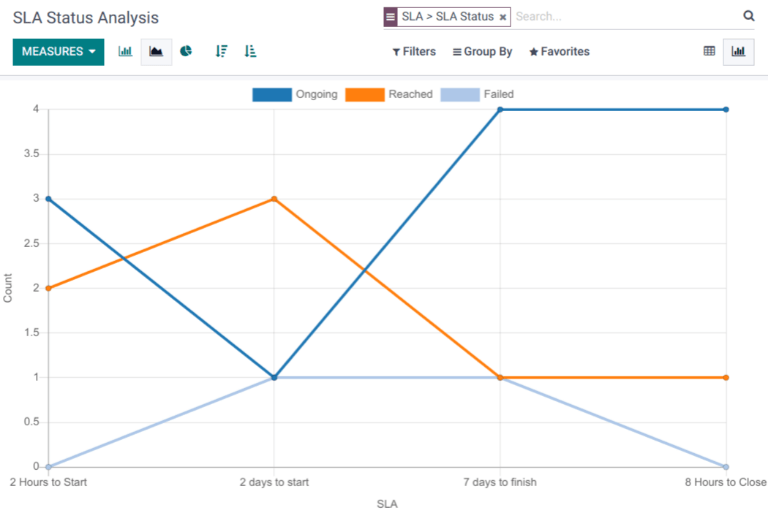
A line chart can visualize data trends or changes over time.
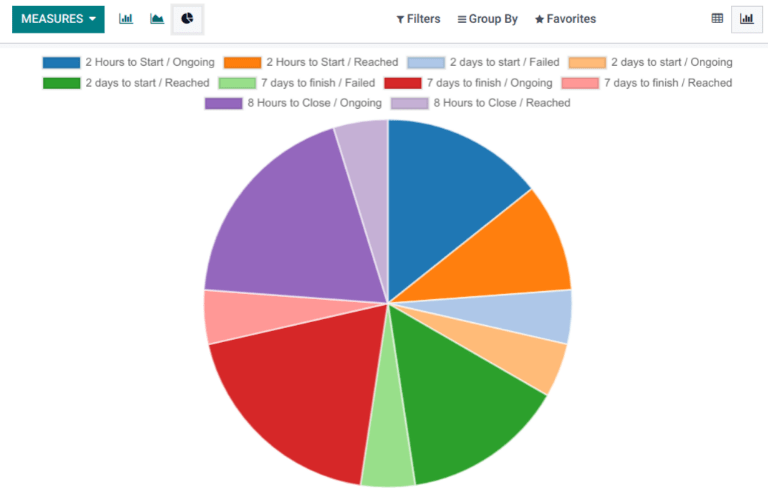
A pie chart compares data among a small number of categories.
Astuce
Both the Bar Chart and Line Chart views can be Stacked by selecting the Stacked icon. This displays two or more groups on top of each other, instead of next to each other, making it easier to compare data.
Pour plus d'infos