Deliveries and invoices to different addresses
People and businesses often use separate addresses for billing (invoicing) and shipping (delivery) purposes. With the Odoo Sales app, contacts can have different specified addresses for delivery and invoicing.
Settings
To properly utilize multiple addresses in Odoo, go to and scroll down to the Quotations & Orders heading. Then, check the box next to Customer Addresses, and click Save.

Contact form configuration
To add multiple addresses to a contact, go to , and clear any default filters from the search bar. Then, click on the desired customer to open their contact form.
Tip
Contact forms can be accessed in the Contacts application, as well.
From the contact form, click Edit, and then select Add, which is located under the Contacts & Addresses tab. Doing so reveals a Create Contact pop-up form, in which additional addresses can be configured.

On the Create Contact pop-up form, start by clicking the default Other Address field to reveal a drop-down menu of address-related options.
Select any of the following options:
Contact: adds another contact to the existing contact form.
Invoice Address: adds a specific invoice address to the existing contact form.
Delivery Address: adds a specific delivery address to the existing contact form.
Other Address: adds an alternate address to the existing contact form.
Private Address: adds a private address to the existing contact form.
Once an option is selected, proceed to enter the corresponding contact information that should be used for the specified address type.
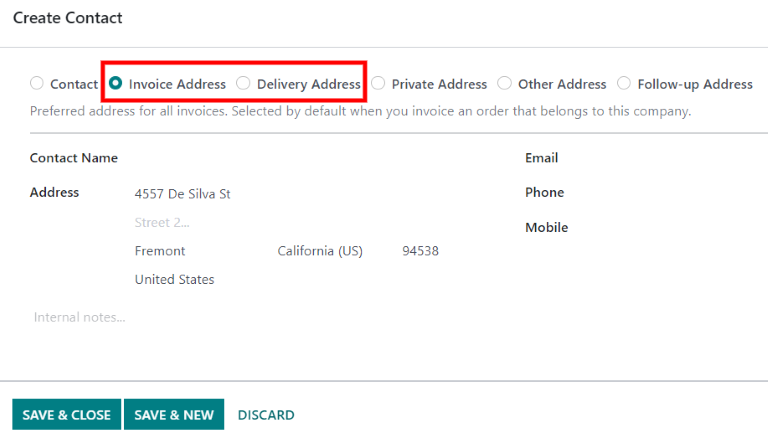
Then, click Save & Close to save the address and close the Create Contact window. Or, click Save & New to save the address and immediately input another one.
Address added to quotations
When a customer is added to a quotation, the Invoice Address and Delivery Address fields autopopulate with the corresponding addresses specified on the customer’s contact form.
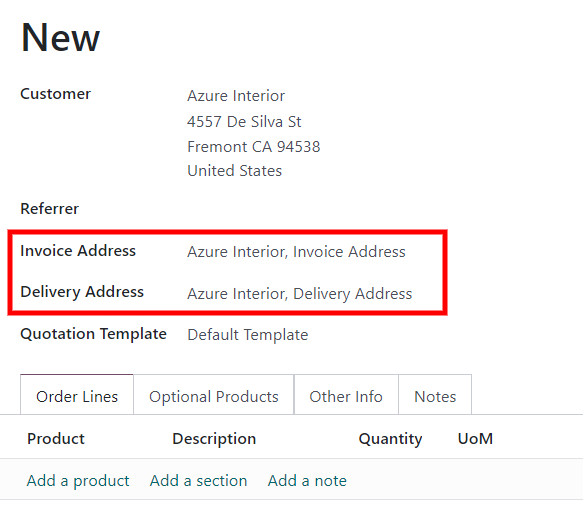
The Invoice Address and Delivery Address can also be edited directly from the quotation by clicking the Edit button, and then clicking the ➡️ (right arrow) internal link buttons next to each address line.
These addresses can be updated at any time to ensure accurate invoicing and delivery.
Tip
If any changes are made on a form in Odoo, include Contacts forms, remember to click Save to save the changes to the database.