Cheltuieli
Odoo Expenses streamlines the management of expenses. After an employee submits their expenses in Odoo, the expenses are reviewed by management and accounting teams. Once approved, payments can then be processed and disbursed back to the employee for reimbursement(s).
Vedeți și
Odoo Expenses: pagina produsului <https://www.odoo.com/app/expenses>
Set expense types
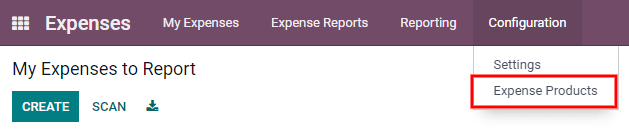
The first step to track expenses is to configure the different expense types for the company (managed as products in Odoo). Each „product” can be as specific or generalized as needed. Go to to view the current expensable products in a default kanban view.
To create a new expense product, click Create. A product form will appear. Only the Product Name and Unit of Measure fields are required to create a new expense product. Enter the Product Name in the field, and select the Unit of Measure from the drop-down menu (most products will be set to Units, which is the default selection).
Sfat
The Sales app is where specification on the units of measure are created and edited (e.g.
units, miles, nights, etc.). Go to and
ensure Units of Measure is enabled in the Product Catalog section. Click on the
Units of Measure internal link to view, create, and edit the units of measure. Refer
to this document to
learn more about units of measure and how to configure them.
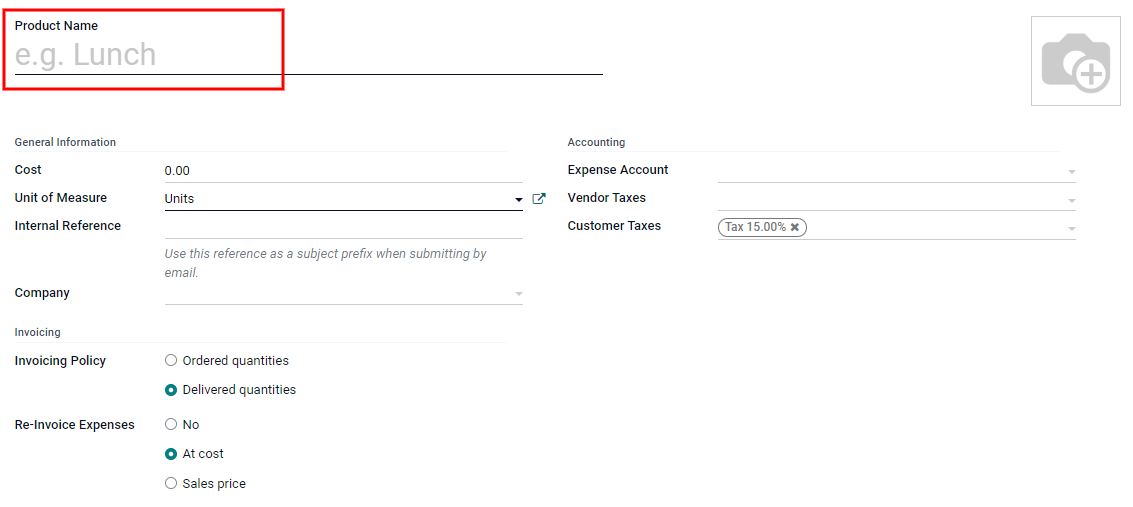
Câmpul Cost din formularul de produs este completat implicit cu o valoare de 0.00. Când o anumită cheltuială trebuie întotdeauna rambursată pentru un anumit preț, introduceți suma respectivă în câmpul Cost. În caz contrar, lăsați Cost setat la 0.00, iar angajații vor raporta costul real atunci când trimit un raport de cheltuieli.
Example
Iată câteva exemple despre când să setați un anumit Cost pe un produs față de lăsarea Cost la 0.00:
Meals: Setați Cost la
0.00. Când un angajat înregistrează o cheltuială pentru o masă, acesta introduce suma reală a facturii și va fi rambursat pentru acea sumă. O cheltuială pentru o masă care costă 95,23 USD ar echivala cu o rambursare de 95,23 USD.Mileage: Set the Cost to
0.30. When an employee logs an expense for „mileage”, they enter the number of miles driven, and are reimbursed 0.30 per mile they entered. An expense for 100 miles would equal a reimbursement for $30.00.Parcare lunară: Setați Cost la
75.00. Când un angajat înregistrează o cheltuială pentru „parcare lunară”, rambursarea ar fi de 75,00 USD.Cheltuieli: Setați Cost la
0.00. Când un angajat înregistrează o cheltuială care nu este o masă, kilometraj sau parcare lunară, folosește produsul generic Cheltuieli. O cheltuială pentru un laptop care costă 350,00 USD ar fi înregistrată ca produs Cheltuieli, iar rambursarea ar fi de 350,00 USD.
Selectați un Cont de cheltuieli dacă utilizați aplicația Contabilitate Odoo. Se recomandă să verificați cu departamentul de contabilitate pentru a determina contul corect la care să faceți referire în acest domeniu, deoarece va afecta rapoartele.
Set a tax on each product in the Vendor Taxes and Customer Taxes fields if applicable. It is considered good practice to use a tax that is configured with Tax Included in Price. Taxes will be automatically configured if this is set.
Înregistrați cheltuielile
Creați manual o cheltuială nouă
To record a new expense, begin in the main app dashboard, which presents the default My Expenses to Report view. This view can also be accessed from .
First, click Create, and then fill out the various fields on the form.
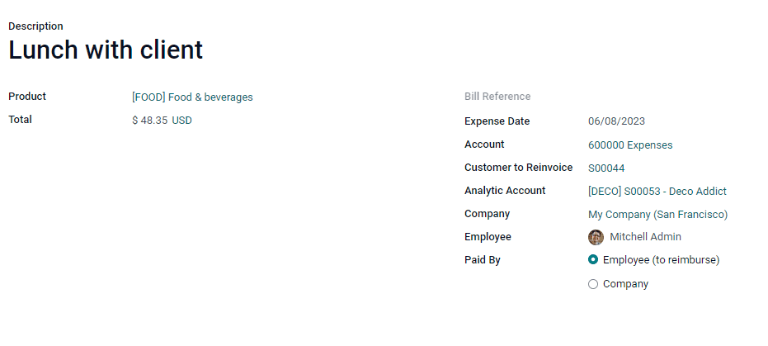
Descriere: Introduceți o scurtă descriere a cheltuielii în câmpul Descriere. Acesta ar trebui să fie scurt și informativ, cum ar fi „prânz cu clientul” sau „hotel pentru conferință”.
Product: Select the product from the drop-down menu that most closely corresponds to the expense. For example, an airplane ticket would be appropriate for an expense Product named Air Travel.
Total: Introduceți suma totală plătită pentru cheltuială într-unul din două moduri:
If the expense is for one single item/expense with a variable price, enter the cost in the Total field. Odoo will not display the Quantity field for a product if it does not need to have the quantity specified (a product with a unit price of
0.00and a quantity of1.00).If the expense is for multiples of the same item/expense with a fixed price, the Unit Price is displayed. Enter the quantity in the Quantity field, and the Total is automatically updated with the correct total (the Quantity x the Unit Price = the Total).
Example
For example, in the case of mileage driven, the Unit Price would be set in the product form as the cost per mile. Simply set the Quantity to the number of miles driven, and the total for the expense is updated.
Bill Reference: If there is any reference text that should be included for the expense, enter it in this field. This field is not visible for expense products that require a Quantity to be entered.
Data cheltuielilor: Folosind modulul calendar, introduceți data la care a fost efectuată cheltuiala. Utilizați săgețile < (stânga) și > (dreapta) pentru a naviga la luna corectă, apoi faceți clic pe ziua specifică pentru a intra în selecție.
Cont: Selectați contul de cheltuieli la care această cheltuială ar trebui să fie conectată din meniul derulant.
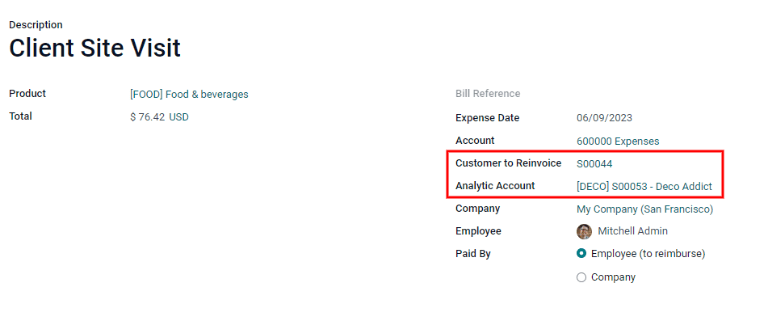
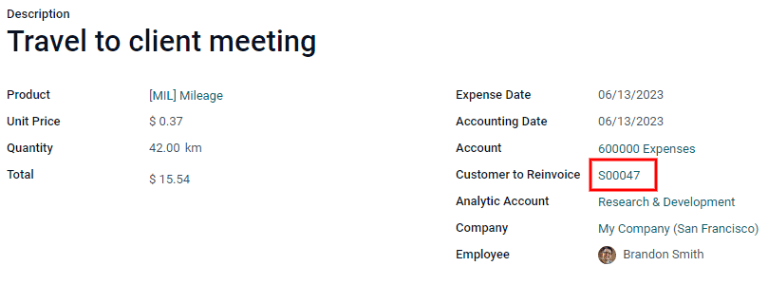
Customer to Reinvoice: If the expense is something that should be paid for by a customer, select the customer and related sales order that will be invoiced for this expense from the drop-down menu. For example, if a customer wishes to have a custom designed piece of furniture, and purchased design hours from our employee, that sales order listing the hours would be referenced as the Customer to Reinvoice. In the list view, there may be many different sales orders referencing the same company, so be sure the correct sales order is selected.
Notă
The Customer to Reinvoice field is only visible if the expense product has either At cost or Sales price selected under the Re-Invoice Expenses section. If No is selected for the Re-Invoice Expenses section, the Customer to Reinvoice field is hidden.
Analytic Account: Select the account the expense should be written against from the drop-down menu.
Company: If multiple companies are set-up, select the company this expense should be filed for from the drop-down menu. If there is only one company, this field will be automatically populated.
Angajat: Folosind meniul derulant, selectați angajatul pentru care se adresează această cheltuială.
Paid By: Click the radio button to indicate who paid for the expense and should be reimbursed. If the employee paid for the expense (and should be reimbursed) select Employee (to reimburse). If the company paid directly instead (e.g. if the company credit card was used to pay for the expense) select Company.
Note…: Dacă sunt necesare note pentru a clarifica cheltuielile, introduceți-le în câmpul de note.
Once all the fields have been filled out, click Save.
Atașați o chitanță
After the expense is saved, the next step is to attach a receipt. A new Attach Receipt button appears after the entry is saved, beneath the former Save button (which turns into an Edit button).

Click the new Attach Receipt button, and a file explorer appears. Navigate to the receipt to be attached, and click Open. The new receipt is recorded in the chatter, and the number of receipts will appear next to the 📎(paperclip) icon beneath the expense form. More than one receipt can be attached to an individual expense, as needed. The number of receipts attached to the expense will be noted on the paperclip icon.
Creați noi cheltuieli dintr-o chitanță scanată
Rather than manually inputting all of the information for an expense, expenses can be created automatically by scanning a PDF receipt.
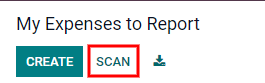
First, in the main Expenses app dashboard view (this view can also be accessed from ), click Scan, and a file explorer pops up. Navigate to the receipt to be uploaded, click on it to select it, and then click Open.
The receipt is scanned, and a new entry is created with today’s date as the Expense Date, and any other fields it can populate based on the scanned data, such as the total. Click on the new entry to open the individual expense form, and click Edit to make changes. The receipt that was scanned in appears in the chatter. Make any edits to the form, then click Save when all the information is entered.
Creați automat noi cheltuieli dintr-un e-mail
În loc să creați individual fiecare cheltuială în aplicația Cheltuieli, cheltuielile pot fi create automat prin trimiterea unui e-mail la un alias de e-mail.
Pentru a face acest lucru, mai întâi, trebuie configurat un alias de e-mail. Accesați :selectare meniu:Aplicația Cheltuieli --> Configurare --> Setări. Asigurați-vă că E-mailuri primite este activat.
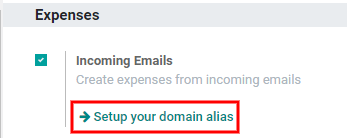
Notă
Dacă aliasul de domeniu trebuie configurat, Configurați aliasul dvs. de domeniu va apărea sub caseta de selectare a e-mailurilor primite în loc de câmpul pentru adresa de e-mail. Consultați această documentație pentru instrucțiuni de configurare și mai multe informații: Nume de domeniu. Odată ce aliasul de domeniu este configurat, câmpul adresei de e-mail va fi vizibil sub secțiunea de e-mailuri primite.
Next, enter the email address to be used in the email field, then click Save. Now that the email address has been entered, emails can be sent to that alias to create new expenses without having to be in the Odoo database.
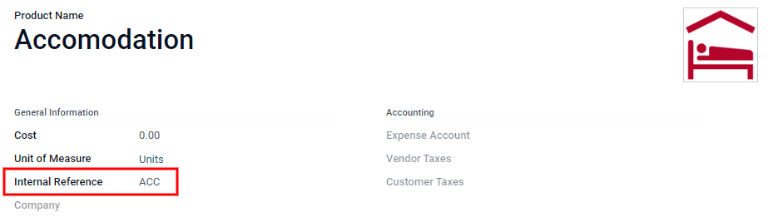
Pentru a trimite o cheltuială prin e-mail, creați un nou e-mail și introduceți codul de referință internă al produsului (dacă este disponibil) și suma cheltuielii în subiectul e-mailului. Apoi, atașați chitanța la e-mail. Odoo creează cheltuiala preluând informațiile din subiectul e-mailului și combinându-le cu chitanța.
To check an expense product’s internal reference, go to . If an internal reference is listed on the product, it is visible in this view.

To add an internal reference on an expense product, click on the product, then click Edit. In edit mode, enter the Internal Reference in the field. Beneath the Internal Reference field, this sentence appears: Use this reference as a subject prefix when submitting by email..
Notă
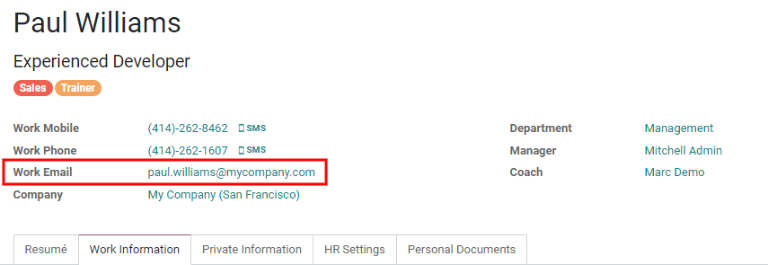
For security purposes, only authenticated employee emails are accepted by Odoo when creating an expense from an email. To confirm an authenticated employee email address, go to the employee card in the Employees app, and refer to the Work Email in the main field.
Example
If submitting an expense via email for a $25.00 meal during a work trip, the email subject would
be Ref005 Meal $25.00.
Explicație:
The Internal Reference for the expense product
MealsisRef005Cost pentru cheltuială este de
$25.00
Creați un raport de cheltuieli
When expenses are ready to submit (such as at the end of a business trip, or once a month), an expense report needs to be created. Go to the main app dashboard, which displays a default My Expenses view, or go to .
First, each individual expense for the report must be selected by clicking the check box next to each entry, or quickly select all the expenses in the list by clicking the check box next to Expense Date.
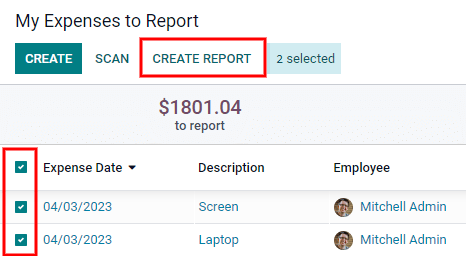
Once the expenses have been selected, click the Create Report button. The new report appears with all the expenses listed, and the Employee, Paid By, Expense Journal, and Company fields are automatically populated from the individual expenses in the report.
It is recommended to add a short summary for each report to help keep expenses organized. Enter a
short description for the expense report (such as Client Trip NYC, or Repairs for Company Car)
in the Expense Report Summary field.
Notă
If all the expenses are listed for the same date, the Expense Report Summary field will be pre-populated with the date for the expenses.
Next, select a Manager from the drop-down menu to assign a manager to review the report.

If some expenses are not on the report that should be, they can still be added. Click Add a line at the bottom of the Expense tab. Click the check box next to each expense to add, then click Select. The items now appear on the report that was just created.

When all edits have been completed, click Save. Once the expense report is saved, an Expenses smart button appears in the top-right corner, listing the number of expenses on the report. Click the Expenses smart button to view the individual expenses for the report in a list.

Trimiteți un raport de cheltuieli
Când un raport de cheltuieli este finalizat, următorul pas este trimiterea raportului către un manager pentru aprobare. Rapoartele trebuie trimise individual și nu pot fi trimise în loturi. Deschideți raportul specific din lista de rapoarte de cheltuieli (dacă raportul nu este deja deschis). Pentru a vedea toate rapoartele de cheltuieli, accesați :selectare meniu:Aplicația Cheltuieli --> Cheltuielile mele --> Rapoartele mele.
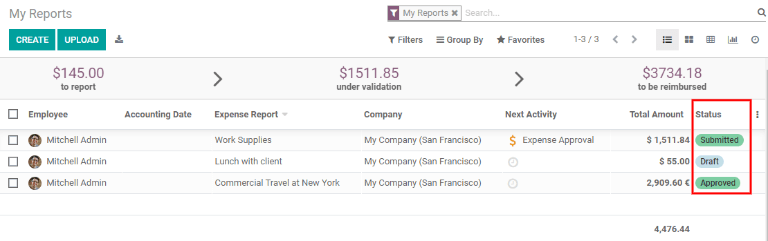
If the list is large, grouping the results by status may be helpful since only reports that are in a Draft mode need to be submitted, reports with an Approved or Submitted status do not.
Notă
The status of each report is shown in the Status column on the far right. If the Status column is not visible, click the ⋮ (additional options) icon at the end of the row, and check the box next to Status.
Faceți clic pe un raport pentru a-l deschide, apoi faceți clic pe Trimiteți managerului. După transmiterea unui raport, următorul pas este să așteptați ca managerul să îl aprobe.
Important
Secțiunile cheltuieli/aprobare, cheltuieli/post și cheltuieli/rambursare sunt doar pentru utilizatorii cu drepturile necesare.
Aprobați cheltuielile
In Odoo, not just anyone can approve expense reports— only users with the necessary rights (or permissions) can. This means that a user must have at least Team Approver rights for the Expenses app. Employees with the necessary rights can review expense reports, and approve or reject them, as well as provide feedback thanks to the integrated communication tool.
Pentru a vedea cine are drepturi de aproba, accesați aplicația principală :selectare meniu:Setări și faceți clic pe Gestionați utilizatorii.
Notă
If the Settings app is not available, then certain rights are not set on the account. In the Access Rights tab of a user’s card in the app, the Administration section is set to one of three options:
None (blank): Utilizatorul nu poate accesa deloc aplicația Setări.
Drepturi de acces: utilizatorul poate vizualiza numai secțiunea Utilizatori și companii din aplicația Setări.
Setări: utilizatorul are acces la întreaga aplicație Setări fără restricții.
Consultați acest document pentru a afla mai multe despre gestionarea utilizatorilor și a drepturilor lor de acces.
Faceți clic pe o persoană pentru a-și vedea cardul, care afișează fila Drepturi de acces în vizualizarea implicită. Derulați în jos la secțiunea Resurse umane. Sub Cheltuieli, există patru opțiuni:
Niciunul (blank): Un câmp necompletat înseamnă că utilizatorul nu are drepturi de a vedea sau aproba rapoartele de cheltuieli și le poate vedea doar pe ale lor.
Team Approver: Utilizatorul poate vedea și aproba numai rapoartele de cheltuieli pentru propria echipă specifică.
All Approver: Utilizatorul poate vizualiza și aproba orice raport de cheltuieli.
Administrator: The user can view and approve any expense report as well as access the reporting and configuration menus in the Expenses app.
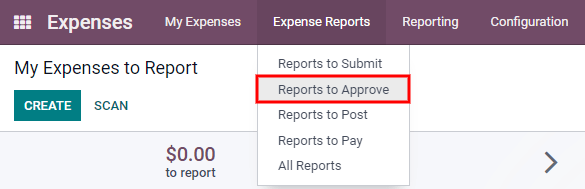
Users who are able to approve expense reports (typically managers) can easily view all expense reports to validate. Go to . This view lists all the expense reports that have been submitted but not approved, as noted by the Submitted tag in the status column.
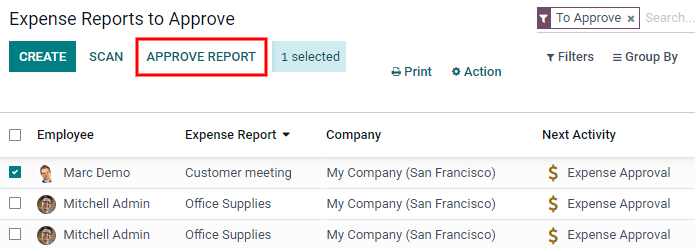
Reports can be approved in two ways (individually or several at once) and refused only one way. To approve multiple expense reports at once, remain in the list view. First, select the reports to approve by clicking the check box next to each report, or click the box next to Employee to select all reports in the list. Next, click the Approve Report button. The number of reports that are selected appear next to the Approve Report button, in an X Selected button, with X being the number of reports currently selected.
To approve an individual report, click on a report to go to a detailed view of that report. In this view, several options are presented: Approve, Refuse, or Reset to draft. Click Approve to approve the report.
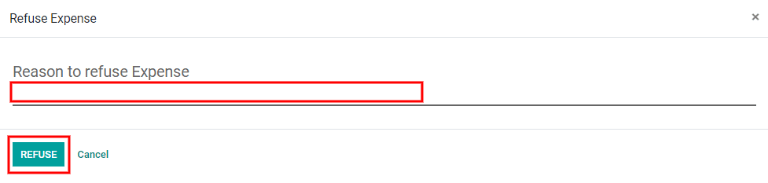
If Refuse is clicked, a pop-up window appears. Enter a brief explanation for the refusal in the Reason to refuse Expense field, then click Refuse.
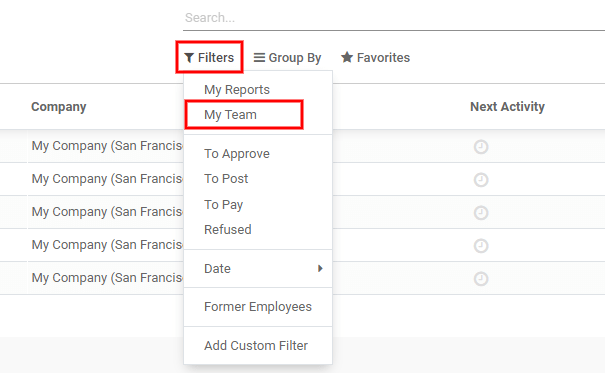
Team managers can easily view all the expense reports to approve for their team members. While in the Reports to Approve view, click on Filters, then click My Team. This presents all the reports to approve for the manager’s team. Manager’s can easily view all reports for their team by simply clicking on and removing the To Approve filter in the Search… bar, leaving only the My Team filter active.
Sfat
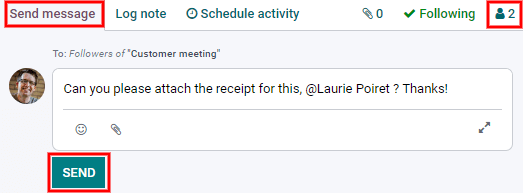
If more information is needed, such as a missing receipt, communication is easy from the chatter. In an individual report, simply click Send Message, then type in a message in the text box that appears, tagging the proper person (if needed), and post it to the chatter by clicking Send. The message is posted in the chatter, and the person tagged will be notified via email of the message, as well as anyone following.
Note that only followers can be tagged in a message. To tag someone who is not following, add them as a follower first. Click the 👤 (person) icon, then click Add Followers, then enter their name in the Recipients field, and finally, click Add Followers.
Înregistrați cheltuielile în contabilitate
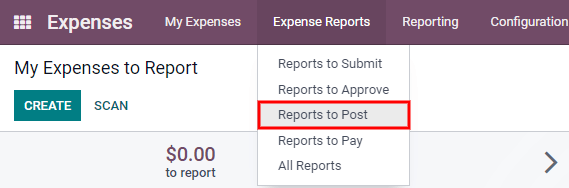
Once an expense report is approved, the next step is to post the report to the accounting journal. To view all expense reports to post, go to .
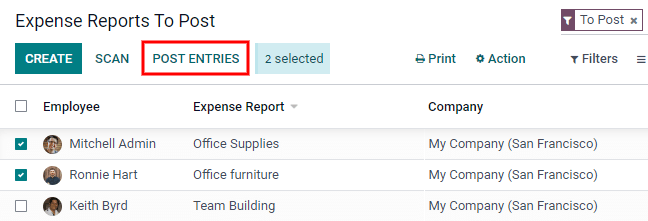
Just like approvals, expense reports can be posted in two ways (individually or several at once). To post multiple expense reports at once, remain in the list view. First, select the reports to post by clicking the check box next to each report, or click the box next to Employee to select all reports in the list. Next, click Post Entries.
Pentru a posta un raport individual, faceți clic pe un raport pentru a accesa vizualizarea detaliată a raportului respectiv. În această vizualizare, sunt prezentate mai multe opțiuni: Postează intrări în jurnal, Raportați în următoarea fișă de plată, Refuzați sau Resetați la Ciornă. Faceți clic pe Postează intrări în jurnal pentru a posta raportul.
If Refuse is clicked, a pop-up window appears. Enter a brief explanation for the refusal in the Reason to refuse Expense field, then click Refuse. Refused reports can be viewed by going to . This list shows all reports, including the refused ones.
Notă
Pentru a posta rapoarte de cheltuieli într-un jurnal contabil, utilizatorul trebuie să aibă următoarele drepturi de acces:
Contabilitate: Contabil sau Consilier
Cheltuieli: Manager
Rambursează angajații
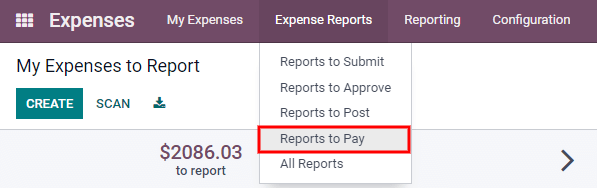
After an expense report is posted to an accounting journal, the next step is to reimburse the employee. To view all expense reports to pay, go to .
Just like approvals and posting, expense reports can be paid in two ways (individually or several at once). To pay multiple expense reports at once, remain in the list view. First, select the reports to pay by clicking the check box next to each report, or click the box next to Employee to select all reports in the list. Next, click Register Payment.
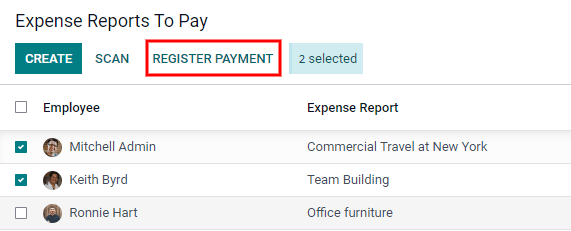
Pentru a plăti un raport individual, faceți clic pe un raport pentru a accesa o vizualizare detaliată a raportului respectiv. Faceți clic pe Înregistrați plata pentru a plăti angajatul.
Refacturați cheltuielile către clienți
If an expense is to be reimbursed by a customer and not the company, the expense can be automatically charged to the customer. This is done by first referencing the SO the expense should be applied to when creating the expense.
The next steps are the same as if the expense is being reimbursed by the company instead of a customer. The expense or expenses are placed on an expense report, and then the expense report is submitted for approval. Next, managers approve the expense report, and the accounting department post the journal entry.
Finally, once the expense report is posted to a journal, the expense then appears on the SO that was referenced when the expense was first created.
The sales order can then be invoiced, thus invoicing the customer for the expense.
Configurare
First, specify the invoicing policy for each expense product. Go to . Click on the expense product to edit, then click Edit. Under the Invoicing section, select the Invoicing Policy and Re-Invoicing Policy by clicking the radio button next to the desired selection.
Invoicing Policy:
Ordered quantities: Expense product will only invoice expenses based on the ordered quantity.
Delivered quantities: Expense product will only invoice expenses based on the delivered quantity.
Re-Invoicing Policy:
No: Expense product will not be re-invoiced.
At cost: Expense product will invoice expenses at their real cost.
At sales price: Expense product will invoice the price set on the sale order.
Create an expense and expense report
First, when creating a new expense, the correct information needs to be entered in order to re-invoice a customer. Using the drop-down menu, select the sales order the expense will appear on in the Customer to Reinvoice section. Next, select the Analytic Account the expense will be posted to. After the expense(s) is created, the expense report needs to be created and submitted as usual.
Important
Selecting a Customer to Reinvoice when creating an expense is critical, since this field is unable to be modified once the expense is added to an expense report.
Validați și postați cheltuielile
Only employees with permissions (typically managers or supervisors) can approve expenses. Before approving an expense report, ensure the Analytic Account is set on every expense line of a report. If an Analytic Account is missing, click Edit and select the correct account from the drop-down menu, then click Approve or Refuse.
The accounting department is typically responsible for posting journal entries. Once an expense report is approved, it can then be posted. The SO is only updated after the journal entry is posted, and the expense(s) now appear on the referenced SO.
Cheltuieli de facturare
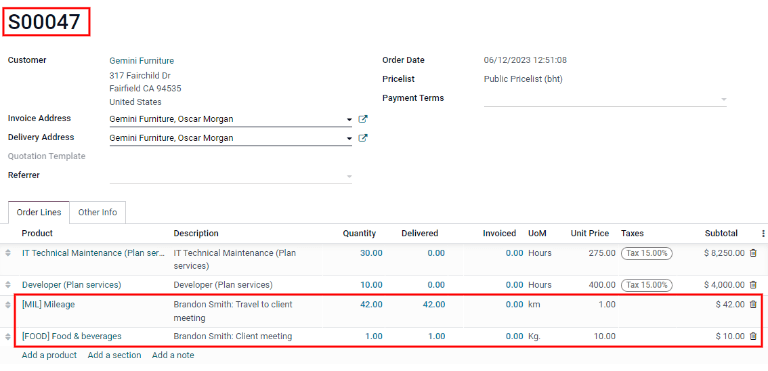
Once the SO has been updated, it is time to invoice the customer. After the expense report has been approved and the journal entry has been posted, the SO can be opened and the expenses can be seen on it. Click anywhere on an expense line, and the details for that individual expense appears in a pop-up. Click on the SO that is listed next to Customer to Reinvoice.
The SO appears, and now the expenses are listed in the Order Lines tab.
Apoi, faceți clic pe Creați factură și selectați dacă factura este pentru o Factură obișnuită, o Acont (procent) sau o Acompaniament (sumă fixă) ) făcând clic pe butonul radio de lângă acesta. Apoi, faceți clic pe Creați factură. Clientul a fost acum facturat pentru cheltuieli.