Chapter 2: Miscellaneous
In the previous task, we learned how to create fields and views. There is still much more to discover in the feature-rich Odoo web framework, so let’s dive in and explore more in this chapter!

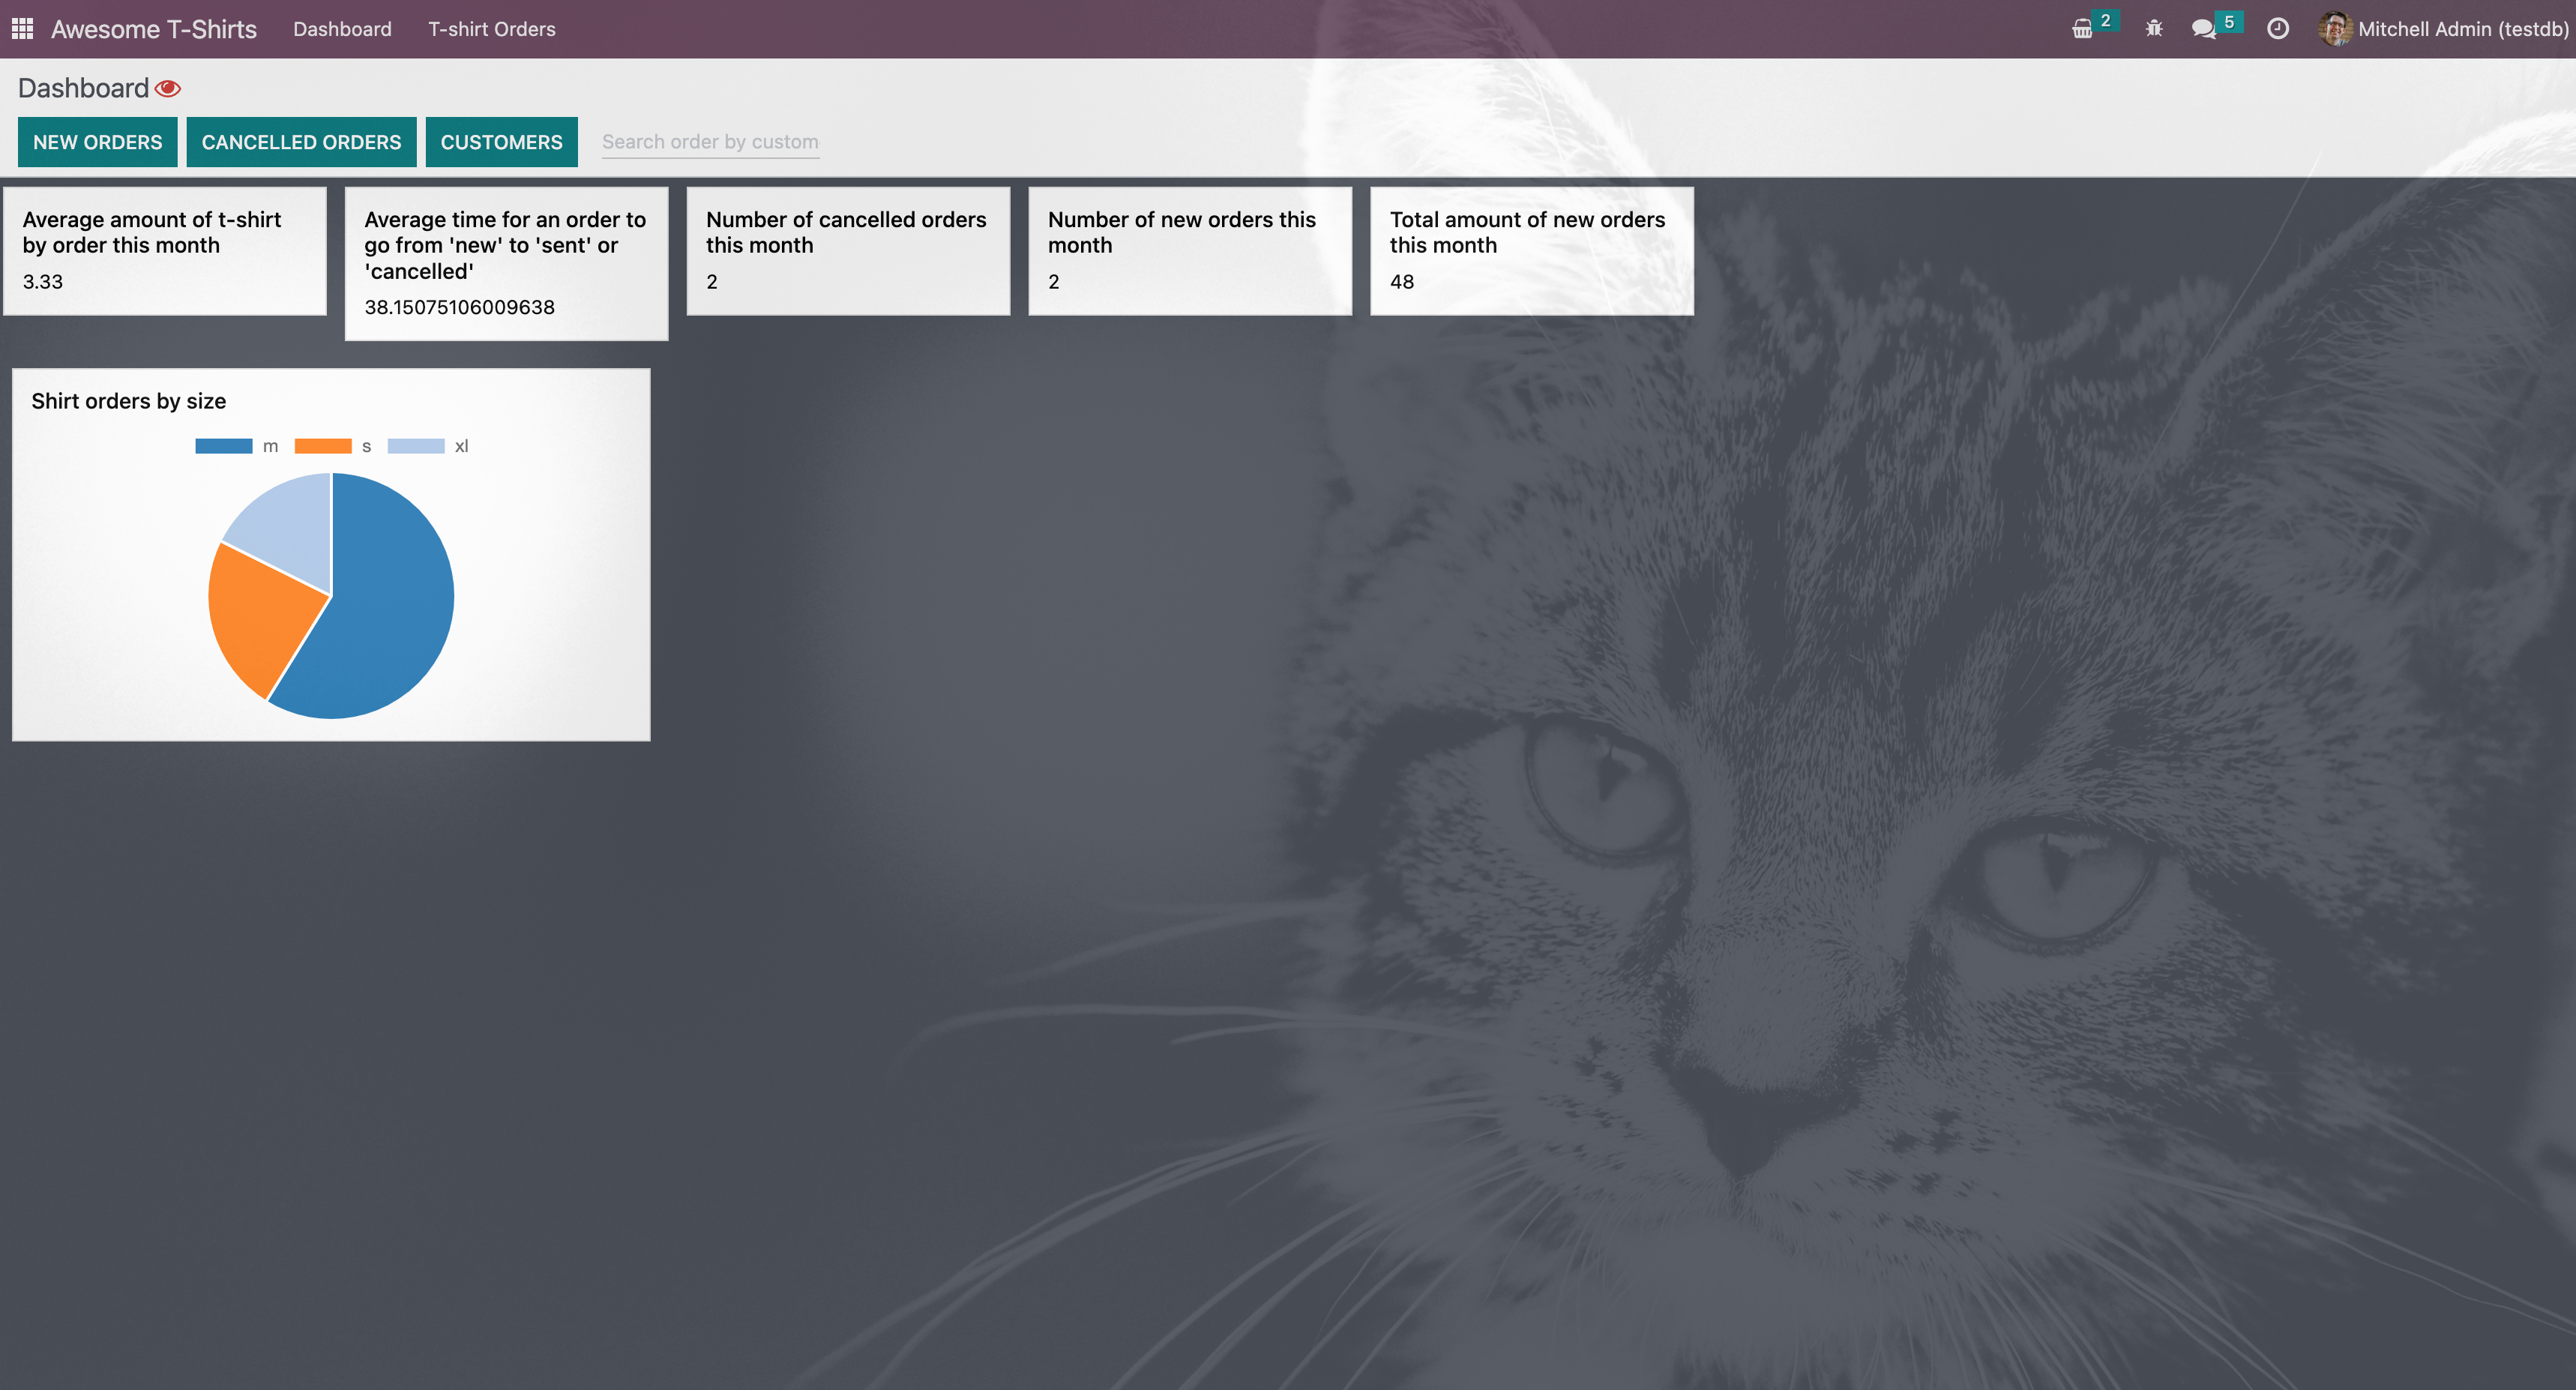
This is the progress that we have made in discovering the JavaScript web framework at the end of Chapter 1: Fields and Views.
Goal
The solutions for each exercise of the chapter are hosted on the official Odoo tutorials repository.
1. Interacting with the notification system
Note
This task depends on the previous exercises.
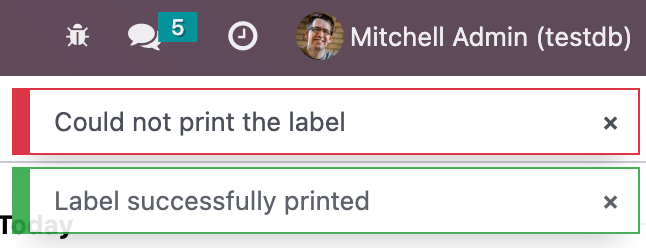
After using the Print Label button for some t-shirt tasks, it is apparent that there
should be some feedback that the print_label action is completed (or failed, for example, the
printer is not connected or ran out of paper).
Exercise
Display a notification message when the action is completed successfully, and a warning if it failed.
If it failed, the notification should be permanent.
Pour plus d'infos
2. Add a systray item
Our beloved leader wants to keep a close eye on new orders. He wants to see the number of new, unprocessed orders at all time. Let’s do that with a systray item.
A systray item is an element that appears in the system tray, which is a small area located on the right-hand side of the navbar. The systray is used to display notifications and provide access to certain features.
Exercise
Create a systray component that connects to the statistics service we made previously.
Use it to display the number of new orders.
Clicking on it should open a list view with all of those orders.
Bonus point: avoid making the initial RPC by adding the information to the session info. The session info is given to the web client by the server in the initial response.

3. Real life update
So far, the systray item from above does not update unless the user refreshes the browser. Let us do that by calling periodically (for example, every minute) the server to reload the information.
Exercise
The
tshirtservice should periodically reload its data.
Now, the question arises: how is the systray item notified that it should re-render itself? It can be done in various ways but, for this training, we choose to use the most declarative approach:
Exercise
Modify the
tshirtservice to return a reactive object. Reloading data should update the reactive object in place.The systray item can then perform a useState on the service return value.
This is not really necessary, but you can also package the calls to
useServiceanduseStatein a custom hookuseStatistics.
Pour plus d'infos
4. Add a command to the command palette
Now, let us see how we can interact with the command palette. The command palette is a feature that
allows users to quickly access various commands and functions within the application. It is accessed
by pressing CTRL+K in the Odoo interface.
Exercise
Modify the image preview field to add a command to the command palette to open the image in a new browser tab (or window).
Ensure the command is only active whenever a field preview is visible on the screen.

Pour plus d'infos
5. Monkey patching a component
Often, we can achieve what we want by using existing extension points that allow for customization, such as registering something in a registry. Sometimes, however, it happens that we want to modify something that has no such mechanism. In that case, we must fall back on a less safe form of customization: monkey patching. Almost everything in Odoo can be monkey patched.
Bafien, our beloved leader, heard about employees performing better if they are constantly being watched. Since he cannot be there in person for each of his employees, he tasked you with updating the user interface to add a blinking red eye in the control panel. Clicking on that eye should open a dialog with the following message: « Bafien is watching you. This interaction is recorded and may be used in legal proceedings if necessary. Do you agree to these terms? »
Exercise
Inherit the
web.Breadcrumbstemplate of the ControlPanel component to add an icon next to the breadcrumbs. You might want to use thefa-eyeorfa-eyesicons.Patch the component to display the message on click by using the dialog service. You can use ConfirmationDialog.
Add the CSS class
blinkto the element representing the eye and paste the following code in a new CSS file located in your patch’s directory..blink { animation: blink-animation 1s steps(5, start) infinite; -webkit-animation: blink-animation 1s steps(5, start) infinite; } @keyframes blink-animation { to { visibility: hidden; } } @-webkit-keyframes blink-animation { to { visibility: hidden; } }

6. Fetching orders from a customer
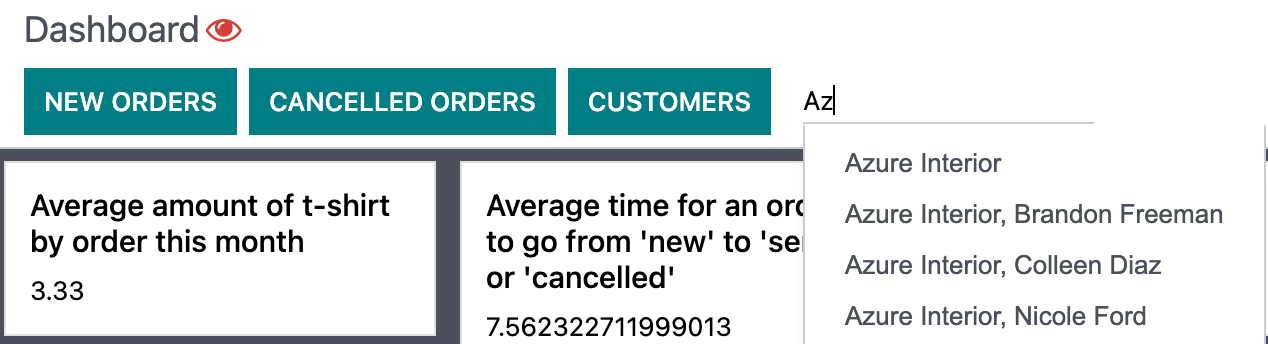
Let’s see how to use some standard components to build a powerful feature combining autocomplete, fetching data, and fuzzy lookup. We will add an input in our dashboard to easily search all orders from a given customer.
Exercise
Update
tshirt_service.jsto add aloadCustomersmethod, which returns a promise that returns the list of all customers (and only performs the call once).Add the AutoComplete component to the dashboard, next to the buttons in the control panel.
Fetch the list of customers with the tshirt service, and display it in the AutoComplete component, filtered by the fuzzyLookup method.
7. Reintroduce Kitten Mode
Let us add a special mode to Odoo: whenever the URL contains kitten=1, we will display a kitten in
the background of Odoo, because we like kittens.
Exercise
Create a
kittenservice, which should check the content of the active URL hash with the help of the router service. Ifkittenis set in the URL, add the classo-kitten-modeto the document body.Add the following SCSS in
kitten_mode.scss:.o-kitten-mode { background-image: url(https://upload.wikimedia.org/wikipedia/commons/5/58/Mellow_kitten_%28Unsplash%29.jpg); background-size: cover; background-attachment: fixed; } .o-kitten-mode > * { opacity: 0.9; }
Add a command to the command palette to toggle the kitten mode. Toggling the kitten mode should toggle the class
o-kitten-modeand update the current URL accordingly.
8. Lazy loading our dashboard
This is not really necessary, but the exercise is interesting. Imagine that our awesome dashboard is a large application with potentially multiple external libraries and lots of code/styles/templates. Also, suppose that the dashboard is used only by some users in some business flows. It would be interesting to lazy load it in order to speed up the loading of the web client in most cases.
So, let us do that!
Exercise
Modify the manifest to create a new bundle
awesome_tshirt.dashboard.Add the awesome dashboard code to this bundle. Create folders and move files if needed.
Remove the code from the
web.assets_backendbundle so that it is not loaded twice.
So far, we only removed the dashboard from the main bundle; we now want to lazy load it. Currently, no client action is registered in the action registry.
Exercise
Create a new file
dashboard_loader.js.Copy the code registering
AwesomeDashboardto the dashboard loader.Register
AwesomeDashboardas a LazyComponent.Modify the code in the dashboard loader to use the lazy component
AwesomeDashboard.
If you open the Network tab of your browser’s dev tools, you should see that
awesome_tshirt.dashboard.min.js is now loaded only when the Dashboard is first accessed.
Pour plus d'infos