ePOS打印机的自签名证书
要与 Odoo 一起使用,某些无需 物联网盒子 即可使用的打印机型号可能需要 HTTPS 协议 才能在浏览器和打印机之间建立安全连接。但是,尝试使用 HTTPS 访问打印机的 IP 地址时,大多数 Web 浏览器都会出现警告页面。在这种情况下,您可以临时 强制连接,这样只要浏览器窗口保持打开,您就可以通过 HTTPS 访问页面,并在 Odoo 中使用 ePOS 打印机。
警告
关闭浏览器窗口后,连接将丢失。因此,此方法只能作为 暂时解决办法 或作为 下列指示 的前提条件。
生成、导出和导入自签名证书
若要有长期解决方案,必须生成 自签名证书。然后,将其导出,并导入浏览器。
重要
产生 SSL 证书的操作,应该只执行 一次 。 如果建立另一个证书,使用旧有证书的装置将失去 HTTPS 访问权限。
导航到 ePOS 的 IP 地址(例如,https://192.168.1.25),点击 高级 和 转到 [IP 地址](不安全) 强制连接。
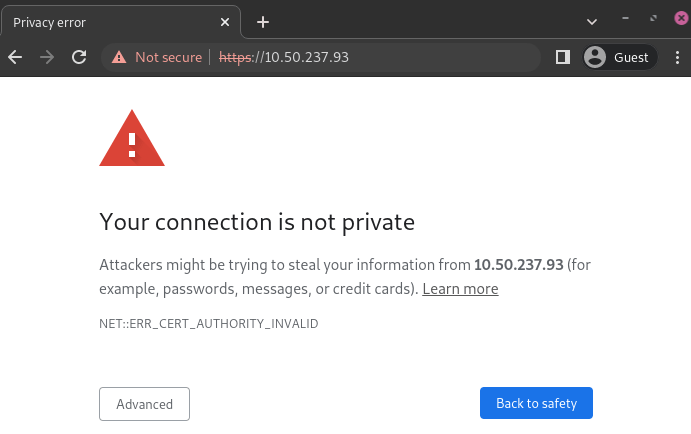
Windows 10 上 Google Chrome 的警告页面
然后,使用您的打印机的证书登录,以访问 ePOS 打印机设置。 若要登录,请在 ID 字段输入 epson,并在 密码 字段输入您的打印机的序号。
在:guilabel:身份验证`部分点击:guilabel:`证书列表,然后点击:guilabel:创建,生成新的**自签名证书**。通用名称 应自动填写。如果没有,请填写打印机 IP 地址编号。在 有效期间 字段中选择证书的有效期,点击 创建,然后点击 重设 或手动重启打印机。
自签名证书已生成。重新加载页面并点击:guilabel:`安全性`部分中的 SSL/TLS,以确保在:guilabel:`服务器证书`部分中,选择了正确的 自签名证书。
导出过程很大程度受 OS(操作系统)`和浏览器影响。首先,导航至其 IP 地址(例如 `https://192.168.1.25),在网页浏览器上访问 ePOS 打印机设置。然后,按照 生成自签名证书选项卡 中的说明,执行强制连接。
如果您使用的是**Google Chrome**,
点击搜索栏旁边的 不安全,然后点击 证书无效;
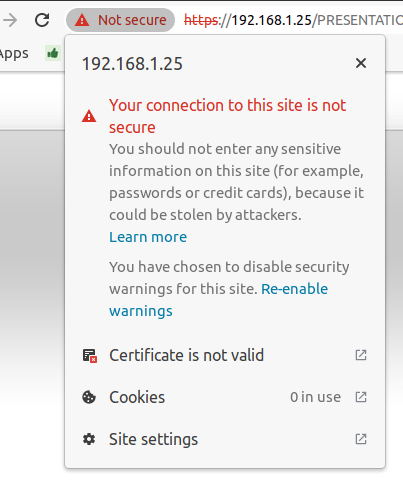
转到 详细资料 选项卡,然后点击 导出;
在文件名末尾添加
.crt,以确保扩展名正确;在弹出视窗的底部,选择 Base64 编码 ASCII,单一证书;
保存,并导出证书。
警告
确保证书以`.crt`扩展名结尾。否则,某些浏览器可能无法在导入过程中看到该文件。
如果您使用的是**Mozilla Firefox**,
点击地址栏左侧的 锁形 图标;
转到 ;
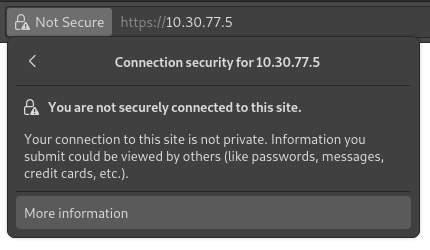
向下滚动到 杂项 部分;
点击 下载 部分中的 PEM(证书);
保存,并导出证书。
导入过程在很大程度上取决于 OS (操作系统) 和浏览器。
Windows 10 是在操作系统层面管理证书,因此自签名证书必须通过证书档案导入,不可使用浏览器汇入。 执行此操作的步骤如下:
打开 Windows 文件资源管理器,找到下载的认证文件;
右键单击证书文件,然后点击 安装证书;
选择安装证书的位置和对象 - 当前用户 或所有用户(本地电脑)。然后,点击 下一步;
在
证书存储页面,勾选 将所有证书放入以下存储,点击 浏览…,并选择 受信任的根证书颁发机构;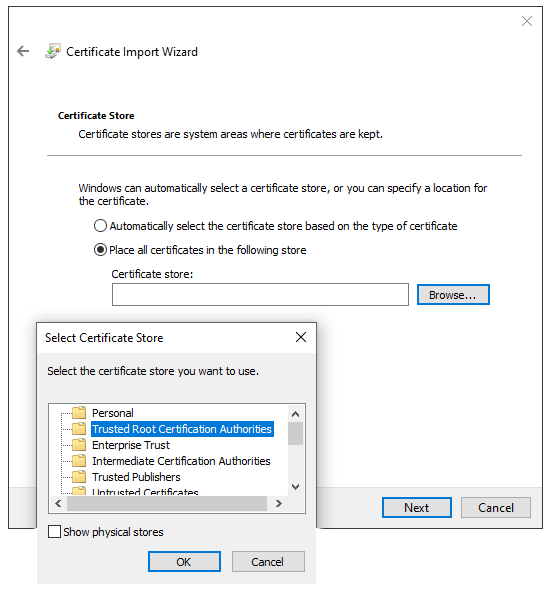
点击 完成,接受弹出的安全窗口;
重新启动计算机,确保更改已应用。
如果您使用的是**Google Chrome**,
开启 Chrome;
前往 ;
进入 授权机构 选项卡,点击 导入,然后选择导出的证书文件;
接受所有警告;
点击 确定;
重新启动浏览器。
如果您使用的是**Mozilla Firefox**,
开启 Firefox;
转到 ;
选择导出的证书文件;
勾选复选框并验证;
重新启动浏览器。
在 Mac OS 上,您可以按照以下步骤确保所有浏览器的连接安全:
打开 Safari,导航到打印机的 IP 地址。这样做会弹出一个警告页面;
在警告页面,转到 ,验证;
重新启动打印机,以便使用其他浏览器。
要生成和导出 SSL 证书并将其发送到 IOS 设备,请打开 Google 浏览器 或 火狐浏览器。然后,
导航到 ePOS 的 IP 地址(例如,https://192.168.1.25),点击 高级 和 转到 [IP 地址](不安全) 强制连接。

Windows 10 上 Google Chrome 的警告页面
然后,使用您的打印机的证书登录,以访问 ePOS 打印机设置。 若要登录,请在 ID 字段输入 epson,并在 密码 字段输入您的打印机的序号。
在:guilabel:身份验证`部分点击:guilabel:`证书列表,然后点击:guilabel:创建,生成新的**自签名证书**。通用名称 应自动填写。如果没有,请填写打印机 IP 地址编号。在 有效期间 字段中选择证书的有效期,点击 创建,然后点击 重设 或手动重启打印机。
自签名证书已生成。重新加载页面并点击:guilabel:`安全性`部分中的 SSL/TLS,以确保在:guilabel:`服务器证书`部分中,选择了正确的 自签名证书。
导出过程很大程度受 OS(操作系统)`和浏览器影响。首先,导航至其 IP 地址(例如 `https://192.168.1.25),在网页浏览器上访问 ePOS 打印机设置。然后,按照 生成自签名证书选项卡 中的说明,执行强制连接。
如果您使用的是**Google Chrome**,
点击搜索栏旁边的 不安全,然后点击 证书无效;

转到 详细资料 选项卡,然后点击 导出;
在文件名末尾添加
.crt,以确保扩展名正确;在弹出视窗的底部,选择 Base64 编码 ASCII,单一证书;
保存,并导出证书。
警告
确保证书以 .crt 扩展名结尾。否则,某些浏览器可能无法在导入过程中找到该文件。
如果您使用的是**Mozilla Firefox**,
点击地址栏左侧的 锁形 图标;
转到 ;

向下滚动到 杂项 部分;
点击 下载 部分中的 PEM(证书);
保存,并导出证书。
要将 SSL 证书导入安卓设备,首先要在电脑上创建并导出证书。然后,使用电子邮件、蓝牙或 USB 将 .crt 文件传输到设备。文件连接到设备后:
打开设置,搜索 “证书”;
点击 :guilabel:`证书授权机构`(从设备存储空间安装);
选择证书文件,将其安装到设备上。
注解
安装证书的具体步骤可能会因 Android 版本和设备制造商的不同而有所不同。
要将 SSL 证书导入 iOS 设备,请首先从计算机创建并导出它。然后,使用电子邮件、蓝牙或任何文件共享服务将`.crt`文件传输到设备。
下载此文件会触发警告弹出窗口。点击:guilabel:`允许`下载配置文件,然后关闭第二个弹出窗口。然后,
转到 iOS 设备上的 设置应用程序;
单击用户详细信息框下的 配置文件已下载;
找到下载的
.crt文件并选择它;点击屏幕右上角的:guilabel:
安装;如果设备上设置了密码,请输入密码;
点击证书警告屏幕和弹出窗口右上角的:guilabel:
安装;点击 已完成。
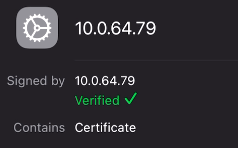
证书已安装,但仍需要进行身份验证。步骤如下:
转到 ;
使用**滑动按钮**启用已安装的证书;
在弹出窗口中点击 继续。
重要
如果您需要从未提及的操作系统或网络浏览器导出 SSL 证书,请在您的首选搜索引擎中搜索
导出 SSL 证书+您的浏览器或操作系统的名称。同样,要从未提及的操作系统或浏览器导入 SSL 证书,请在您的首选搜索引擎中搜索
导入 SSL 证书根颁发机构+您的浏览器或操作系统的名称。
检查证书是否正确导入
要确认打印机的连接安全,请使用 HTTPS 连接到其 IP 地址。例如,在浏览器中导航到 https://192.168.1.25。如果 SSL 证书已正确应用,您不应再看到警告页面,并且地址栏应显示挂锁图标,表明连接安全。