Plan comptable
Le Plan comptable (COA) est la liste de tous les comptes utilisés pour enregistrer les transactions financières dans le grand livre d’une organisation.
Les comptes sont généralement répertoriés dans l’ordre d’apparition dans les rapports financiers. La plupart du temps, ils sont répertoriés comme suit :
Comptes de bilan
Immobilisations
Passifs
Capitaux propres
Pertes et Profits
Revenus
Dépense
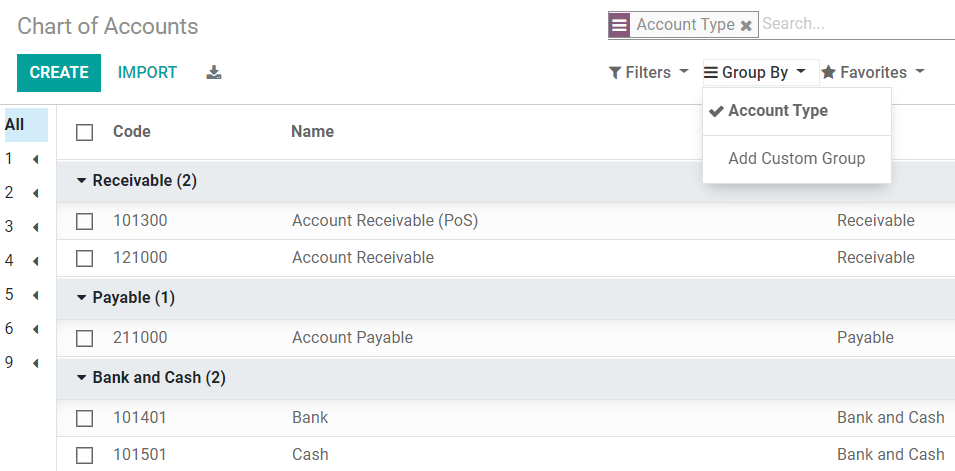
Lorsque vous parcourez votre plan comptable, vous pouvez filtrer les comptes par numéro, dans la colonne de gauche, et également les regrouper par type de compte.

Configuration of an Account
The country you select at the creation of your database (or additional company on your database) determines which Fiscal Localization Package is installed by default. This package includes a standard Chart of Accounts already configured according to the country’s regulations. You can use it directly or set it according to your company’s needs.
Avertissement
Il n’est pas possible de modifier la localisation fiscale d’une entreprise une fois qu’une écriture comptable a été publiée.
Pour créer un nouveau compte, allez dans , cliquez sur Créer, et remplissez le formulaire.
Code et nom
Chaque compte est identifié par son Code et son Nom, qui indiquent également l’objectif du compte.
Type
Configurer correctement le Type de compte est essentiel car il sert à plusieurs fins :
Information on the account’s purpose and behavior
Generate country-specific legal and financial reports
Set the rules to close a fiscal year
Generate opening entries
Pour configurer un type de compte, ouvrez le sélecteur déroulant du champ Type et sélectionnez le bon type parmi la liste suivante :
Rapport |
Catégorie |
Types de compte |
|---|---|---|
Bilan |
Immobilisations |
Débiteur |
Banque et liquidités |
||
Actif circulant |
||
Actif immobilisé |
||
Prépaiements |
||
Immobilisations |
||
Passifs |
Payable |
|
Carte de crédit |
||
Dettes à court terme |
||
Passif immobilisé |
||
Capitaux propres |
Capitaux propres |
|
Bénéfices de l’année en cours |
||
Pertes et Profits |
Revenus |
Revenus |
Autres revenus |
||
Dépense |
Dépense |
|
Amortissement |
||
Coût des ventes |
||
Autre |
Autre |
Hors bilan |
Automatisation des actifs, des dépenses reportées et des revenus reportés
Some Account Types display a new field to automate the creation of Assets entries, Deferred Expenses entries, and Deferred Revenues entries.
Vous avez trois choix pour le champ Automatisation :
Non : c’est la valeur par défaut. Rien ne se passe.
Create in draft: whenever a transaction is posted on the account, a draft entry is created, but not validated. You must first fill out the corresponding form.
Create and validate: you must also select a Model. Whenever a transaction is posted on the account, an entry is created and immediately validated.
Note
Veuillez vous référer à la documentation associée pour plus d’informations.
Taxes par défaut
Select a default tax that will be applied when this account is chosen for a product sale or purchase.
Groupes de comptes
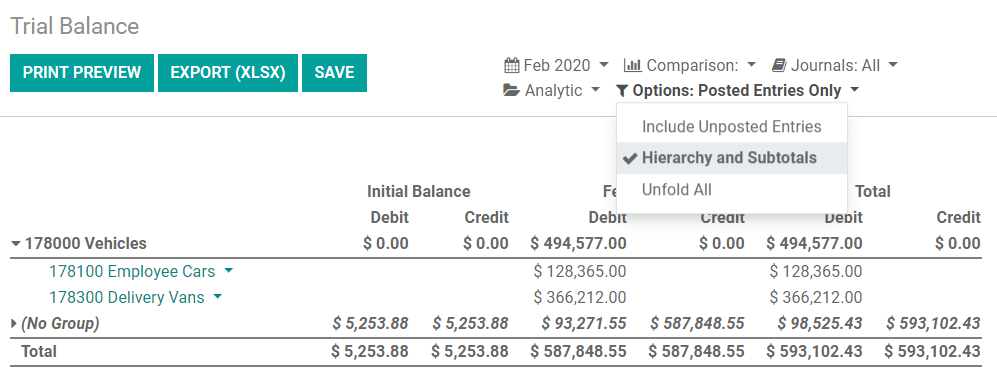
Account Groups are useful to list multiple accounts as sub-accounts of a bigger account and thus consolidate reports such as the Trial Balance.
To create a new Account Group, open the account you want to configure as sub-account, click on the Group drop-down selector, select Create and Edit…, fill out the form, and save. Next, set all the sub-accounts with the right Account Group.
To display your Trial Balance report with your Account Groups, go to , then open the Options menu and select Hierarchy and Subtotals.

Autoriser le lettrage
Some accounts, such as accounts made to record the transactions of a payment method, can be used for the reconciliation of journal entries.
For example, an invoice paid with a credit card can be marked as paid if reconciled with the payment. Therefore, the account used to record credit card payments needs to be configured as allowing reconciliation.
To do so, check the Allow Reconciliation box and save.
Obsolète
It is not possible to delete an account once a transaction has been recorded on it. You can make them unusable by using the Deprecated feature.
To do so, check the Deprecated box and save.