Process receipts in three steps
Some companies require a quality control process before receiving goods from suppliers. To accomplish this, Odoo has a three-step process for receiving goods.
In the three-step receipt process, products are received in an input area, then transferred to a quality area for inspection. Products that pass the quality inspection are then transferred into stock. The products are not available for further processing until they are transferred out of the quality area and into stock.
配置
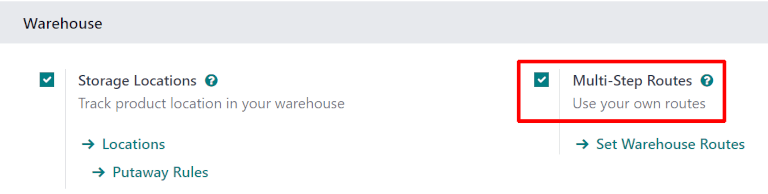
Odoo is configured by default to receive and deliver goods in one step, so the settings need to be changed in order to utilize three-step receipts. First, make sure the Multi-Step Routes option is enabled in . Note that activating Multi-Step Routes will also activate Storage Locations.
Next, the warehouse needs to be configured for three-step receipts. To do that, go to , and select the desired warehouse to be edited. Doing so reveals the detail form for that specific warehouse.
On that Warehouse detail form page, select Receive goods in input, then quality and then stock (3 steps) for Incoming Shipments.

Activating three-step receipts and deliveries creates two new internal locations: Input (WH/Input), and Quality Control (WH/Quality Control). To rename these locations, go to , then click on the desired location to change (or update) the name.
Receive in three steps (input + quality + stock)
创建采购订单
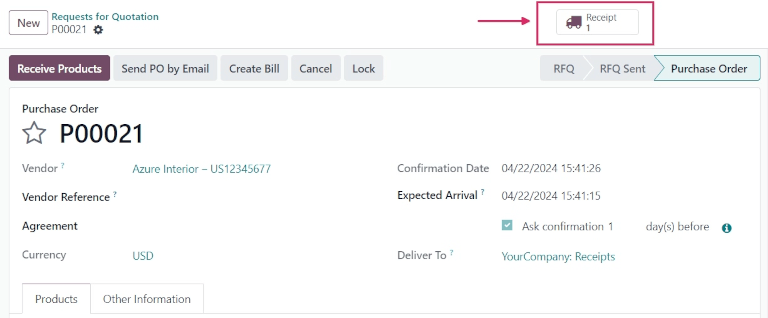
To create a new RfQ, navigate to , which reveals a blank RfQ form page. On this page, select a Vendor, add a storable Product, and click Confirm Order.
A Receipt smart button will appear in the top right, and the receipt will be associated with the purchase order. Clicking on the Receipt smart button will show the receipt order.
Process a receipt
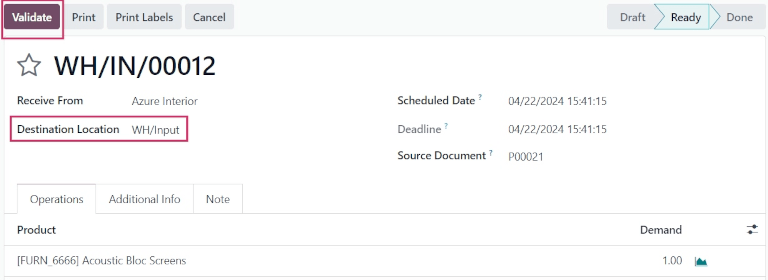
Once the purchase order (PO) is confirmed, a receipt (WH/IN) operation is generated and ready to
process.
The receipt can be confirmed from the original purchase order form, or it can be accessed by navigating to the , and locating the Receipts task card.
Click the # To Process button to reveal all incoming receipts to process. Click the receipt associated with the previous purchase order.
Click Validate to validate the receipt, and move the product to the destination location, WH/Input.
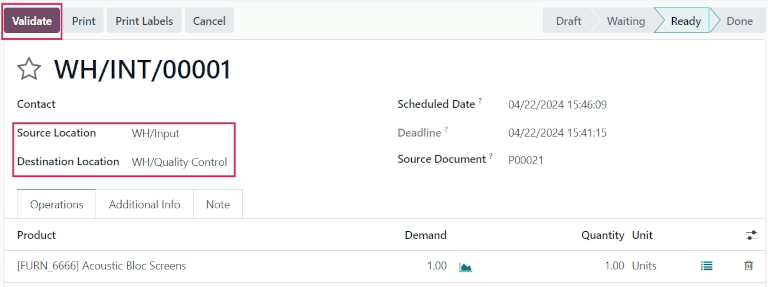
Process a transfer to Quality Control
Once the receipt has been validated, an internal transfer operation to move the product to quality control is ready to process.
Click Inventory Overview in the breadcrumbs to navigate back to the dashboard, and locate the Internal Transfers task card.
Select the # To Process button to reveal all internal transfers to process. Then, choose the internal transfer associated with the validated receipt.
Once ready, click Validate to complete the transfer, and move the product from WH/Input to WH/Quality Control.
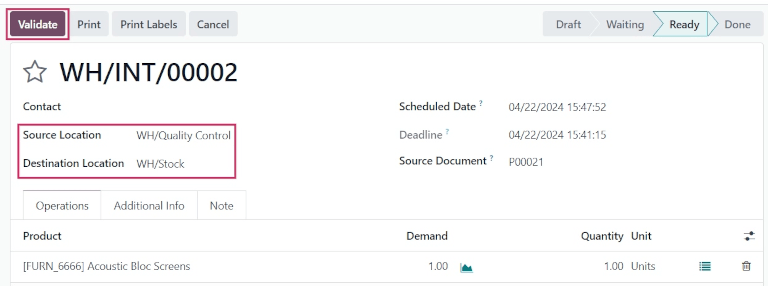
Process a transfer to stock
Once the internal transfer to move the product to quality control has been validated, another internal transfer operation to move the product into warehouse stock is ready to process.
Click YourCompany: Internal Transfers in the breadcrumbs to reveal the list of all
internal transfers to process. Then, select the new internal transfer to move the product from
WH/Quality Control to WH/Stock.
Once ready, click Validate to complete the transfer, and move the product from WH/Quality Control to WH/Stock.