邮件列表
Mailing lists in Odoo are used for both pre and post sales communications in the Email Marketing application. They provide sales teams with qualified lead lists, focus group participants, or current customers that fulfill specific criteria.
Mailing lists can be generated in Odoo, and exported as a downloadable file, or into the Knowledge, Dashboards, or Spreadsheets applications, or imported via copy/paste or file upload.
创建邮件列表
To create a mailing list in the Email Marketing application, navigate to .
Clicking New reveals a blank mailing list form.
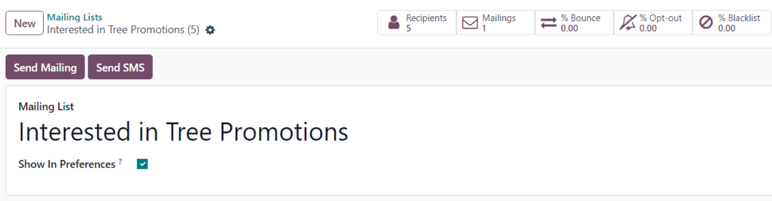
On the form, type a name in the Mailing List field at the top.
If the mailing list should be accessible by recipients from the subscription management page, allowing them to update their preferences, tick the box next to Show In Preferences.
In the upper-left corner of the mailing list form, there are two buttons: Send Mailing and Send SMS.
重要
The Send SMS button only appears if the SMS Marketing application is installed.
Clicking Send Mailing reveals a separate page with a blank email template form, which can be filled out by following steps explained in the Email Marketing doc.
Clicking Send SMS reveals a separate page with a blank SMS template form, which can be filled out by following steps explained in the SMS essentials doc.
At the top of the mailing list form is a series of smart buttons that display a variety of metrics related to the specific mailing list. When any of the smart buttons are clicked, a separate page is revealed, showcasing detailed analytics related to that particular statistic.
The smart buttons available on a mailing list form are:
Recipients: how many people are subscribed to the mailing list
Mailings: how many mailings have been sent using this mailing list
% Bounce: percentage of mailings related to this mailing list that have been bounced back
% Opt-out: percentage of recipients that have opted-out of mailings from this mailing list
% Blacklist: percentage of recipients that have blacklisted themselves from the mailing list altogether
Once all the configurations on the mailing list form are complete, Odoo automatically adds the new mailing list to the Mailing List page in the Email Marketing app ().
Add contacts to mailing list
In Odoo Email Marketing, there are a few different ways to add contacts to a mailing list.
From the Mailing Lists page (), click the Total Contacts link on the line of the desired mailing list to which contacts should be added.
Doing so reveals a separate Mailing List Contacts page for that specific mailing list, where contacts can be created or imported, and then added to the specific mailing list.
This same page can also be accessed by clicking the desired mailing list from the Mailing Lists page, and then clicking the Recipients smart button on the mailing list form.
Doing so also reveals a separate Mailing List Contacts page for that specific mailing list, where contacts can be created or imported, and then added to the specific mailing list.
Contacts can also be directly imported to a specific mailing list from the Mailing Lists page, by clicking Import Contacts to the far-right of the desired mailing list.

Doing so reveals an Import Mailing Contacts pop-up form.
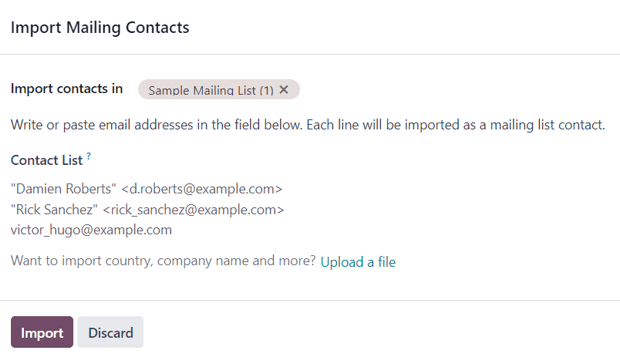
Here, the desired mailing list is auto-populated in the Import contacts in field. Beneath that, write or paste email addresses in the Contact List field.
The option to import a country, company name, and more is available, via the Upload a file link at the bottom of the pop-up form.
When all contacts and configurations are complete, click Import.
To add contacts to a specific mailing list from a master list of all mailing list contacts in the database, navigate to . Doing so reveals the Mailing List Contacts page, featuring a list of all contacts associated with every mailing list.
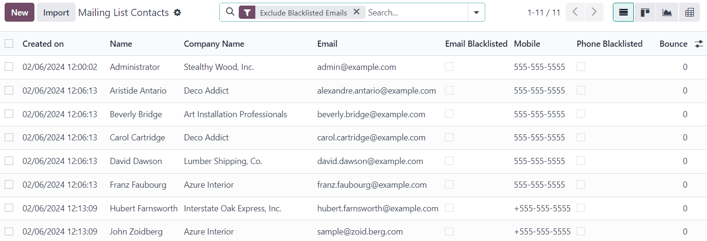
The default Exclude Blacklisted Emails filter appears in the search bar.
From the Mailing List Contacts page, contacts can be created and/or imported, and then added to a mailing list.
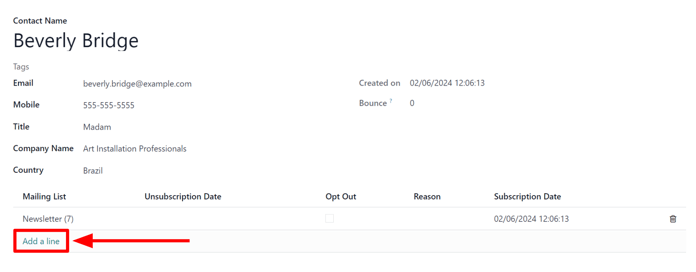
To add an existing contact to a mailing list, select the desired contact from the list on the Mailing List Contacts page to reveal their contact form.
At the bottom of their contact form, click Add a line under the Mailing List column, locate the desired mailing list from the drop-down menu, and select it.
小技巧
A mailing list can be created directly from a contact form, by typing the name of the new mailing list in the Mailing List field. Then, after a new mailing list name has been entered, two options appear on the drop-down menu beneath the new mailing list name.
From this drop-down menu, select Create to create the mailing list and edit it later, or select Create and edit… to create and edit the new mailing list right away.
To remove a contact from a mailing list that the contact has been added to, enable the Opt Out checkbox. If the Opt Out checkbox is ticked, the ability to add a Reason why the contact opted-out is also available.
When/if a contact has opted-out of a mailing list, the date they activated their opt-out appears in the Unsubscription Date column on their contact form.
Lastly, the initial Subscription Date can be seen, as well. This field is auto-populated with the date and time their subscription to the mailing list has been saved.
Multiple mailing lists can be added to a single contact form.
To delete any mailing list from a contact form, simply click the 🗑️ (trash can) icon.
Link mailing list to website
When a mailing list is created in the database, Odoo provides the option to directly link the mailing list to the Odoo-built website (created via the Odoo Website application).
To link a mailing list to a website, navigate to the front-end of the website, which can be accomplished in a variety of ways throughout the database. The most direct way to get to the front-end of the website is to simply open the application from the main Odoo dashboard.
Doing so reveals the designated homepage of the Odoo-built website for the database.
From the front-end of the website, click the Edit button in the upper-right corner. When clicked, Odoo reveals a right-sidebar, filled with drag-and-drop building blocks, packed with various features, options, and design elements.
Next, in the search bar of the right-sidebar, search for Newsletter. The Newsletter
selection of building blocks is used to add subscription fields for any mailing list onto the
website.
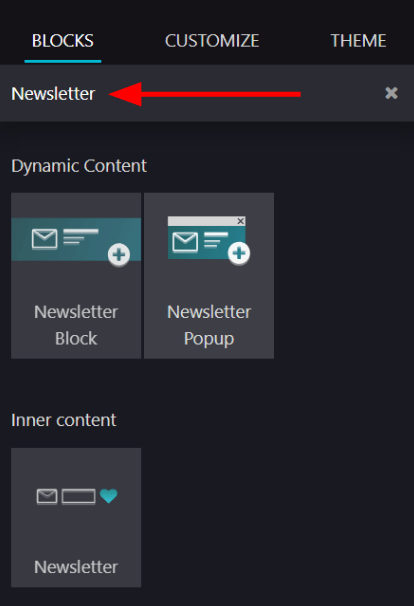
Doing so reveals the following building block options: Newsletter Block, Newsletter Popup, and Newsletter. Any of these options can be used to add subscription fields for a mailing list onto the website.
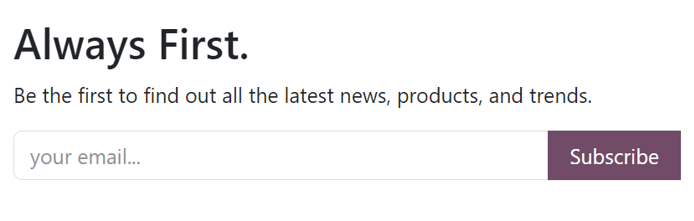
The Newsletter Block option places a customizable block onto the body of the website where a visitor to enter their email and click a button to subscribe to a designated mailing list.
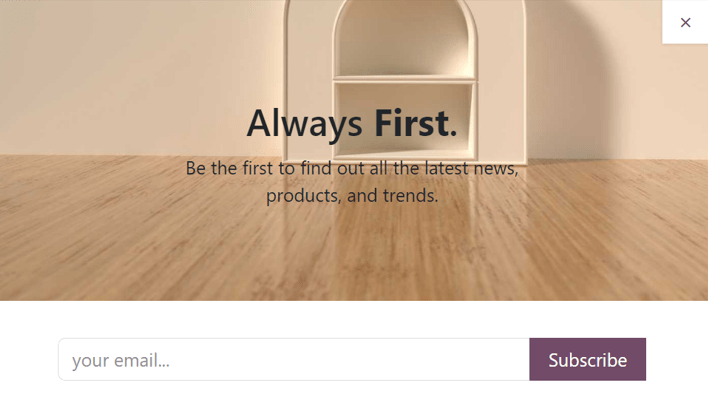
The Newsletter Popup option reveals a customizable pop-up window that appears when a visitor scrolls to the specific section of the webpage on which the building block is placed. When the visitor reaches the designated section, a pop-up window appears, in which a visitor can enter their email address, click a button, and subscribe to that predetermined mailing list.
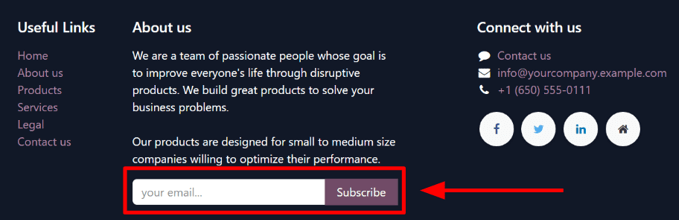
The Newsletter option provides the same functionality as the other options. However, it only consists of a field for the visitor to enter their email address, and a button to subscribe to the mailing list.
It is covertly designed in this fashion to be cleanly implemented into the content of the webpage and/or footer.
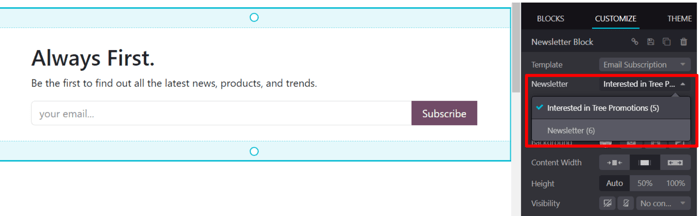
Once the desired newsletter building block is chosen, drag-and-drop it onto the body of the website. Then, select the newly-placed newsletter building block to reveal its configuration options on the right-sidebar.
From there, open the Newsletter drop-down menu, and select the specific mailing list that should be applied to the block.
Once the desired configurations and customizations are complete, be sure to click the Save button in the upper-right corner.
Now, when a visitor enters their email address, and clicks the button to subscribe, they are instantly subscribed to that pre-configured mailing list. They are also added as a contact for that mailing list in Odoo Email Marketing.