售后服务
可在*服务台*应用程序中为各个团队配置*售后*服务。启用后,用户可直接从工单中:ref:签发退款<helpdesk/refundds>、生成优惠券、处理退货。
设置售后服务
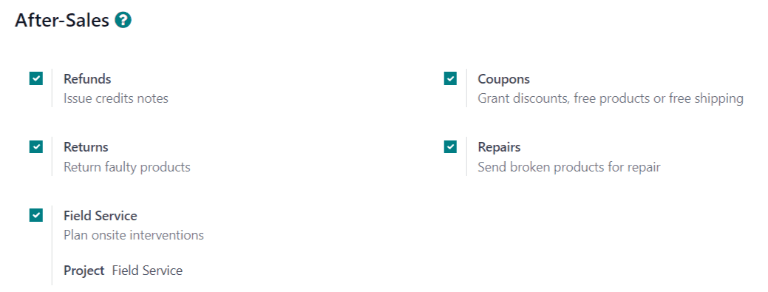
首先在特定*服务台*团队上启用售后服务,方法是进入:menuselection:服务台应用程序 --> 配置 --> 服务台团队,点击服务应适用的团队。然后,滚动到团队设置页面上的 售后 部分,选择要启用的以下选项:
Refunds: issues credit notes to refund a customer, or adjust the remaining amount due.
Coupons: offers discounts and free products through an existing coupon program.
Returns: initiates a product return from a customer through a reverse transfer.
Repairs: creates repair orders for broken or faulty products.
Field Service: plans onsite intervention through the Field Service application.
启用的服务可根据团队提供的支持类型而有所不同。
危险
由于 Odoo 中的所有售后服务都需要与其他应用程序整合,因此启用其中任何一项服务都可能导致安装额外的模块或应用程序。在“单一应用程序免费”数据库上安装新应用程序,会触发 15 天的试用期。试用期结束时,如果数据库中尚未添加付费订阅,则将无法再访问该数据库。
Issue refund with credit note
*贷记单据*是向客户出具的一份文件,通知客户已将一定金额贷记给他们。可用于向客户提供全额退款,或调整任何剩余应付金额。通常通过*会计*或*发票*应用程序创建,也可以通过*服务台*票据创建。
重要
Invoices must be posted before a credit note can be generated.
To create a credit note, navigate to a ticket on the , and click the Refund button in the top-left corner of the ticket form. This opens a Refund pop-up window.
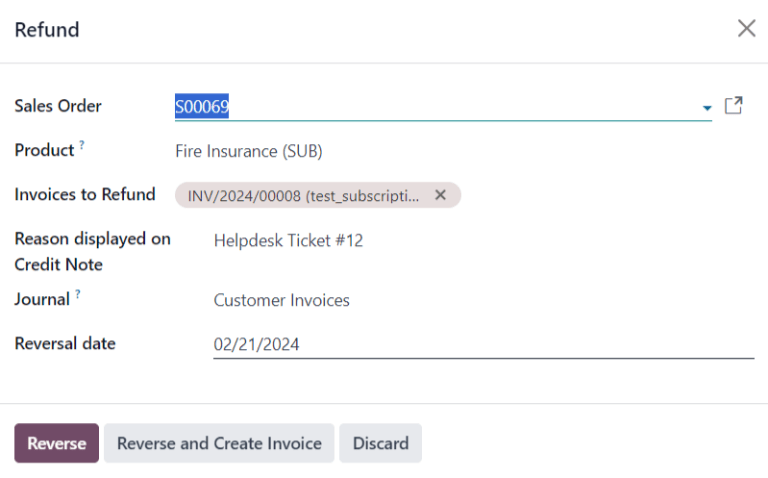
Fill out the fields with the necessary information:
Sales Order: if a sales order was referenced on the original ticket, it automatically populates in this field.
Product: the product the ticket is about. If an item is selected in this field, only the sales orders, deliveries, and invoices including this product can be selected.
Lot/Serial Number: this field is only visible if the Product selected has associated lot or serial numbers.
Invoices to Refund: this field is required. If no invoices are available in the drop-down, it indicates this customer currently has no posted invoices, or the Product has no related invoices.
Reason displayed on Credit Note: this field automatically populates with the ticket number, though it can be edited with additional information.
Journal: the accounting journal where the credit note should be posted. After an invoice is selected, this field defaults to the journal listed on the original invoice, though it can be changed, if necessary.
Reversal date: when this field is clicked, use the pop-up calendar that appears to select a date for the credit note invoice. This field is required.
After the necessary fields are filled in, click Reverse or Reverse and Create Invoice.
Reverse creates a credit note in a draft state that can be edited before it is posted. This option can be used to provide a partial refund.
Reverse and Create Invoice creates a credit note that is automatically posted as well as an invoice in a draft state. The invoice contains the same information as the original invoice, though this information can be altered.
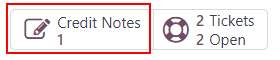
Once the credit note has been posted, a Credit Notes smart button is added to the Helpdesk ticket.
参见
从工单发放优惠券
优惠券可用于改变产品或订单的价格。条件规则定义了优惠券的使用限制。优惠券程序*在*销售、*POS*或*网站*应用程序中配置。
重要
必须安装**电子商务*模块,才能从*网站*创建优惠券代码。
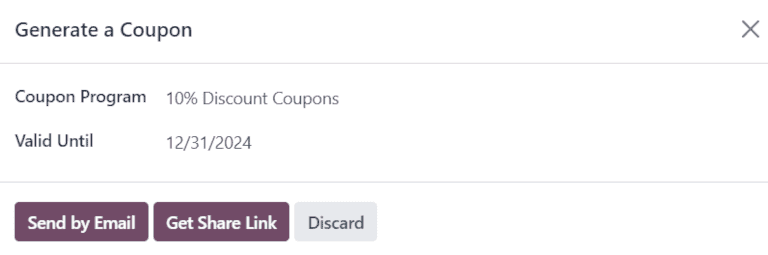
要生成优惠券,请打开*服务台*工单并点击左上角的 优惠券`按钮。在弹出的 :guilabel:`生成优惠券 窗口中,从 优惠券项目 下拉菜单中选择一个选项。
注解
要创建新的 优惠券计划,请导航至 ,然后点击 新建。要与*服务台*客户共享该计划,**必须**将 项目类型`设置为 :guilabel:`优惠券。这将生成一次性使用的优惠券代码,可立即获得奖励和折扣。
Coupon programs can also be created in the Point of Sale application or Website application. Refer to discount and loyalty programs for more information.
Click on the Valid Until field, and use the pop-up calendar to select an expiration date for this coupon code. If this field is left blank, the code does not expire.
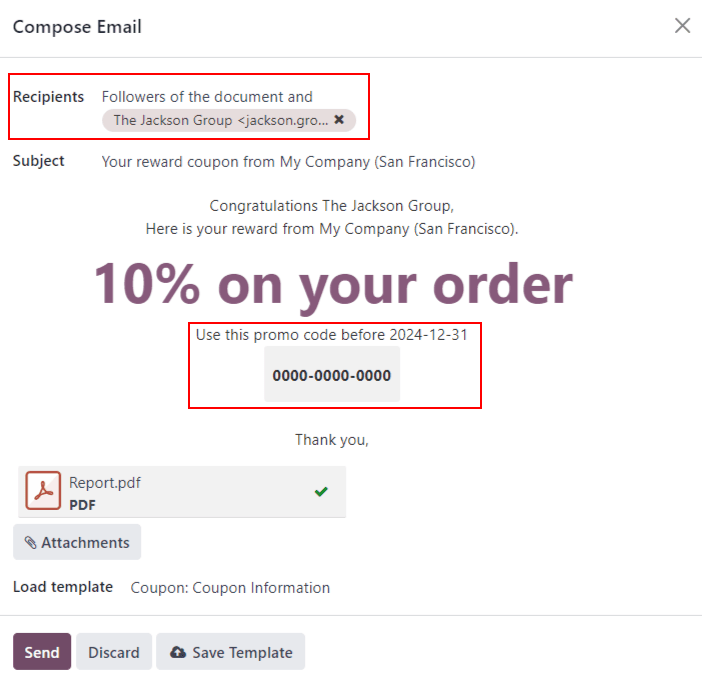
Click Send by Email to compose an email to send to the customer with the coupon code.
注解
When emailing a coupon code, all the followers of the ticket are added as recipients to the email. Additional recipients can be added to the email as well, in the Recipients field of the Compose Email pop-up window. If an expiration date was selected for the code, it is included in the message template.
Click Get Share Link to generate a link to send directly to the customer. Doing so opens a Share Coupons pop-up window. Click the Copy button next to the Share Link field and paste the results to any communication with the customer. When the customer uses the link, the code is automatically applied to their cart.
After a Coupon Code has been generated, a Coupons smart button is added to the top of the ticket; click the smart button to view the coupon code, expiration date, and additional information.

通过逆向转移促进产品退货
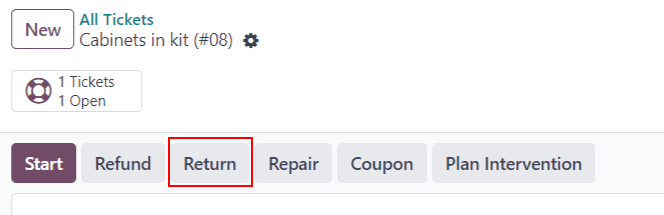
退货通过*逆向转移*完成,为退货产品生成新的仓库操作。点击工单左上角的 退货 按钮,打开 逆向转移 弹出窗口。
重要
The Return button only appears on a ticket if the customer has a recorded delivery in the database.
Select a Sales Order or Delivery to Return to identify the products that need to be returned.
By default, the quantity matches the validated quantity from the delivery order. Update the Quantity field, if necessary. To remove a line, click the 🗑️ (trash can) icon.
Select a Return Location where the items should be directed after the return is completed.
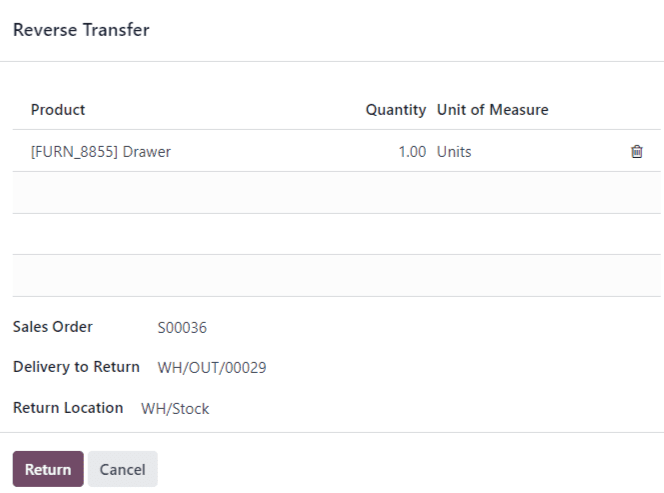
Click Return to confirm the return. This generates a new warehouse operation for the incoming returned products.
Use the breadcrumbs to return to the helpdesk ticket. A new Return smart button can now be accessed at the top of the ticket.

参见
通过工单发送产品进行维修
If the ticket is related to an issue with a faulty or broken product, a repair order can be created from the Helpdesk ticket, and managed through the Repairs application.
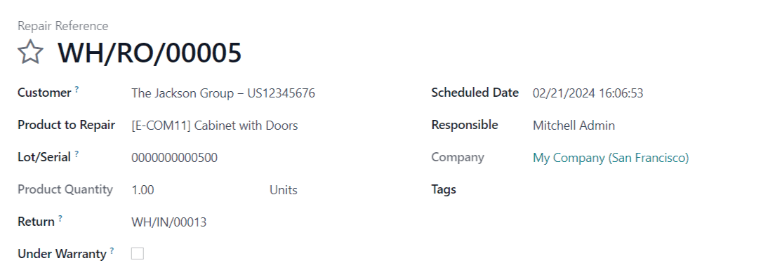
要创建新维修单,请打开:menuselection:服务台`工单并单击左上角的:guilabel:`维修`按钮。将打开 :guilabel:`维修参考 表单。
Fill out the fields with the necessary information:
客户:该字段沿用工单,但可从下拉菜单中选择新联系人。
要维修的产品:如果在工单得 产品 字段中指定了产品,则该产品将自动添加到此字段中。如果没有,请点击该字段,从下拉菜单中选择产品。
批次/编号:**只有**通过批号或序列号追踪维修的产品时,此字段才可见。
退货:要维修的产品来自的退货订单。
在保修期内:如果选中此复选框,维修订单中所有产品的销售价格都将设为零。
计划日期:该字段默认为当前日期。要选择新日期,请点击该字段,然后使用下拉日历选择日期。
负责人:从下拉菜单中指定一个用户来管理维修。
标签:点击此字段,可指定现有标签或创建新标签。可指定多个标签。
如果维修需要部件,可在 部件 选项卡中添加。内部维修团队的其他信息可添加到 维修说明 选项卡中。
表格填写完成后,请点击 确认维修。要创建、编辑和发送此维修的报价,请单击 创建报价。
然后会在工单上添加一个 维修 智能按钮,关联到维修单。

小技巧
用户从 服务台 票单创建维修单后,即使没有 维修 应用程序的访问权限,也可以通过票单的 维修 智能按钮或聊天记录中的链接访问。
从工单创建现场服务任务
现场干预可以通过工单进行计划,并通过 现场服务 应用程序进行管理。拥有 门户访问 的客户能够像追踪*服务台*工单一样追踪*现场服务* 任务的进度。
小技巧
要更改团队默认 现场服务 项目,请进入 选择 团队。滚动到 售后 部分,在 现场服务 下选择一个项目。
要创建新的*现场服务*任务,请导航到 ,打开 创建现场服务任务 弹出窗口。
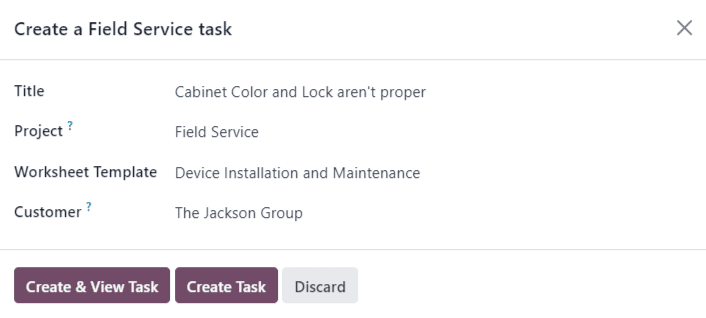
确认或更新任务 标题。
在:guilabel:创建现场服务任务`弹出窗口中,:guilabel:`项目`字段默认为与团队设置页面上确定的*现场服务*项目相同。要更改此特定任务的项目,请从 :guilabel:`项目 字段中选择。
如果适用,请从下拉菜单中选择 工作表模板。
注解
*现场服务工作表*是详细记录现场工作完成情况的报告。工作完成后,客户会在工作表上签字,以确认工作已完成且客户满意。
如果分配给 服务台 团队的 现场服务 项目已启用工作表,并已分配默认模板,则该模板会自动出现在 工作表模板 下拉字段中。但是,仍可对该字段进行编辑,并选择其他模板。
如果*现场服务*项目未启用工作表,则:guilabel:`工作表模板`字段不会出现在:guilabel:`创建现场服务任务`弹出窗口中。
单击 创建任务 或 创建并查看任务。
创建任务后,会在工单中添加 任务 智能按钮,将 现场服务 任务链接到工单。

参见