Getting started
When working with a Point of Sale application, employees want a simple, and user-friendly solution. A solution that works online or offline and with any device.
A Point of Sale system is a fully integrated application that allows any transaction, automatically registers product moves in your stock, and gives you real-time statistics and consolidations across all shops.
Configuration
Make products available in the PoS
To make products available for sale, go to and open a product. In the Sales tab, enable Available in Point of Sale.

Note
You can also define if the product has to be weighted or not.
Configure your payment methods
To add a payment method, you first need to create it. Go to and click on create. Then, you can name your payment method and set it up.

Note
Don’t forget your credentials for methods using a payment terminal.
Now, you can select the payment method in your PoS settings. To do so, go to and open the PoS in which you want to include the payment method. Then, add the payment method.

Note
Configuration is the menu where you can edit all your point of sale settings. Some more features are available for restaurants.
Your first PoS session
Your first order
Open a new session from the dashboard by clicking on New Session.

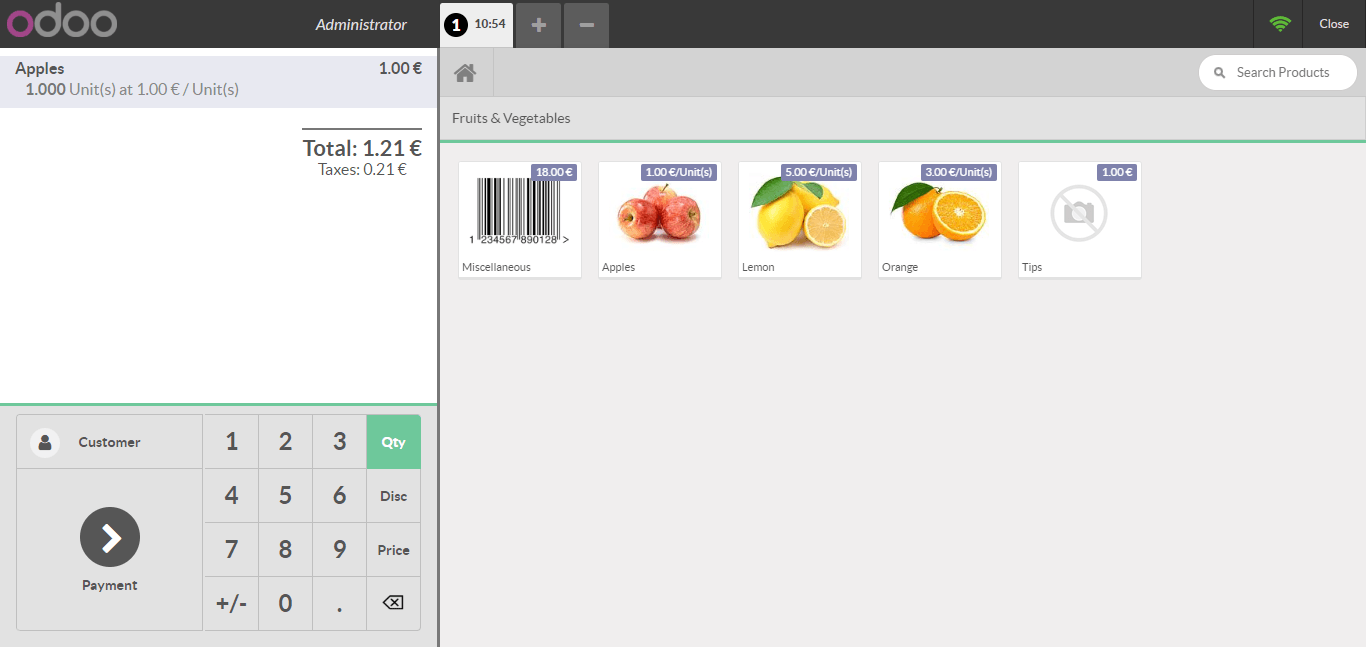
After the loading screen, you arrive on the PoS interface.

Once an order is completed, you can register the payment. All the available payment methods appear on the left of the screen. Select the payment method and enter the received amount. Then, you can validate the payment.
Tip
You can use both , and . on your keyboard as decimal separators.
Return and refund products
Having a well-thought-out return policy is key to keep customers satisfied and make the process of accepting returns and refunds easy for you.
To do that, from the PoS interface, select the product and quantity (with the +/- button) that the customer wants to return. For multiple products, repeat the process individually.

When on the payment interface, the total is negative. To end the refund, process the payment and validate it.

Close the PoS session
To close your session at the end of the day, click on the close button on the upper right corner of your screen and confirm. Now, close the session on the dashboard view.

Tip
It’s strongly advised to close your PoS session at the end of each day.
Once a session is closed, you can see a summary of all transactions per payment method. Then, click on a line to see all orders that were paid during your PoS session. If everything is correct, validate the session and post the closing entries.

Tip
To connect the PoS hardware with an Odoo IoT Box, please refer to these docs: Connect an IoT Box to your database and Use the IoT Box for the PoS.
View your statistics
Keeping track of your sales is essential to get meaningful statistics. That’s why Odoo provides analyzes about your sales.
To access your statistics, go to . There, you can see various statistics in graph or pivot form.

You can also access them through the dashboard.
