Use the Master Production Schedule
The Master Production Schedule (MPS) is a valuable tool to plan your production based on your demand forecast.
Configuration
Go to the and activate the Master Production Schedule feature before hitting save.

Tip
In the manufacturing settings, you can define the time range of your MPS (month/week/day) and the number of periods you want to display.
Now, go in and click on add a product. You can now define your safety stock target (= the stock you want to have on hand at the end of the period) and the minimum and maximum quantities to replenish.

Tip
The products are ordered in the MPS based on their sequence. You can rearrange that sequence by going on the list of your products and reorganize them with drag and drop.

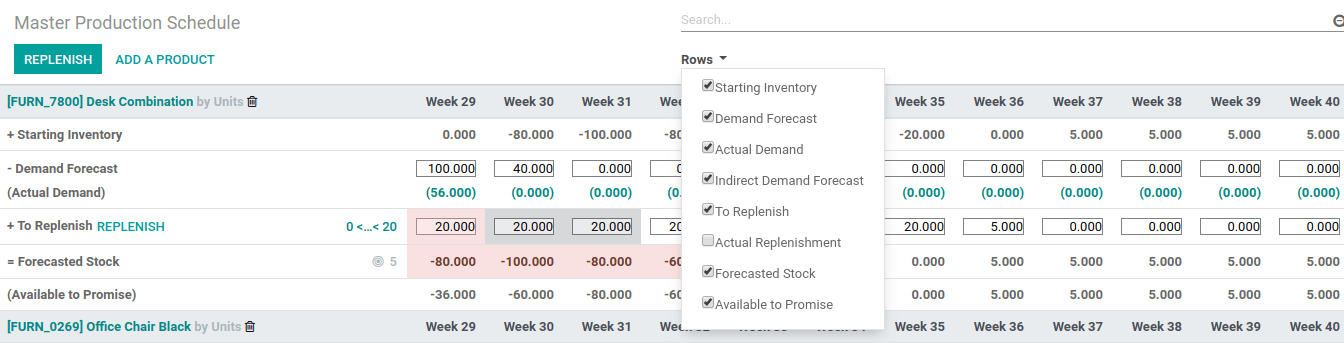
In the MPS view, you can decide which information you would like to show by clicking on rows. Some fields can be added to the view, such as Actual demand, which will show which quantity of products has already been ordered for the period, or Available to Promise, which allows you to know what can still be sold during the period (what you plan to replenish - what is already sold during the period). You can also decide to hide some information if it isn’t necessary.
Estimate your demand and launch replenishment
The next step is to estimate the demand for the period. This estimation should be entered in the row Demand Forecast. You can easily, at any time, compare the demand forecast with the actual demand (= confirmed sales). The demand forecast for a finished product will impact the indirect demand for its components.

Then, the quantity to replenish for the different periods will be automatically computed. The replenishments you are supposed to launch based on your lead times (vendor lead time or manufacturing lead time) are displayed in green. You can now launch the replenishment by clicking on the replenish button.
Depending on the configuration of the product (buy vs. manufacture), requests for quotations or manufacturing orders will be created. You can easily access those by clicking on the Actual Replenishment cell.


In case you manually edit the To replenish quantity, a small cross will appear on the left. In case you want to go back to the automatically computed value given by Odoo, you can click the cross.

Cells color signification
The cells, which are part of the To replenish line, can take different colors depending on the situation:
Green: quantity of products which should be replenished to reach the expected safety stock considering the demand forecast and the indirect demand forecast.
Grey: replenishment order has already been generated, and its quantity still matches current data.
Red: replenishment order has already been generated, and its quantity was too high considering current data.
Orange: replenishment order has already been generated, and its quantity was too low considering current data.
The Forecasted stock line can also contain red cells, which means the stock will be negative during the period in question.
What if I have underestimated the demand?
You can still increase the demand forecast. It will impact the quantity to replenish. The cell will become orange, and you’ll be able to launch a new replenishment.
What if I have overestimated the demand?
You can decrease the demand forecast. The cell will become red to inform you that you’ve ordered more than planned. If you’re still able to do it, you can cancel some RFQ or MO manually.
What if I wrongly added a product to the MPS?
You can easily remove a product from the MPS by clicking the small bin on the right of its name.
