Activate the Barcodes in Odoo
The barcode scanning features can save you a lot of time usually lost switching between the keyboard, the mouse and the scanner. Properly attributing barcodes to products, pickings locations, etc. allows you to work more efficiently by controlling the software almost exclusively with the barcode scanner.
Configuration
To use this feature, you first need to activate the Barcode functionality via . Once you have ticked the feature, you can hit save.

Set Product Barcodes
You can easily assign barcodes to your different products via the Inventory app. To do so, go to .

Then, you have the possibility to assign barcodes to your products directly at creation on the product form.

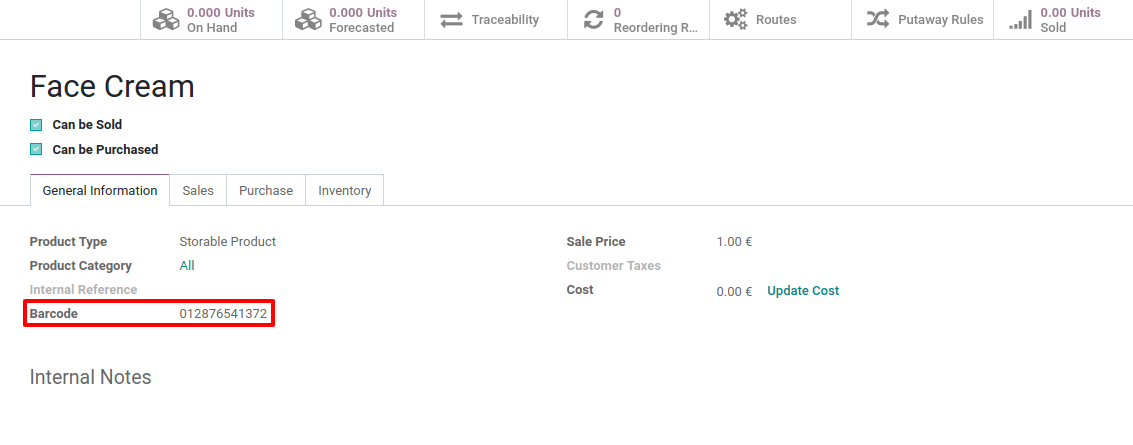
Note
Be careful to add barcodes directly on the product variants and not on the template product. Otherwise, you won’t be able to differentiate them.
Set Locations Barcodes
If you manage multiple locations, you will find useful to attribute a barcode to each location and stick it on the location. You can configure the locations barcodes in .
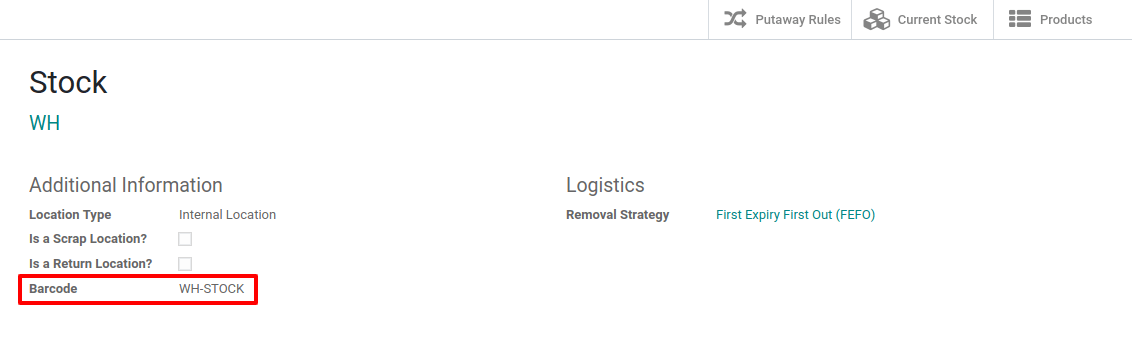

Note
You can easily print the barcode you allocate to the locations via the Print menu.
Barcode Formats
Most retail products use EAN-13 barcodes. They cannot be made up without proper authorization. You must pay the International Article Numbering Association a fee in exchange for an EAN code sequence.
Still, as Odoo supports any string as a barcode, you can always define your own barcode format for internal use.