Șabloane de e-mail
Știm toți că scrierea unor e-mailuri bune este vitală pentru a obține un rata mare de răspuns, dar nu doriți să rescrieți aceeași structură de fiecare dată, nu? Acesta este locul unde șabloanele de e-mail vin în ajutor. Fără nevoia de a rescrie întreaga structură de e-mail de fiecare dată, economisiți timp pentru a vă concentra pe conținut. Șabloanele multiple vă permit de asemenea să livrați mesajul potrivit publicului potrivit, îmbunătățindu-le astfel experiența generală cu compania.
Enable it and understand a few concepts
The Developer mode must be activated). Then, go to . A view of the existing templates is shown.
Pericol
It is highly recommended not to change the content in existing templates unless the user has prior knowledge about placeholders.
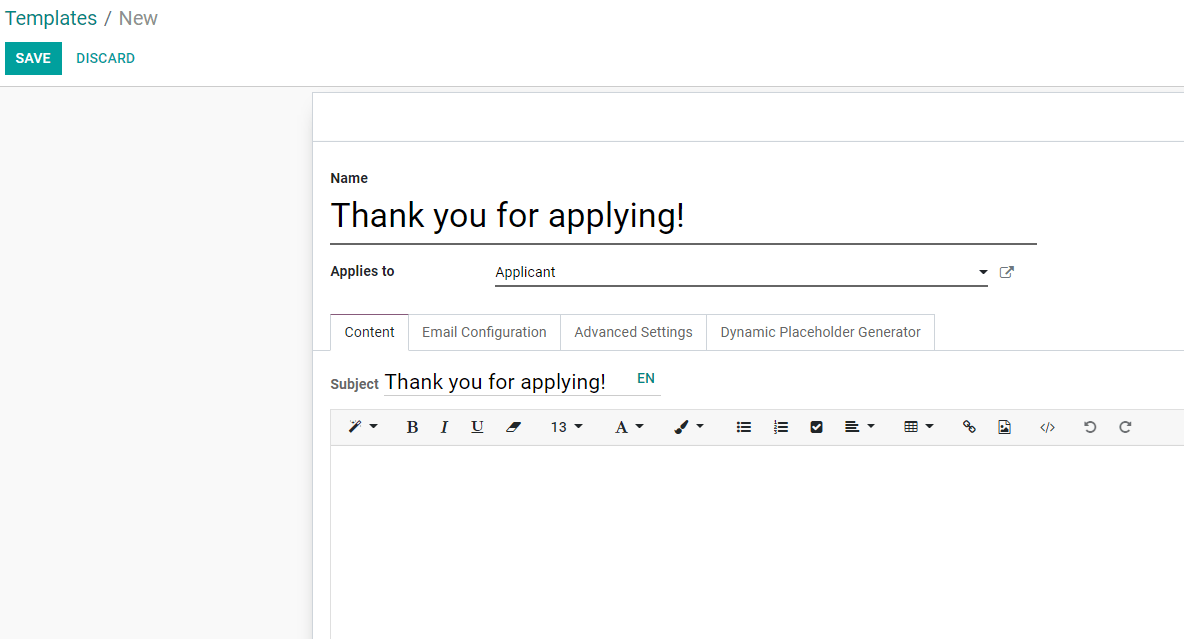
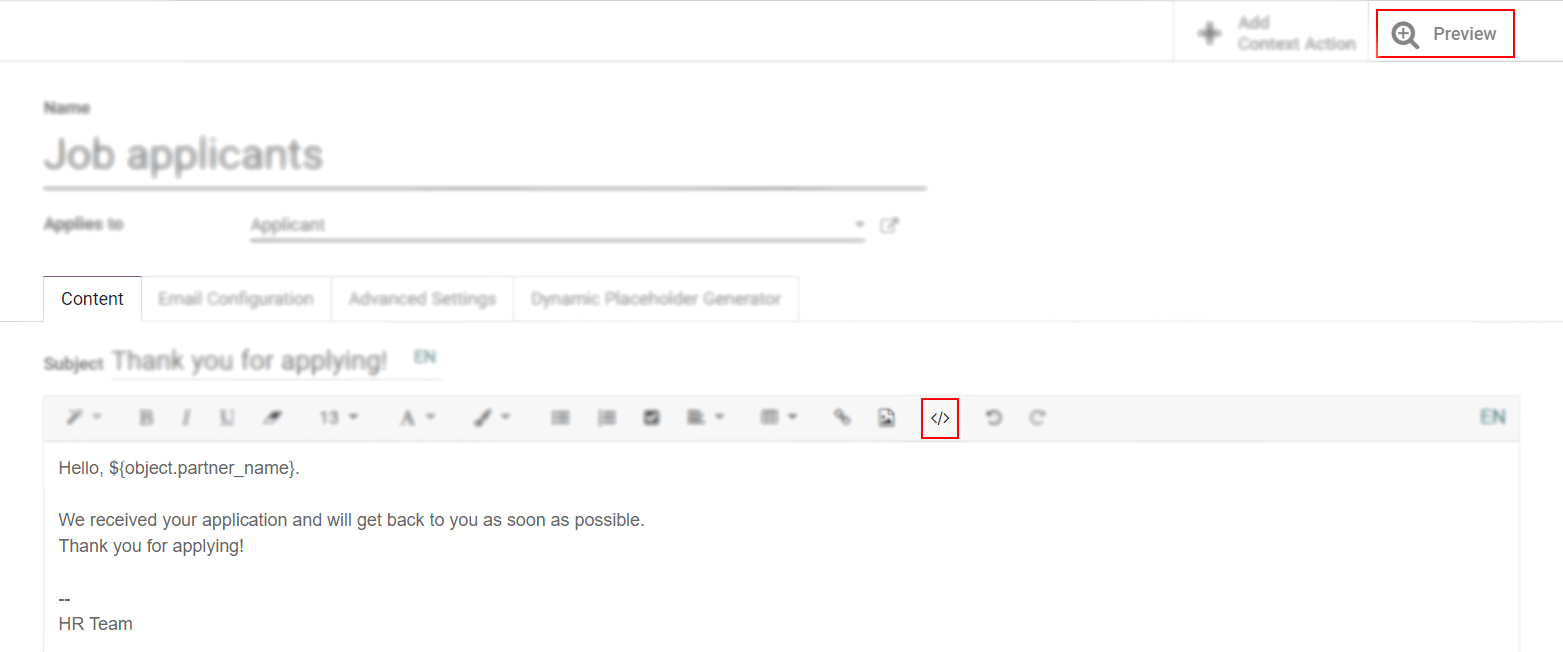
To add a new one, click on Create and choose the type of document this template is used with. In the example below, the template would be sent to job applicants.
Writing content including placeholder expressions
A placeholder is a string of characters that temporarily takes the place of the final data. With email templates, for example, placeholders let you put dynamic content in order to personalize the email for the recipient.
A common use is to use it to indicate the name of the recipient in the newsletter so that each recipient gets a personalized newsletter.
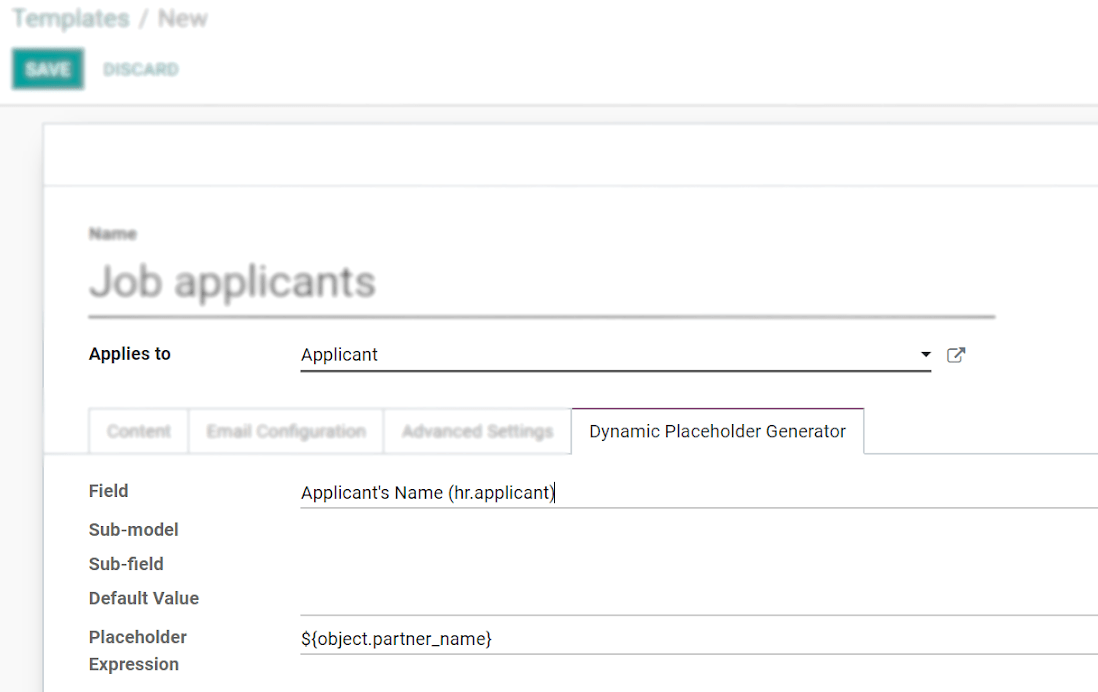
Placeholders and more specifically fields that are available for a template will depend on the template you modify. One way to see the fields that are available is to check the Dynamic Placeholder Generator tab.
Under the tab Dynamic Placeholder Generator, look for the Field you would like to use.
Next, copy the Placeholder Expression and paste it in the Body of the email, under the Content tab, using - essentially - the Code View.
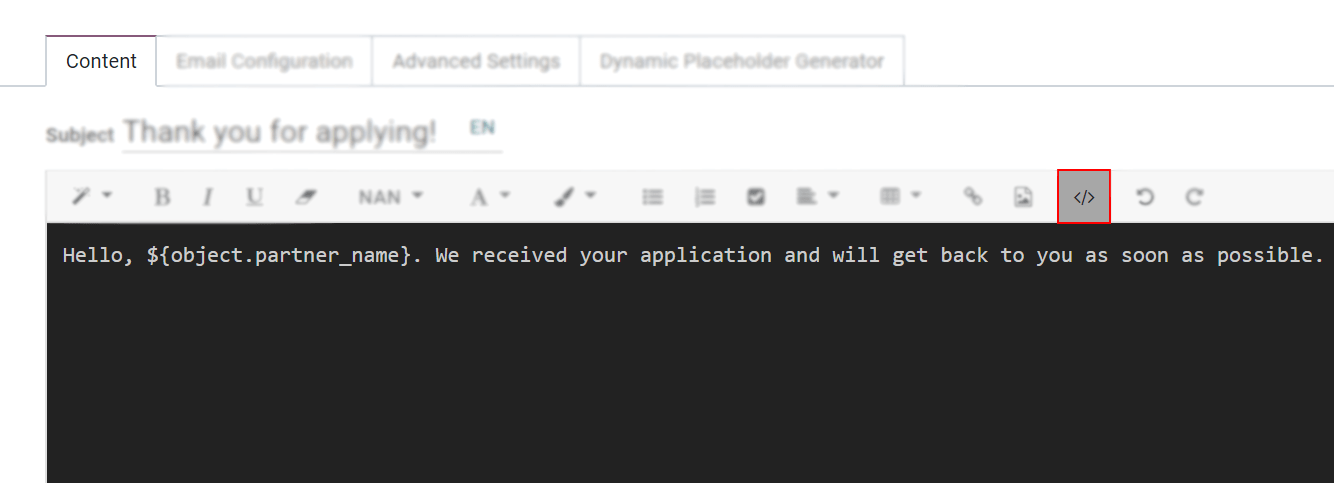
Deactivate the Code View option by simply clicking on it again, and easily design the message. Click on Preview to check how the email looks before sending it.
Using functions with placeholders
Functions can be used along with your placeholders in order to format the data as you’d like within
your mail templates, for example, the time format can be changed using a function such
as format_time.
In order to use functions, you have to know the available fields to format. To know that, you have to check the fields (the properties) of the object that are available to be used.
Checking the fields (properties) available on the object
To check the fields available, click on the link next to Applies to. For the example we use the Portal: new user template, so we click on Portal user Config.

By clicking on the link, you are redirected to the model, in this case the Portal user Config
model that lists all the fields that you can use within your mail template.
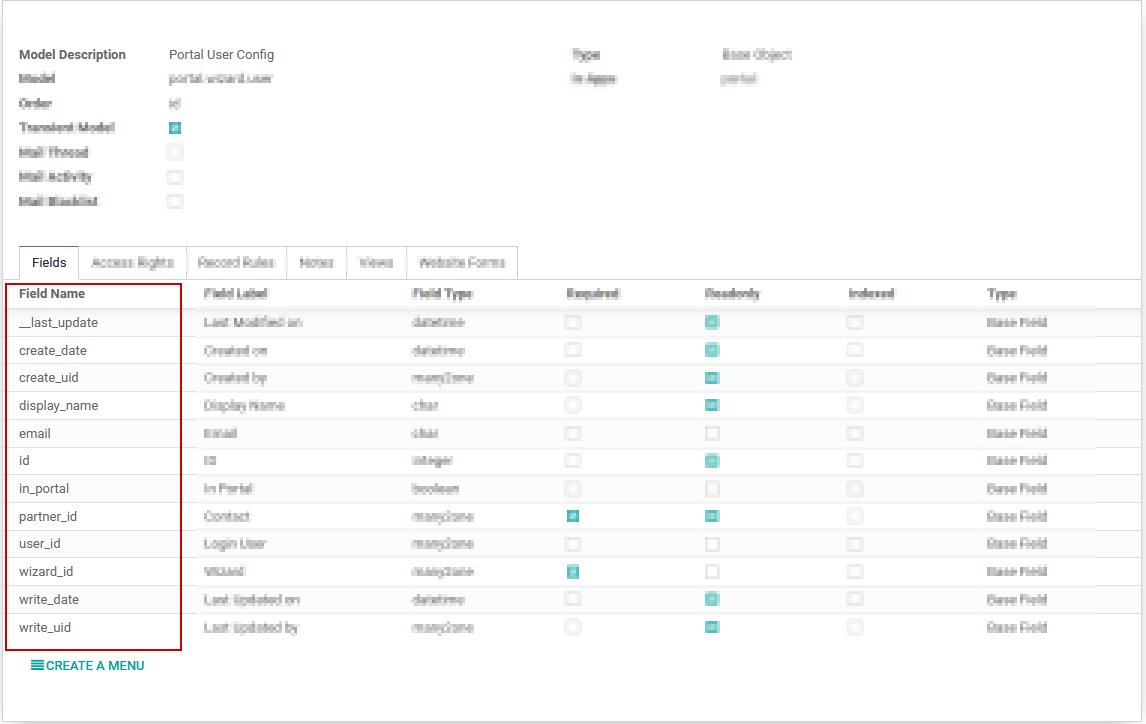
As a side note, you can also see the fields that are available by accessing the dynamic placeholder generator, as described previously.
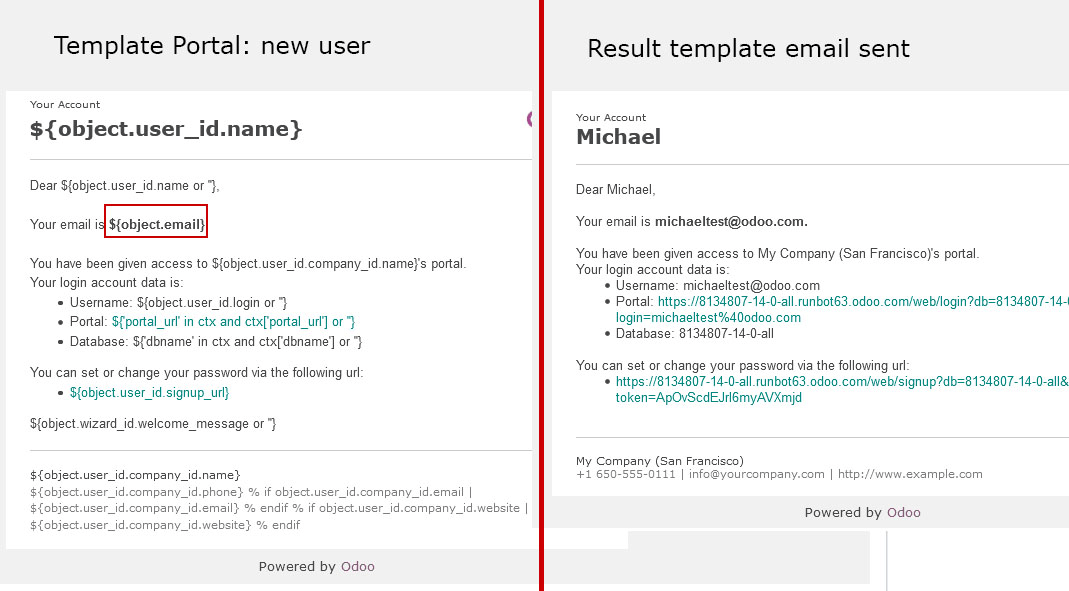
See below an example with the email field that was added in the template and its result as well as some other placeholders already present by default.
Using fields with functions
Now that you know the fields that can be used, you can use one of them with a function. For this
example, we add the creation date, create_date field to the body of the template ‘Portal: new user’
along with the format_date function so that the user knows when he was invited.
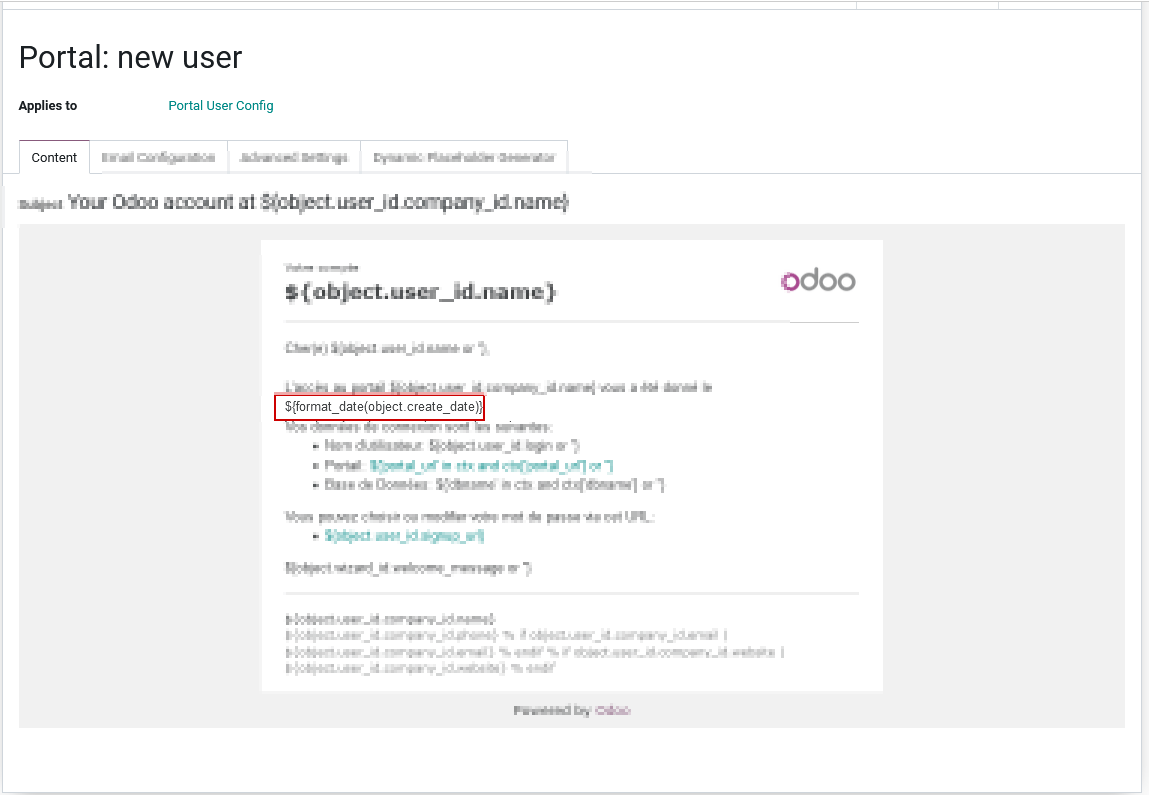
As you can see we use the placeholder ${} with the format_date function which uses as a
parameter the field create_date available on the current object, this gives the following line
of code ${format_date(object.create_date)}.
Atenționare
It’s really important to check that the preview is working, if it’s broken your template might appear totally blank when previewing it. We also recommend not changing the content in existing templates unless you have prior knowledge. We highly recommend duplicating the template and apply your changes within this one.
Find below the result of the e-mail received in the recipient’s mailbox with the modifications applied.
Still by using the format_date function, you have the possibility to adapt the format of the
date just in a specific email by specifying the formatting of the date as a second parameter.
If not specified, the format used by default is the one defined in the settings of the language.
More information on how to access these parameters can be found here.
In order to adapt the date format, the piece of code used in the above example
${format_date(object.create_date)} becomes ${format_date(object.create_date, date_format='dd -- MM -- YYYY')}
here dd is the day, MM the month and YYYY the year.
Here is the result once the function is adapted in the template.

Functions used by default within email templates
To format your data, many functions can be used, here are some examples.
Notă
This list of functions is not exhaustive, meaning that all functions that are available aren’t listed in the below list, for more functions, we invite you to check the babel documentation, last but not least, modifications on the templates are considered as customization and isn’t covered by our support.
For the following examples, we will introduce mostly some date functions. By default, the format of the date used is the one defined in the settings of the language.
These settings can only be accessed when the developer mode is enabled. Once developer is enabled go to and click on one of the languages to see all the settings such as the time format or date format used by the language.
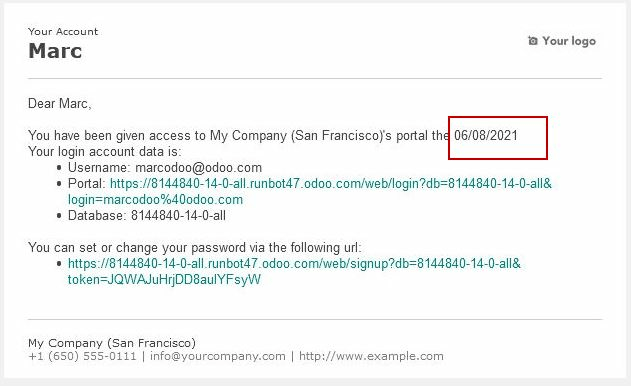
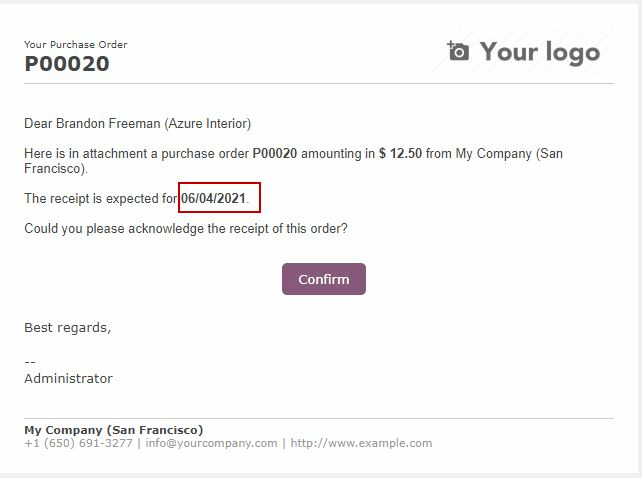
format_date() - formats the date (without the time).
Can be found on the template
Purchase Order: Send PO:
The result will look like this:
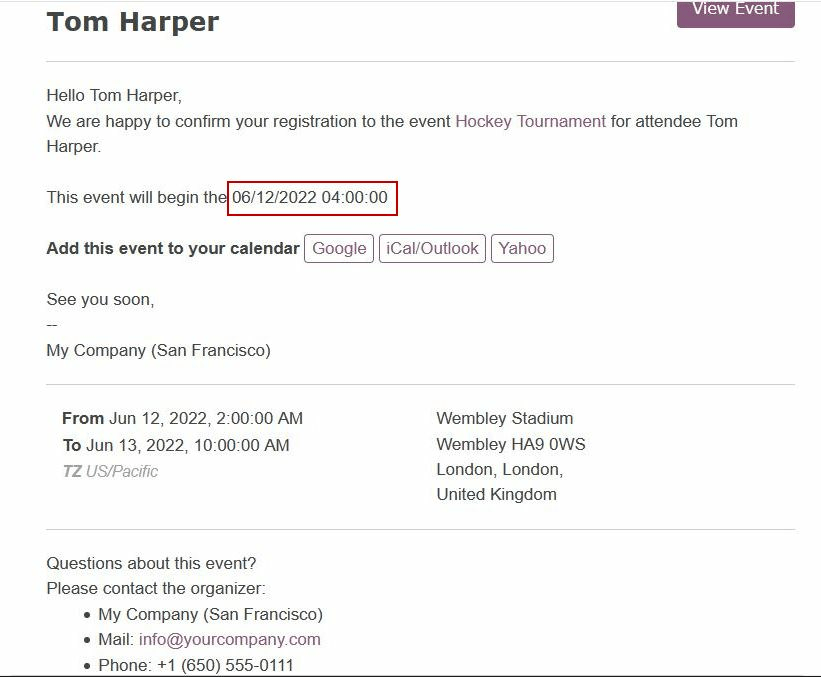
format_datetime() - formats the datetime, defining a specific timezone, in this case Central European Time (CET).
Can be found on the template
Event: Registration.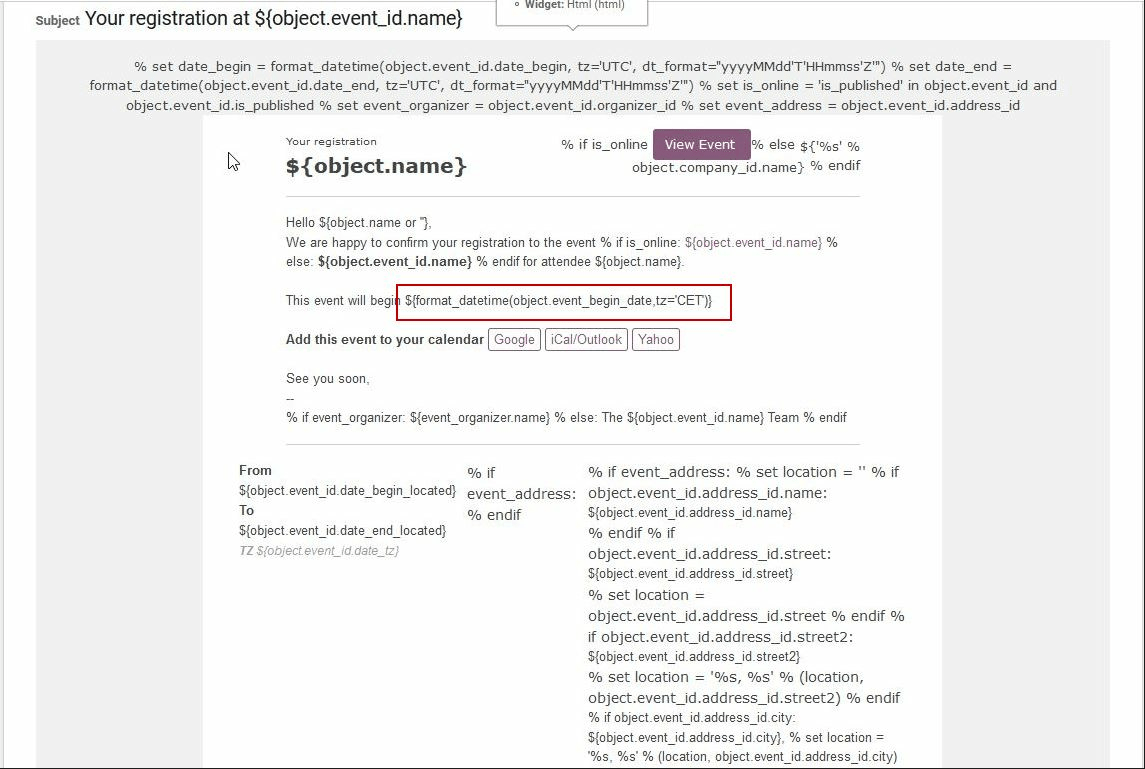
The result will look like this:
format_time() - Similar to the format_datetime function except It’s used only for the time, not a date.
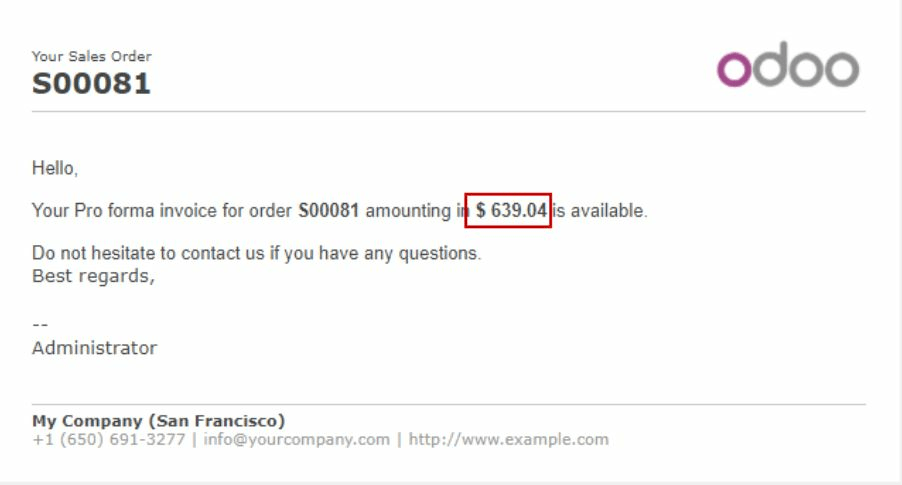
format_amount() - Formats a number, an amount to display the currency depending on the display setting that has been defined on the currency (the debug mode must be activated to see this feature) (before or after the amount depending on the convention).
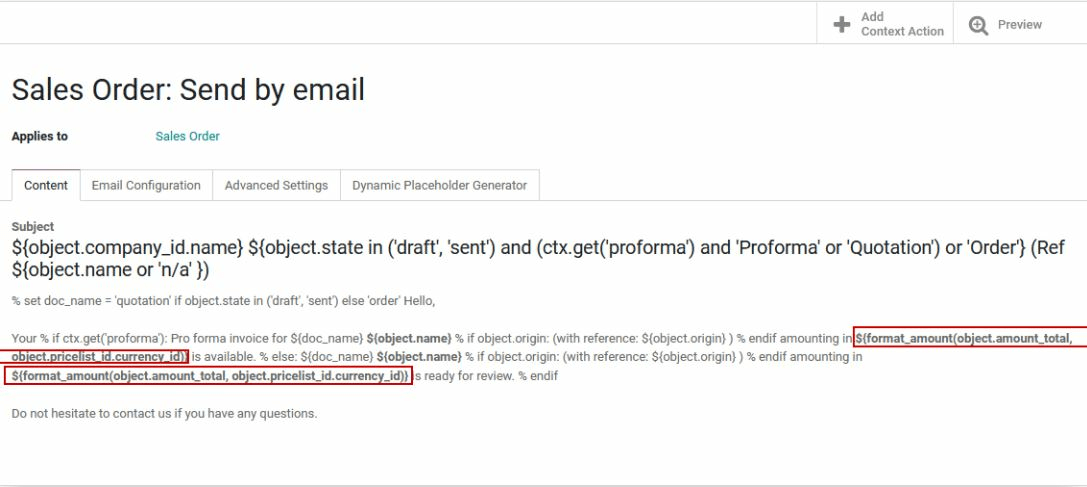
Which will look like this:
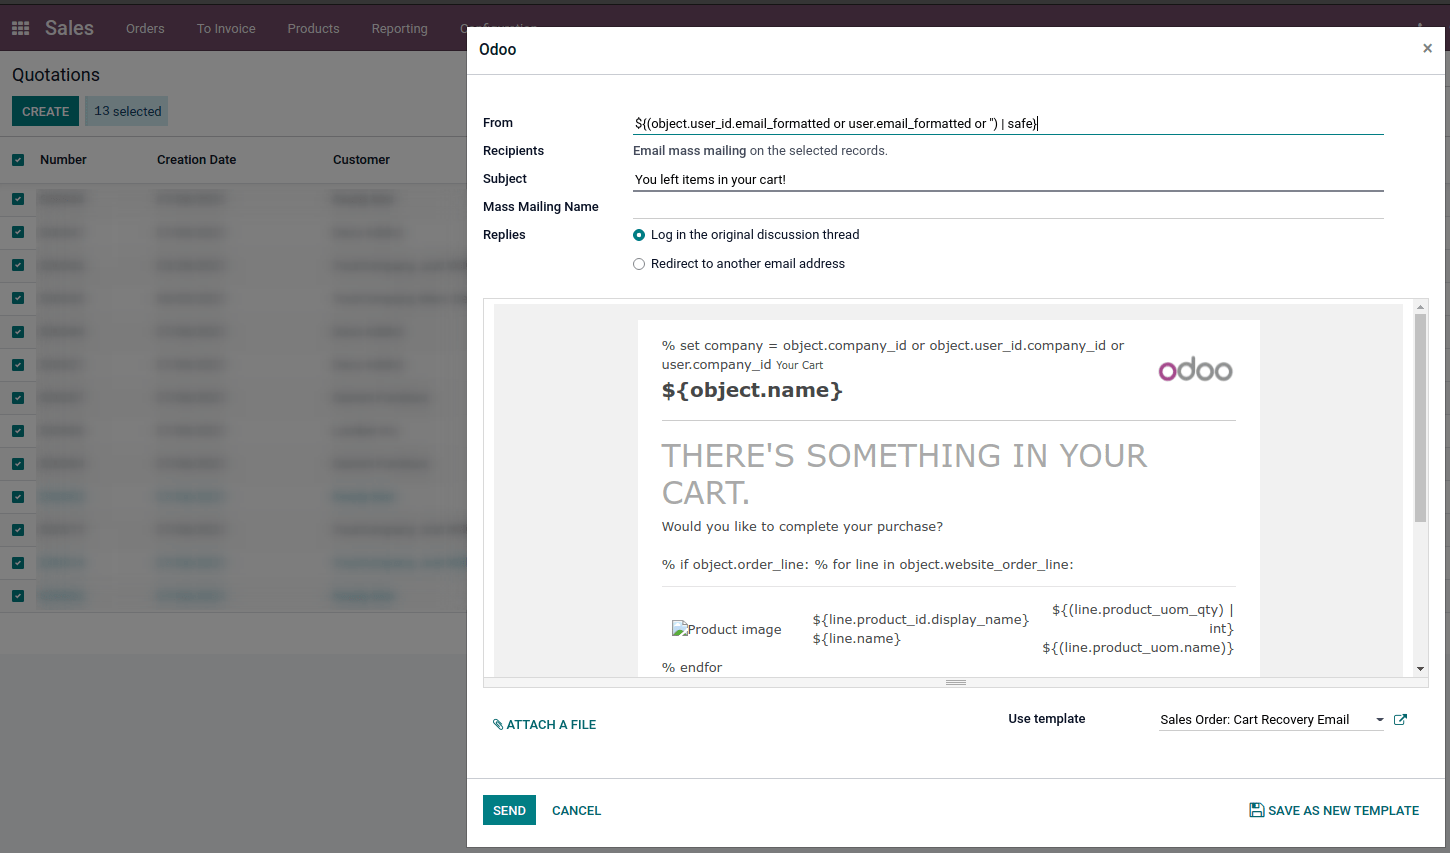
Definirea unui răspuns implicit la șablonul dvs. de e-mail
Deși câmpul răspunde la este disponibil în șabloanele de e-mail, acest câmp este utilizat doar pentru modul de e-mail de masă (aceasta înseamnă când trimiteți șabloane pe ceea ce numim e-mailing în bloc). Puteți trimite e-mailuri în bloc în aproape toate aplicațiile care au o vizualizare a listei. Selectați înregistrările pe care doriți să le trimiteți și faceți clic pe butonul de acțiune. Dacă aveți o opțiune pentru a trimite un e-mail, veți vedea un compozitor de e-mail cu posibile valori pentru a defini:
De asemenea, puteți să le definiți implicit pe șablon:
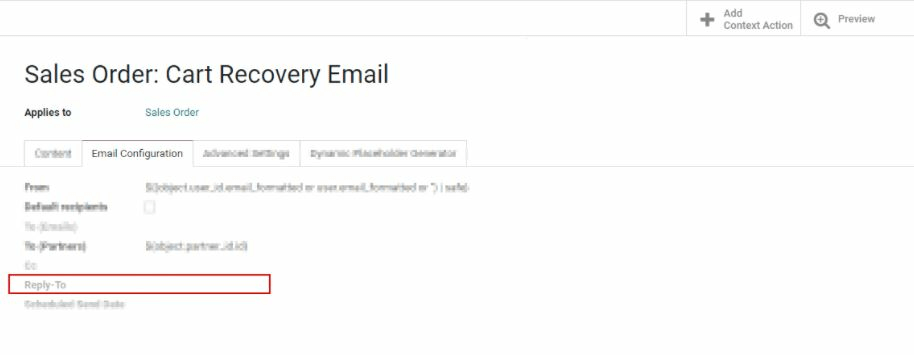
Din acest motiv, setarea unei valori în acest câmp este inutilă deoarece valoarea definită va fi complet ignorată. Valoarea implicită răspunde la este adresa de e-mail implicită pentru a asigura o comunicare între clientul dvs. și baza de date Odoo. Pentru mai multe informații despre modul în care funcționează catchall, consultați: cum să gestionați mesajele de intrare.
Emailuri transacționale și URL-ul corespunzător pentru fiecare companie
Când utilizați Odoo, mai multe evenimente declanșează trimiterea de e-mailuri automate. Aceste e-mailuri sunt cunoscute sub numele de e-mailuri transacționale și uneori conțin link-uri care indică baza de date Odoo.
În mod implicit, link-urile generate de baza de date utiliză cheia web.base.url din parametrii de sistem. Mai multe informații despre acest parametru.
Dacă aplicația website nu este instalată, cheia web.base.url va fi întotdeauna parametrul implicit utilizat pentru a genera toate link-urile.
Este important să știți că această cheie poate avea doar o singură valoare, ceea ce înseamnă că într-o mediu multi-website/companie, chiar dacă aveți un nume de domeniu specific pentru fiecare website, link-urile generate pentru a partaja un document sau într-un e-mail transacțional pot rămâne aceleași, indiferent de website/companie legate de trimiterea e-mailului/documentului.
Acest lucru nu este întotdeauna adevărat deoarece unele aplicații Odoo au un link stabilit în baza de date cu aplicația website, ceea ce înseamnă că în acest caz, dacă un domeniu specific este definit pentru website-uri, URL-ul generat în șablonul de e-mail va utiliza domeniul definit pe website-ul corespunzător companiei.
Avertisment
Un document partajat utilizând aplicația documente va utiliza întotdeauna cheia web.base.url, deoarece documentul partajat nu este asociat cu nici un website anume. Ceea ce înseamnă că URL-ul va fi întotdeauna același (cheia web.base.url), indiferent de compania din care este partajat, aceasta este o limitare cunoscută!
De altfel, comenzile de vânzări făcute de un client pe unul dintre website-urile dvs. Odoo e-commerce au un link stabilit cu website-ul de unde a fost comanda a fost făcută. Ca rezultat, e-mailul trimis pentru comenzile de vânzări utilizează numele de domeniu definit pentru website-ul corespunzător pentru a genera link-urile.
Pentru mai multe informații despre cum să configurați domeniile, vă invităm să verificați documentația noastră despre numele de domeniu.
Actualizarea traducerilor în șabloanele de e-mail
Șabloanele de e-mail sunt traduse automat. Modificarea traducerilor nu ar trebui să fie necesară. Cu toate acestea, dacă pentru o anumită motiv vreți să modificați unele dintre traducerile, acest lucru poate fi făcut.
La fel ca orice modificare în cod, țineți minte că modificările care nu sunt făcute corect (de exemplu modificările care duc la o sintaxă greșită) pot strica șablonul, ca rezultat, șablonul va apărea gol.
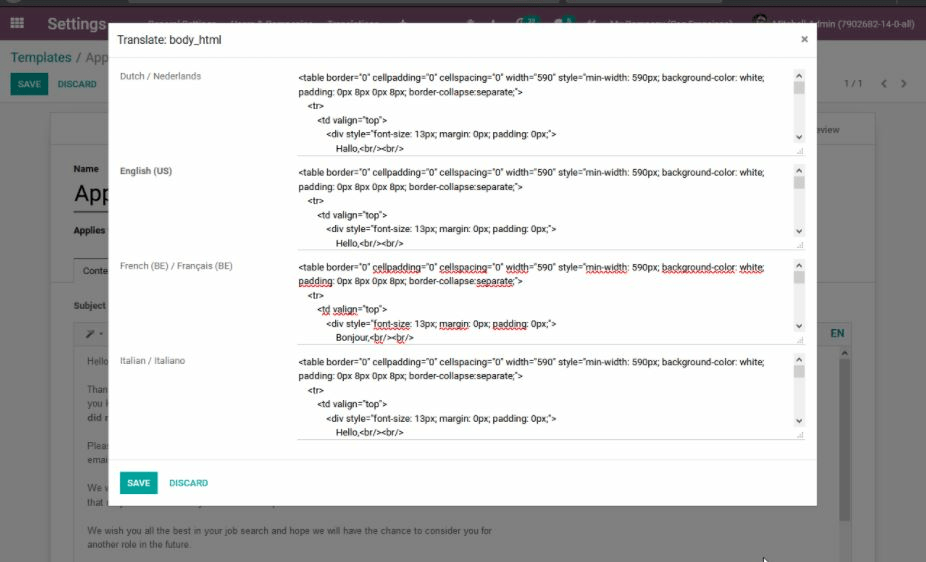
Pentru a edita traducerile, urmați acești pași din șablon.
Faceți clic pe butonul de editare, apoi pe butonul de limbă
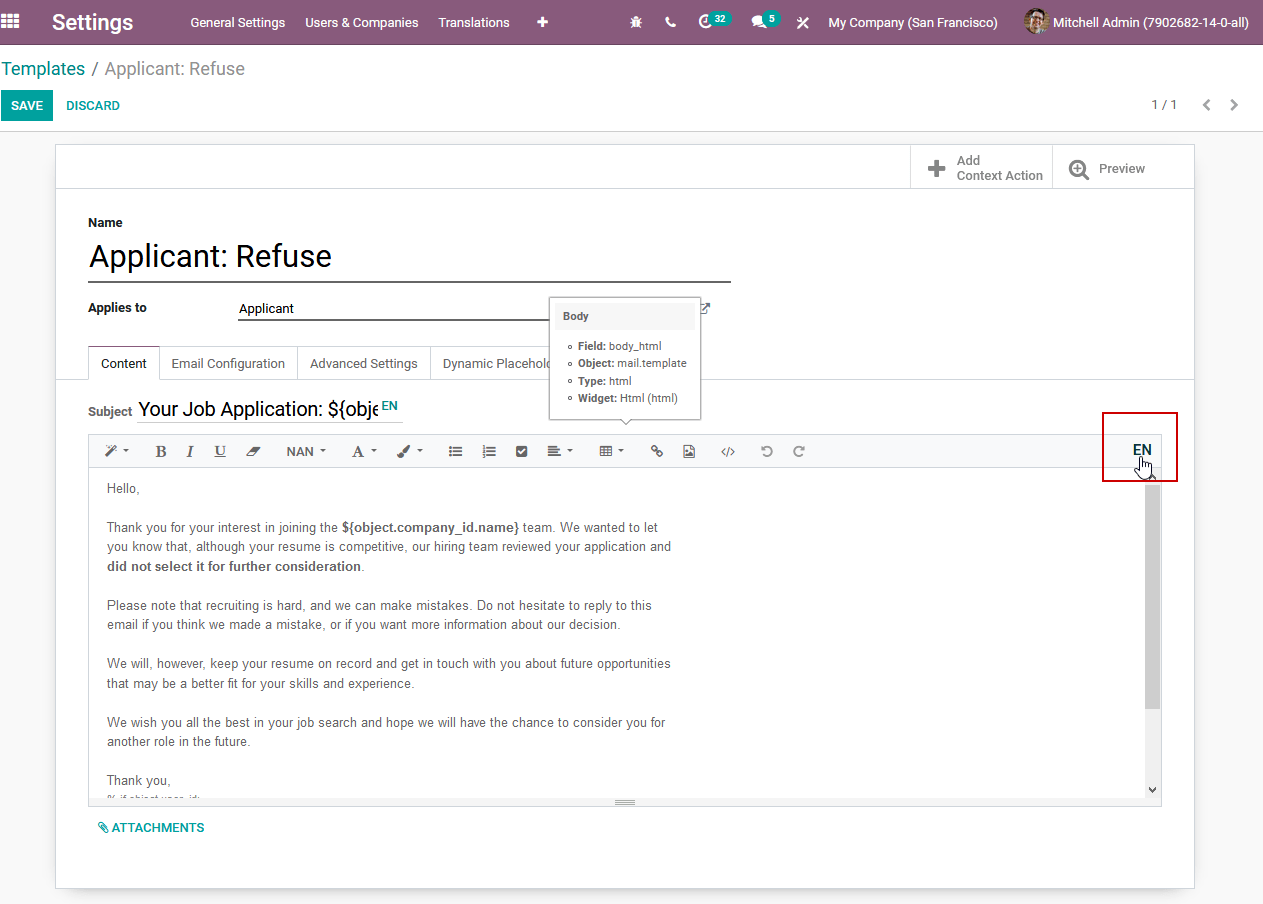
O fereastră pop-up cu diferitele limbi instalate în baza de date va fi afișată. De aici, editarea traducerilor va fi posibilă. Nu uitați să apăsați butonul de salvare pentru a păstra modificările.