Email Templates
We all know writing good emails is vital to get a high response rate, but you do not want to rewrite the same structure every time, do you? That is where email templates come in. Without the need to rewrite the entire email structure every time, you save time to focus on the content. Multiple templates also let you deliver the right message to the right audience, improving their overall experience with the company.
Enable it and understand a few concepts
The Developer mode must be activated). Then, go to . A view of the existing templates is shown.
Danger
It is highly recommended not to change the content in existing templates unless the user has prior knowledge about placeholders.
To add a new one, click on Create and choose the type of document this template is used with. In the example below, the template would be sent to job applicants.

Writing content including placeholder expressions
A placeholder is a string of characters that temporarily takes the place of the final data. With email templates, for example, placeholders let you put dynamic content in order to personalize the email for the recipient.
A common use is to use it to indicate the name of the recipient in the newsletter so that each recipient gets a personalized newsletter.
Placeholders and more specifically fields that are available for a template will depend on the template you modify. One way to see the fields that are available is to check the Dynamic Placeholder Generator tab.
Under the tab Dynamic Placeholder Generator, look for the Field you would like to use.

Next, copy the Placeholder Expression and paste it in the Body of the email, under the Content tab, using - essentially - the Code View.
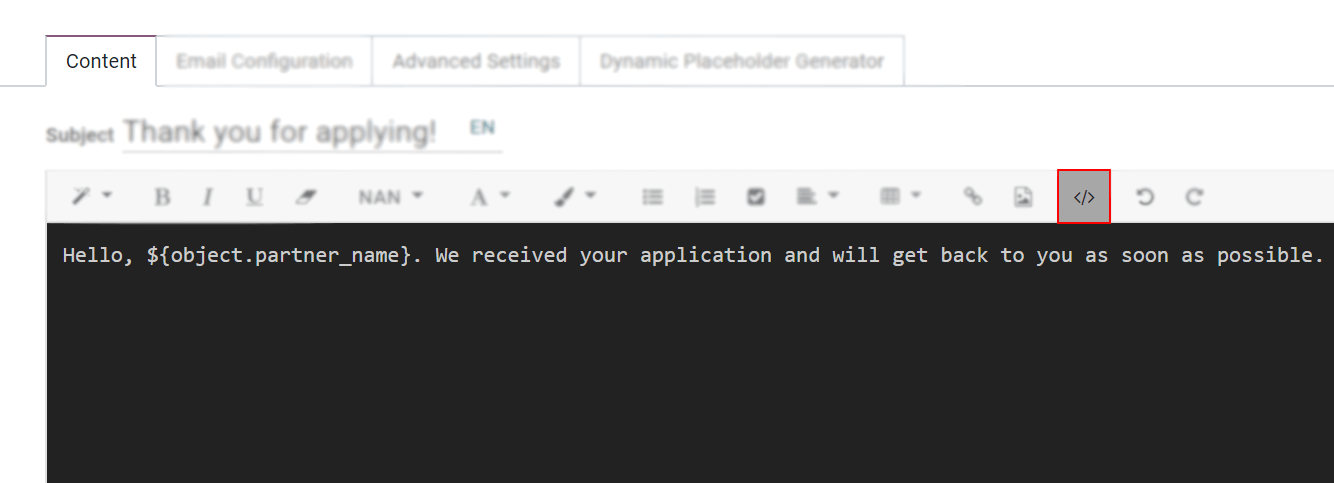
Deactivate the Code View option by simply clicking on it again, and easily design the message. Click on Preview to check how the email looks before sending it.

Using functions with placeholders
Functions can be used along with your placeholders in order to format the data as you’d like within
your mail templates, for example, the time format can be changed using a function such
as format_time.
In order to use functions, you have to know the available fields to format. To know that, you have to check the fields (the properties) of the object that are available to be used.
Checking the fields (properties) available on the object
To check the fields available, click on the link next to Applies to. For the example we use the Portal: new user template, so we click on Portal user Config.
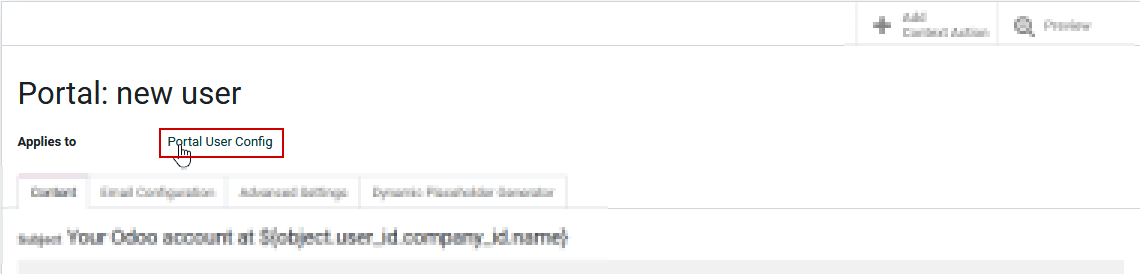
By clicking on the link, you are redirected to the model, in this case the Portal user Config
model that lists all the fields that you can use within your mail template.

As a side note, you can also see the fields that are available by accessing the dynamic placeholder generator, as described previously.
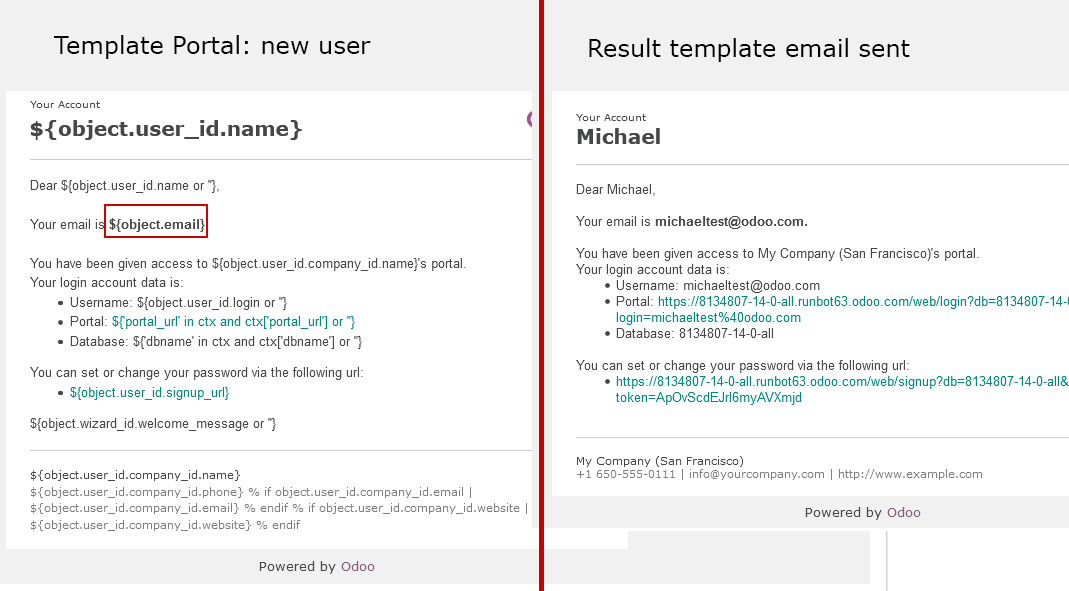
See below an example with the email field that was added in the template and its result as well as some other placeholders already present by default.
Using fields with functions
Now that you know the fields that can be used, you can use one of them with a function. For this
example, we add the creation date, create_date field to the body of the template ‘Portal: new user’
along with the format_date function so that the user knows when he was invited.
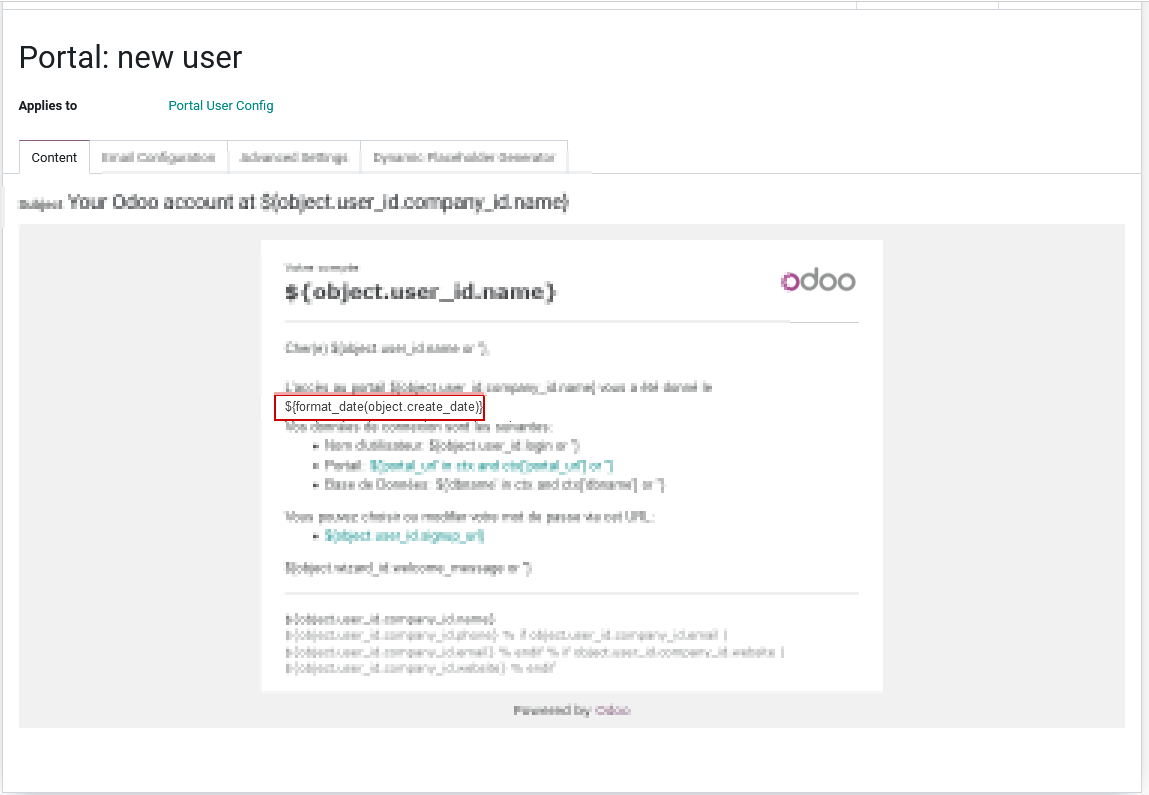
As you can see we use the placeholder ${} with the format_date function which uses as a
parameter the field create_date available on the current object, this gives the following line
of code ${format_date(object.create_date)}.
Warning
It’s really important to check that the preview is working, if it’s broken your template might appear totally blank when previewing it. We also recommend not changing the content in existing templates unless you have prior knowledge. We highly recommend duplicating the template and apply your changes within this one.
Find below the result of the e-mail received in the recipient’s mailbox with the modifications applied.
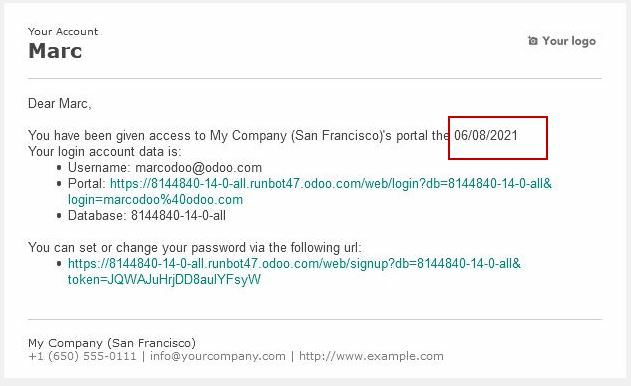
Still by using the format_date function, you have the possibility to adapt the format of the
date just in a specific email by specifying the formatting of the date as a second parameter.
If not specified, the format used by default is the one defined in the settings of the language.
More information on how to access these parameters can be found here.
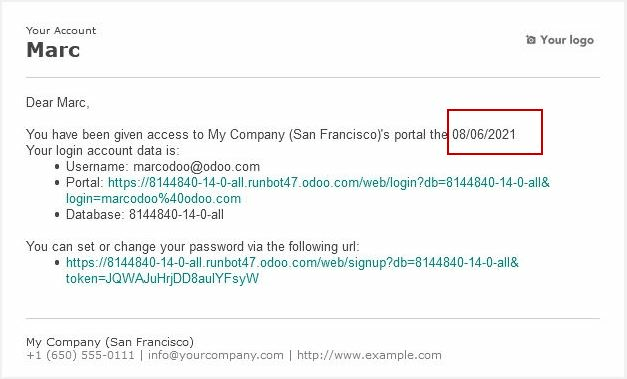
In order to adapt the date format, the piece of code used in the above example
${format_date(object.create_date)} becomes ${format_date(object.create_date, date_format='dd -- MM -- YYYY')}
here dd is the day, MM the month and YYYY the year.
Here is the result once the function is adapted in the template.
Functions used by default within email templates
To format your data, many functions can be used, here are some examples.
Note
This list of functions is not exhaustive, meaning that all functions that are available aren’t listed in the below list, for more functions, we invite you to check the babel documentation, last but not least, modifications on the templates are considered as customization and isn’t covered by our support.
For the following examples, we will introduce mostly some date functions. By default, the format of the date used is the one defined in the settings of the language.
These settings can only be accessed when the developer mode is enabled. Once developer is enabled go to and click on one of the languages to see all the settings such as the time format or date format used by the language.
format_date() - formats the date (without the time).
Can be found on the template
Purchase Order: Send PO:
The result will look like this:

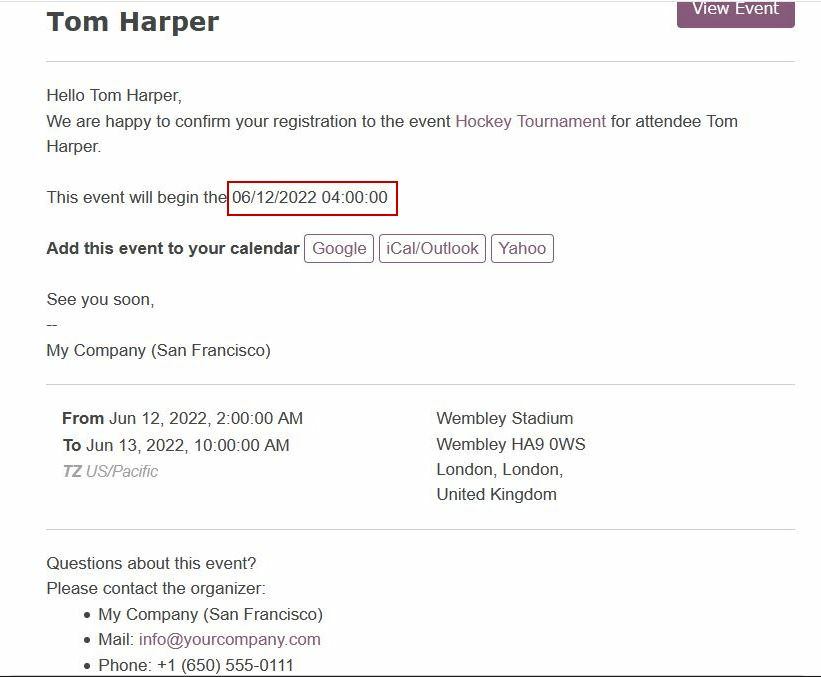
format_datetime() - formats the datetime, defining a specific timezone, in this case Central European Time (CET).
Can be found on the template
Event: Registration.
The result will look like this:
format_time() - Similar to the format_datetime function except It’s used only for the time, not a date.
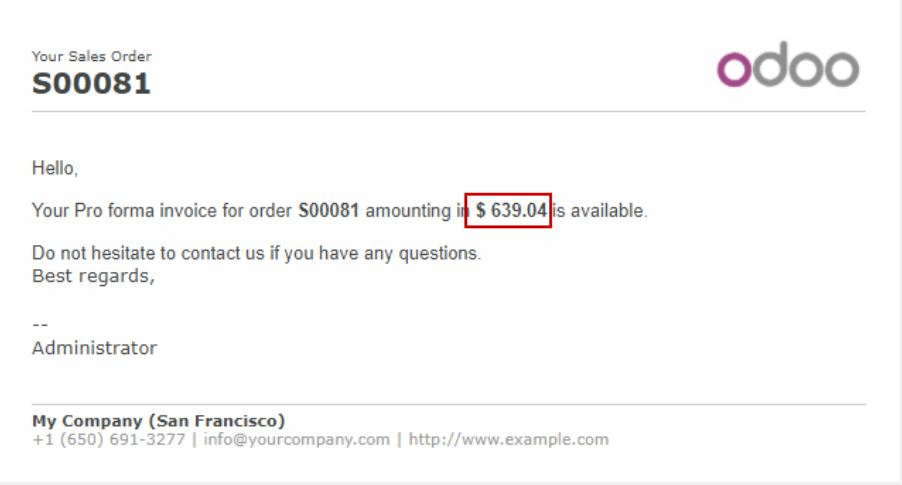
format_amount() - Formats a number, an amount to display the currency depending on the display setting that has been defined on the currency (the debug mode must be activated to see this feature) (before or after the amount depending on the convention).
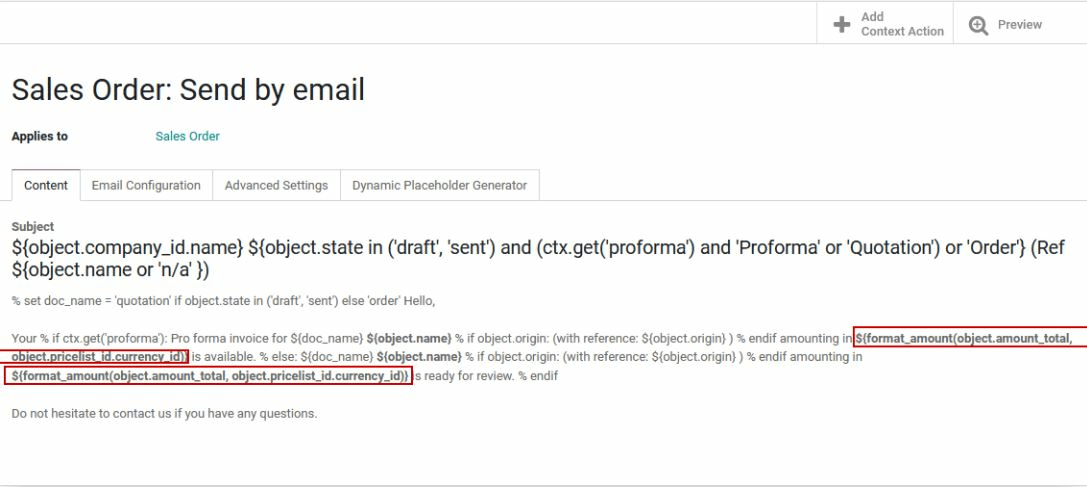
Which will look like this:
Defining a default reply to on your mail template
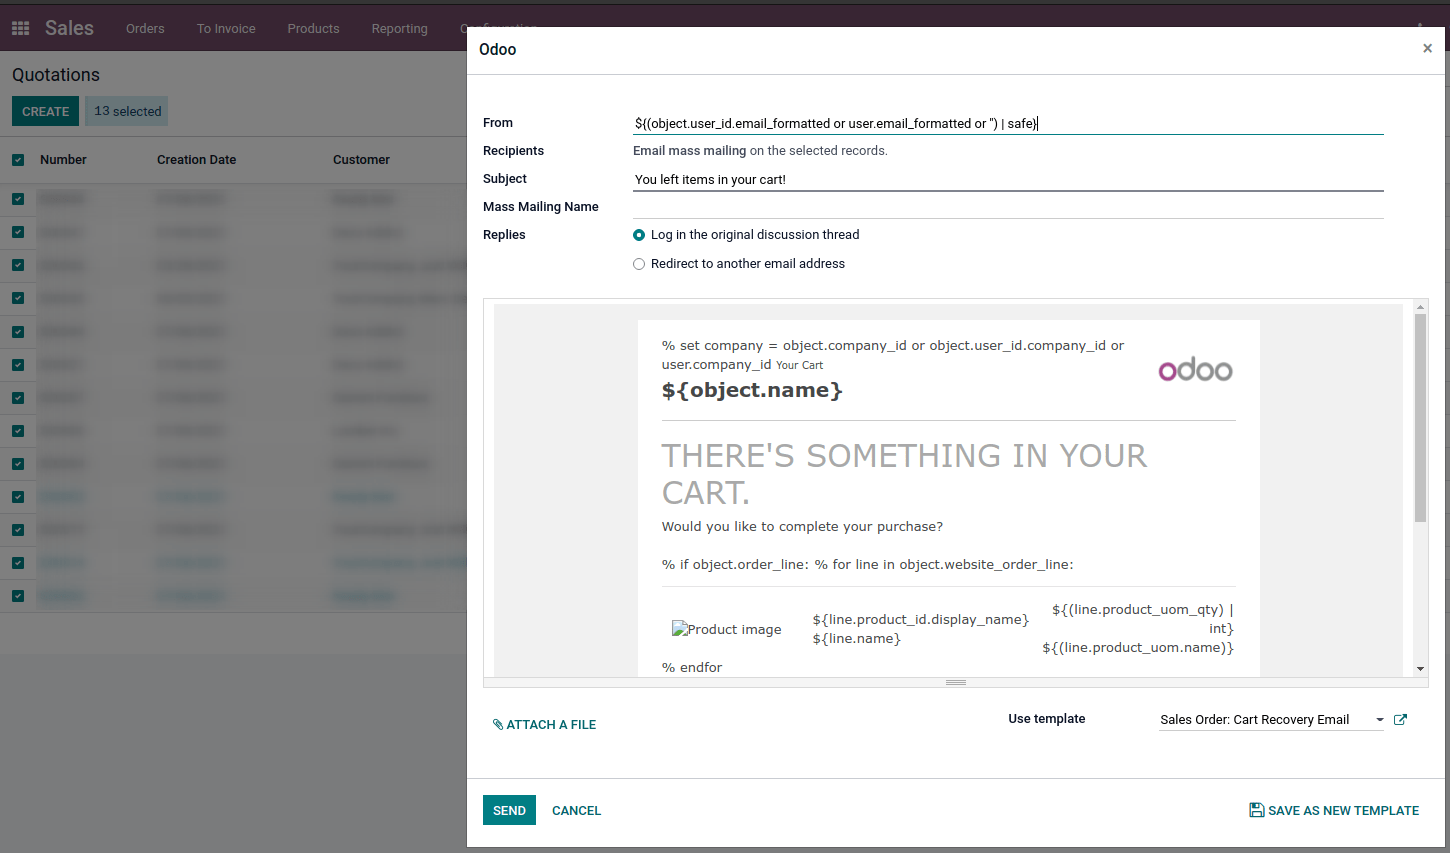
Although the field reply to is available within the mail templates, this field is only used for mass mailing mode (this means when sending templates on what we call bulk emailing). You can send emails in bulk in almost every app that has a list view. Select the records you want and click on the action button. If you have an option to send an email, you will see a mail composer with possible values to define:
You can also define them by default on the template:
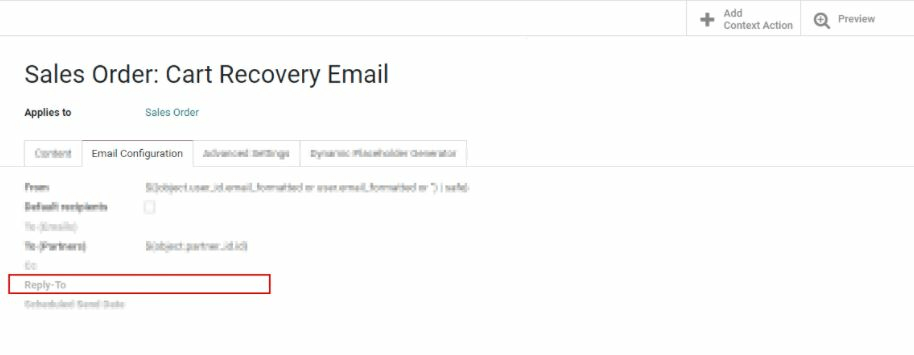
Because of this, setting a value in this field is useless as the value defined will be totally ignored. The default reply-to value is the default catchall email address to ensure a communication between your customer and your Odoo database. For more information about the way the catchall works, please check how to manage inbound messages.
Transactional emails and corresponding URL for each company
When using Odoo, multiple events trigger the sending of automated emails. These emails are known as transactional emails and sometimes contain links pointing to your Odoo database.
By default, links generated by the database use the dynamic web.base.url key defined in the system parameters. More information about this parameter.
If the website application isn’t installed, the web.base.url key will always be the default parameter used to generate all the links.
It’s important to know that this key can only have a single value, meaning that in a multi-website/company database environment, even if you have a specific domain name for each website, the links generated to share a document or within a transactional email might remain the same, whatever the website/company related to the sending of the email/document.
This is not always the case as some Odoo applications have a link established in the database with the website application, meaning that in this case, if a specific domain is defined for the websites, the URL generated in the email template will use the domain defined on the corresponding website of the company.
Caution
A document shared using the documents application will always use the web.base.url key, as the document shared isn’t associated with any particular website. Meaning that the URL will always be the same (the web.base.url key value), whatever the company it’s shared from, this is a known limitation!
On the other hand, sales orders made by a customer on one of your Odoo e-commerce websites have a link established with the website from which the order was made. As a result, the e-mail sent for the sales orders uses the domain name defined for the corresponding website to generate the links.
For more information about how to configure your domains, we invite you to check our domain name documentation.
Updating translations within email templates
Email templates are automatically translated. Changing the translations shouldn’t be necessary. However, if for a specific reason you’d like to change some of the translations, this can be done.
Like any modification in the code, keep in mind that modifications that aren’t done correctly (for example modifications leading to bad syntax) can break the template, as a result, the template will appear blank.
In order to edit your translations, follow these steps from the template.
Click on the edit button, then on the language button

A pop-up window with the different languages installed on the database will be displayed. From here, editing the translations will be possible. Don’t forget to hit the save button to preserve your changes.
