为开支重新开具发票
如果对客户项目的费用进行了追踪,则这些费用可自动向客户收取。具体方法是 创建费用,引用费用添加到的销售订单,然后 创建费用报告。
最后,一旦费用报告记入日记账,费用就会出现在指定的 SO。然后,已开具发票 就会向客户收取费用。
设置
首先,为每个费用类别指定开票策略。导航至 。点击费用类别,查看费用类别表单。在 发票 部分,点击所需的 重新开具费用发票 选项旁边的单选按钮:
否:该费用类别不能重新开票。
按成本计算:费用类别,按费用类别表格中设定的费用开具发票。
销售价格:费用类别按费用表单上设置的销售价格开具发票。
创建费用
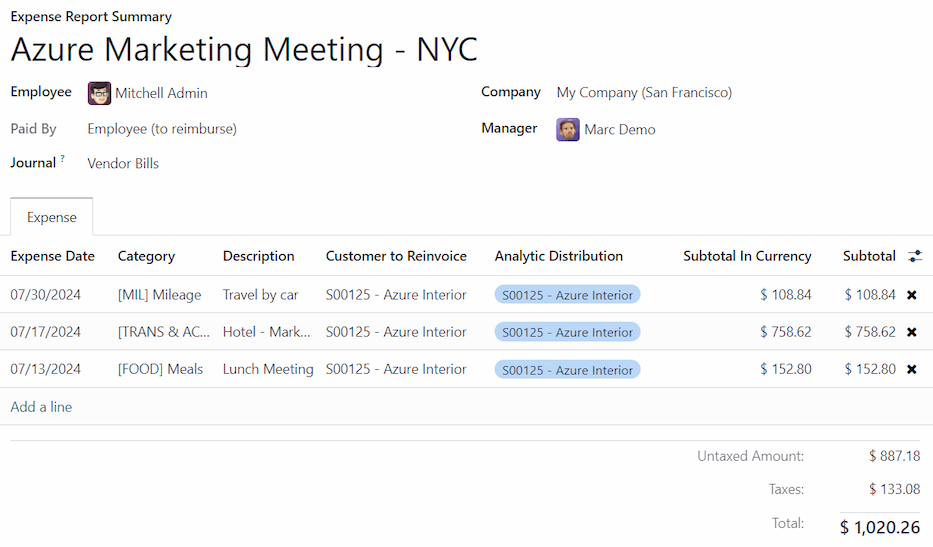
首先,当 创建新费用 时,需要输入正确的信息,以便向客户重新开具费用发票。使用下拉菜单,在 客户重新开发票 字段中选择要添加费用的 SO(销售订单)。
下一步,选择费用过账到的 分析分配 账户。如果需要,可以选择多个账户。
要添加另一个 分析分配,请点击行以显示 分析 弹出窗口。点击 添加行,然后从下拉菜单中选择所需的 分析分配。如果选择多个 分析分配 字段,则必须修改 百分比 字段。默认情况下,这两个字段都填充为 100%。调整所有字段的百分比,使所有选定账户的总和等于 100%。
Example
一家油漆公司同意为两家不同公司所在的办公楼进行油漆。在估价期间,公司在办公地点召开会议讨论项目。
两家公司都同意支付油漆公司员工的差旅费。在创建里程和酒店费用时,两家公司 都列在 分析分配 一行,各占 50%。
创建开支报告
创建费用后,必须以与所有其他支出相同的方式 创建 和 提交 创建支出报告。
提交费用报告后,费用报告的顶部中心会出现一个 销售订单 智能按钮,并且每个单独的费用记录都会重新开具发票。

重要
在 客户重新开发票 字段中选择适当的 SO(销售订单) 是 关键的,因为这是费用报告批准后自动开具发票的方式。
在费用报告获得 **批准**之前,只能修改 客户重新开发票 字段。费用报告被批准后,客户到重新开发票 字段就不能再修改了。
批准并过账费用
在 批准费用报告 前,确保为每一费用行填充 分析分配 部分。
如果缺少 分析分配 条目,请从下拉菜单中指定正确的账户,然后点击 批准。
注解
只有在 已提交 费用报告提交后,才会出现 审批 按钮。
会计部门通常负责 过账日记账分录 。要将费用过账到会计分录,请点击 过账分录。费用报告一经批准,即可过账。
只有在分录入账后,SO(销售订单) 才会 更新。日记账分录入账后,费用就会出现在所引用的 :abbr:`SO(销售订单)`上。
开票费用
在费用报告获得批准和日记账分录入账后,SO(销售订单) 将被更新,并可向客户开具发票。
选择费用报告,然后点击 销售订单`智能按钮,打开 :abbr:`SO (销售订单)。要重新开发票的费用现在会出现在 SO。
注解
费用报告中可以引用一个以上的 SO(销售订单)。如果超过一个 SO 被引用,点击 销售订单 智能按钮将打开一个列表,显示与该费用报告相关的所有 SO。点击 SO(销售订单) 打开单个 SO(销售订单) 的详细信息。
费用详情会在 SO(销售订单) 订单行 选项卡中列出。

然后,点击 创建发票,弹出 创建发票 窗口。选择发票是 普通发票、首付款(百分比) 还是 首付款(固定金额)。然后,点击 创建发票草稿。这样就为客户创建了一张发票草稿。点击 确认,确认发票,然后向客户开具费用发票。