Articles editing
Add and style content
Om te beginnen met het toevoegen van inhoud, klik je ergens op de pagina. Je cursor wordt automatisch ingesteld om de eerste koptekst van het artikel te schrijven. Als je klaar bent met het schrijven van de titel, druk je op enter op je toetsenbord om naar de volgende regel te gaan.
Tip
Klik op Untitled aan de linkerkant van de bovenste balk om automatisch je h1 (First-level header) titel en de naam van het artikel te matchen. Om de naam van je artikel later te wijzigen, moet je dit handmatig doen. Klik hiervoor op de naam in de bovenste balk en ga verder met de wijziging.
Text editor
Als je de tekst wilt opmaken met de teksteditor, selecteer je de tekst die je wilt opmaken.
Then, you can:
Change the style by clicking Normal. Doing so opens a dropdown menu with multiple styles to choose from (Normal, Code, Header 1 → Header 6, Quote);
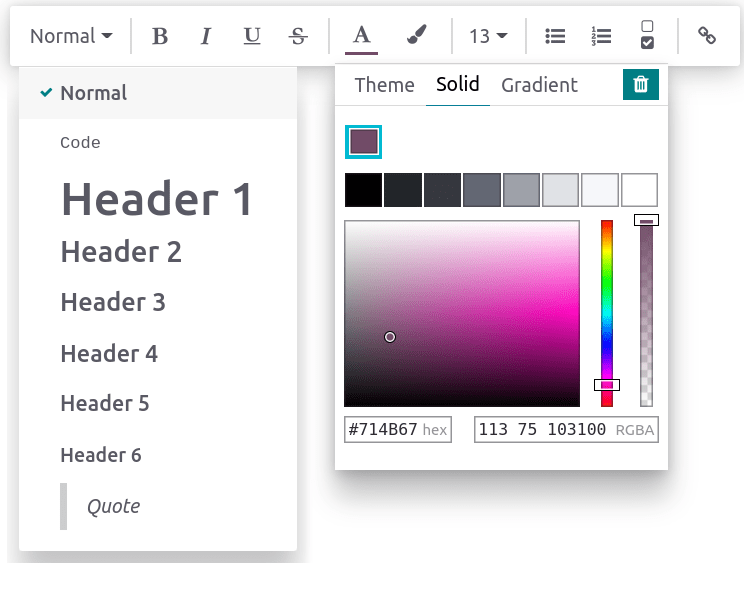
Format the text. Click B to put it in bold, I to put it in italic, U to underline, and S to strikethrough;
Verander de kleur van het lettertype door te klikken op A of de achtergrondkleur door te klikken op het potlood pictogram:
Om uit een vooraf gedefinieerde themakleur te kiezen, klik je op Thema en selecteer je de gewenste kleur.
Om aan te passen klik je op Solid en definieer je een kleur met behulp van het wiel, door de hexcode of RGBA-waarden in te voeren.
Om een kleurverloop te gebruiken klik je op Verloop, kies je een vooraf gedefinieerd kleurverloop of klik je op Aangepast om een persoonlijk kleurverloop te maken.
Om de grootte van de tekst te wijzigen, klik je op het grootte getal en selecteer je de gewenste grootte;
Klik op de lijsten iconen om van de alinea een ongeordende lijst, een geordende lijst of een checklist te maken;
Klik op het ketting pictogram om een URL-link in te voegen of te bewerken.
Om een hele alinea op te maken typ je / ergens in de tekst. Hiermee open je de powerbox, waarmee je:
Een alinea veranderen in lijsten (ongeordend, geordend, checklists).
Een alinea veranderen in een koptekst (1 → 6), normale tekst,
codeof aanhalingstekens.
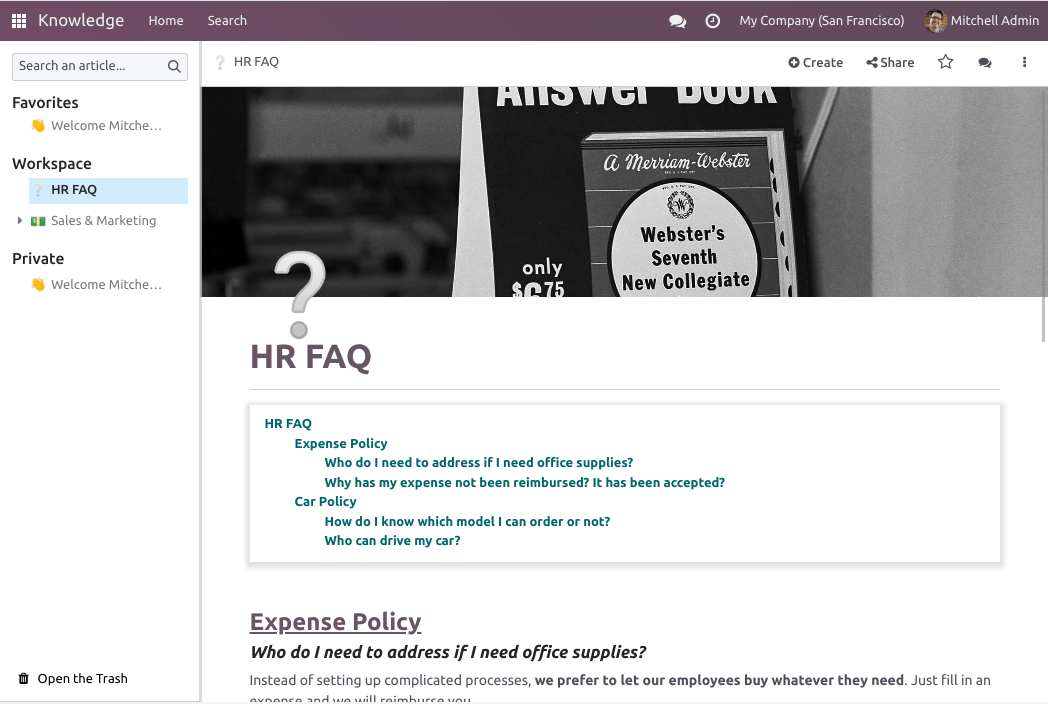
Foto’s omslag
Je kunt je artikel aanpassen door een omslagfoto en een pictogram toe te voegen. Ga met de muis boven de h1-titel staan en klik op Een cover toevoegen. Er wordt een pop-upvenster geopend waarin je een omslagfoto kunt instellen.
Als je database en je Unsplash account gekoppeld zijn, wordt de omslagfoto automatisch geselecteerd op basis van de naam van het artikel. Om deze aan te passen, ga je met de muis over de afbeelding zodat de knoppen verschijnen, klik je op Change Cover en selecteer je een andere afbeelding.
Afbeeldingen ophalen uit verschillende bronnen:
Doorzoek de Unsplash database.
Voer de URL van een foto in.
Upload een afbeelding vanaf een computer.
Om de cover te verwijderen, ga je er met de muis overheen zodat de knoppen verschijnen en klik je op Remove Cover.
Notitie
To associate Unsplash with your database, please refer to Unsplash.
De artikelen zijn responsive en dat geldt ook voor de omslagafbeeldingen. Hierdoor kunnen de afbeeldingen niet handmatig worden verplaatst om op een bepaald scherm te passen, omdat ze automatisch worden aangepast aan het apparaat.
Pictogrammen
Om een pictogram toe te voegen, ga je met de muis boven de h1-titel staan en klik je op Add Icon. Hierdoor wordt automatisch een willekeurige emoji ingesteld. Om het te wijzigen klik je erop en selecteer je er een uit het emoji-venster. Om het te verwijderen, ga je op dezelfde manier te werk en klik je op het rood omcirkelde x.
Notitie
De emoji wordt ook weergegeven vóór het bijbehorende artikel in de hiërarchische boom van het zijpaneel.
Klik op de emoji in het zijpaneel om deze te wijzigen zonder het gerelateerde artikel te openen.
Commando’s
Om een commando te gebruiken typ je / en open je de powerbox. Typ de naam van de opdracht of kies uit meerdere functies om blokken, afbeeldingen, bestanden, enz. in te voegen. Sommige daarvan, zoals /Afbeelding of /Artikel zijn gemeenschappelijk voor alle apps, maar andere zijn inherent aan de kennis-app en kunnen in geen enkele andere applicatie worden gevonden of gebruikt.
Lijst met commando’s
Commando’s zijn onderverdeeld in meerdere categorieën, afhankelijk van hun gebruik.
Opdracht |
Gebruiken |
|---|---|
opgevulde lijst |
Maak een lijst met opsommingstekens. |
Genummerde lijst |
Maak een lijst met nummering. |
Checklist |
Volg taken met een checklist. |
Tabel |
Een tabel invoegen. |
Separator |
Een horizontale lijn invoegen. |
Quote |
Een blokcitaat sectie toevoegen. |
Code |
Een code sectie toevoegen. |
2 kolommen |
Converteren naar 2 kolommen. |
3 kolommen |
Converteren naar 3 kolommen. |
4 kolommen |
Converteren naar 4 kolommen. |
Opdracht |
Gebruiken |
|---|---|
Kop 1 |
Grote sectiekop. |
Kop 2 |
Medium sectiekop. |
Kop 3 |
Kleine sectiekop. |
Richting veranderen |
Draai de tekstrichting om. |
Tekst |
Paragraaf blok. |
Opdracht |
Gebruiken |
|---|---|
Afbeelding |
Een afbeelding invoegen. |
Artikel |
Koppel een artikel. |
Opdracht |
Gebruiken |
|---|---|
Link |
Een link toevoegen. |
Knop |
Een knop toevoegen. |
Aanstelling |
Voeg een specifieke afspraak toe. |
Kalender |
Een afspraak plannen. |
Opdracht |
Gebruiken |
|---|---|
3 sterren |
Voeg een waardering van meer dan 3 sterren toe. |
5 sterren |
Voeg een waardering van meer dan 5 sterren toe. |
Opdracht |
Gebruiken |
|---|---|
Inhoudsopgave |
Voeg een inhoudsopgave toe met de koppen van het artikel. |
Index |
Toon het eerste niveau van geneste artikelen. |
Outline |
Toon alle geneste artikelen. |
Item Kanban |
Insert a kanban view of article items. |
Item Lijst |
Insert a list view of article items. |
Bestand |
Een bestand insluiten dat kan worden gedownload. |
Template |
Voeg een sjabloonsectie toe die kan worden ingevoegd in berichten, algemene voorwaarden of beschrijvingen in andere applicaties. |
Opdracht |
Gebruiken |
|---|---|
Handtekening |
Je handtekening invoegen. |
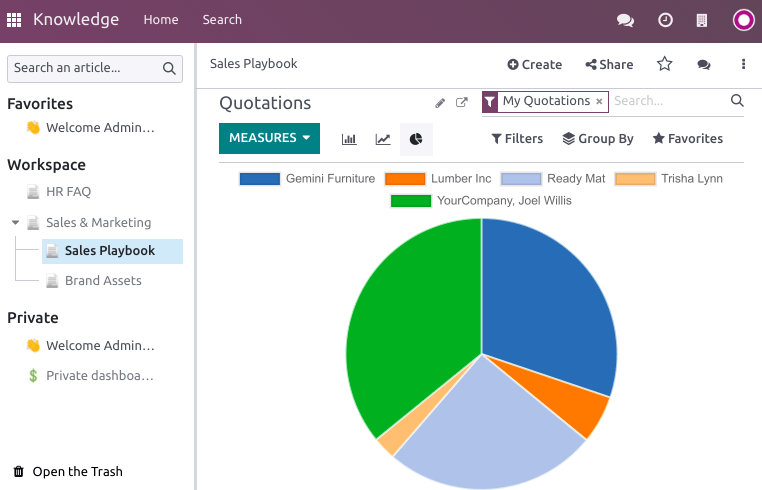
Content from other apps
Knowledge maakt het mogelijk om inhoudsweergaven van andere applicaties op te halen. Ga hiervoor naar de doelapplicatie en maak de gewenste weergave. Klik vervolgens op :menuselectie:`Favoriet --> Weergave invoegen in artikel` en selecteer een artikel. De weergave wordt onderaan het geselecteerde artikel ingevoegd.
Example
Om de onderstaande weergave op te halen, hebben we deze gemaakt door naar te gaan en hebben we deze ingevoegd door op te klikken en het Sales Playbook artikel te selecteren.
Belangrijk
Gebruikers die geen toegang hebben tot de view zullen geen toegang hebben tot de view in Knowledge, ook al hebben ze wel toegang tot het artikel dat de view bevat.