Outlook Agenda synchronisatie
Synchronizing a user’s Outlook Calendar with Odoo is useful for keeping track of tasks and appointments across all related applications.
Microsoft Azure setup
Om de Outlook Agenda te synchroniseren met de Kalender van Odoo is een Microsoft Azure account nodig. Het aanmaken van een account is gratis voor gebruikers die Azure nog nooit geprobeerd of betaald hebben. Bekijk voor meer informatie de accountopties op de Azure website.
Raadpleeg Microsoft’s documentatie over het instellen van een Microsoft Entra ID (voorheen Microsoft Azure Active Directory (Azure AD) genoemd). Dit is een API-console voor het beheren en registreren van Microsoft applicaties.
Bestaande Microsoft Entra ID gebruikers moeten inloggen op de Microsoft Azure developer portal. Selecteer vervolgens View onder het gedeelte met de naam Manage Microsoft Entra ID.
Register application
Na het inloggen met de Microsoft Entra ID, registreer een applicatie.
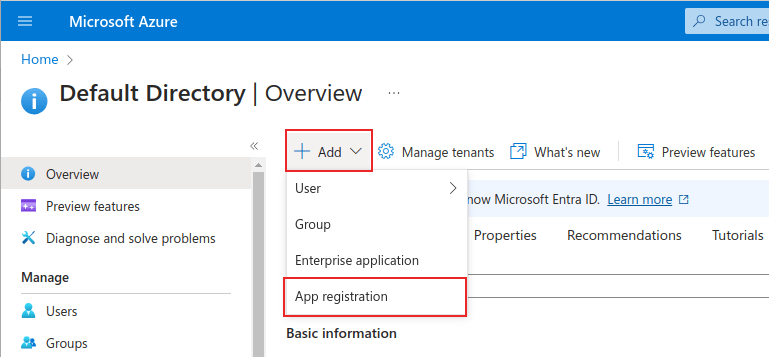
To create an application, click + Add in the top menu. From the resulting drop-down menu, select App Registration.
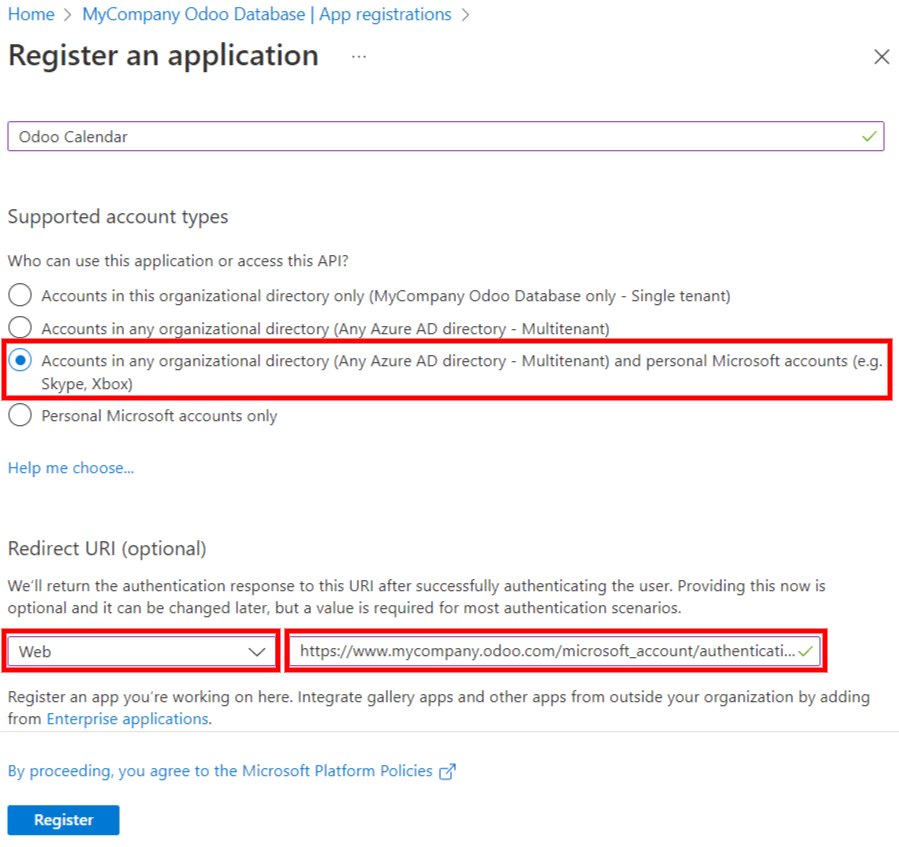
Enter a unique Name for the connected application.
Het kiezen van het juiste Ondersteund accounttype is essentieel, anders werkt de aangesloten applicatie niet. Gebruikers die hun Outlook Agenda willen verbinden met Odoo moeten de Accounts in elke organisatiemap (Elke Microsoft Entra ID map - Multitenant) en persoonlijke Microsoft accounts (bijv. Skype, Xbox) optie selecteren voor Ondersteunde accounttypes.
Wanneer je de Redirect URI configureert, kies dan de Web optie uit het eerste dropdown menu. Voer vervolgens de Odoo database URI (URL) in gevolgd door /microsoft_account/authenticatie.
Example
Voer https://yourdbname.odoo.com/microsoft_account/authentication in voor de Redirect URI. Vervang uwnaam.odoo.com door de URL.
Tip
Zorg ervoor dat de URL (domein) van de database die in de URI wordt gebruikt precies hetzelfde domein is als het domein dat is ingesteld op de web.base.url systeemparameter.
Krijg toegang tot de web.base.url door ontwikkelmodus te activeren en te navigeren naar . Selecteer deze vervolgens uit de Key lijst op de System Parameters pagina.
Kijk voor meer informatie over de beperkingen en restricties van URI’s op Microsofts Redirect URI (antwoord URL) beperkingen en restricties pagina.
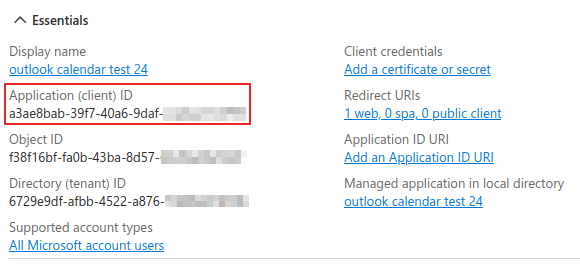
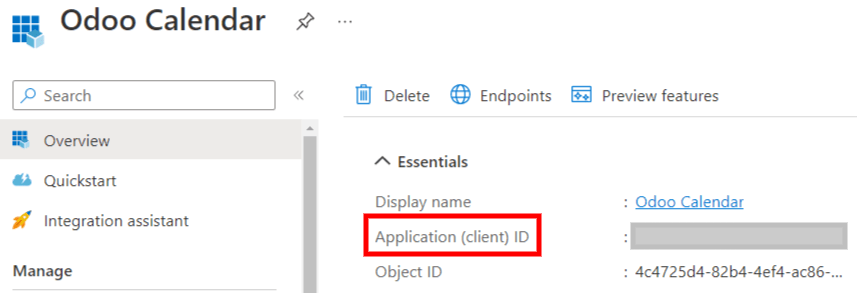
Klik ten slotte op de applicatieregistratiepagina op de Register knop om de applicatieregistratie te voltooien. De Application (client) ID wordt gemaakt. Kopieer deze waarde, omdat je die later nodig hebt, in de Configuratie in Odoo.
Klantgeheim aanmaken
The second credential needed to complete the synchronization of the Microsoft Outlook Calendar is the Client Secret. The user must add a client secret, as this allows Odoo to authenticate itself, requiring no interaction from the user’s side. Certificates are optional.
To add a client secret, click in the left menu. Then click + New client secret to create the client secret.

Typ vervolgens een Beschrijving en selecteer wanneer het cliëntgeheim verloopt. Beschikbare opties zijn onder andere: 90 dagen (3 maanden), 365 dagen (12 maanden), 545 dagen (18 maanden), 730 dagen (24 maanden) of Aangepast. Met de Aangepast optie kan de beheerder een Begin en Einde datum instellen.
Klik ten slotte op Add om Add a client secret te kiezen.
Tip
Omdat het resetten van de synchronisatie lastig kan zijn, raadt Odoo aan om de maximaal toegestane vervaldatum voor het klantgeheim in te stellen (24 maanden of aangepast), zodat er niet snel opnieuw gesynchroniseerd hoeft te worden.
Kopieer de Waarde voor gebruik in de volgende sectie.
Waarschuwing
Client secret values cannot be viewed, except immediately after creation. Be sure to save the secret when created before leaving the page.
Configuratie in Odoo
Ga in de Odoo database naar , en vink het selectievakje aan naast de Outlook Agenda instelling. Vergeet niet op Opslaan te klikken om de wijzigingen door te voeren.
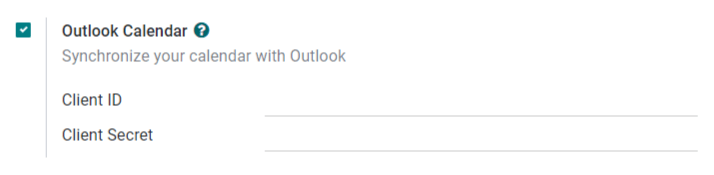
Kopieer vanuit het Microsoft Azure portaal, onder de Overzicht sectie van de applicatie, de Application (Client) ID, als deze nog niet is gekopieerd, en plak deze in het Client ID veld in Odoo.
Copy the previously-acquired Value (Client Secret Value), and paste it into the Client Secret field in Odoo.

Klik ten slotte op de Odoo pagina op Opslaan.
Synchroniseren met Outlook
Waarschuwing
Odoo raadt ten zeerste aan de Outlook agenda synchronisatie te testen op een test database en een test e-mailadres (dat niet voor andere doeleinden wordt gebruikt) voordat je probeert de gewenste Outlook agenda te synchroniseren met de productie database van de gebruiker.
Als de gebruiker gebeurtenissen in het verleden, heden of de toekomst in zijn Odoo agenda heeft staan voordat hij zijn Outlook agenda synchroniseert, dan zal Outlook de gebeurtenissen die tijdens de synchronisatie uit Odoo’s agenda worden gehaald behandelen als nieuwe gebeurtenissen, waardoor er een e-mailnotificatie vanuit Outlook naar alle deelnemers van het evenement wordt gestuurd.
Om te voorkomen dat er ongewenste e-mails worden gestuurd naar alle vorige, huidige en toekomstige deelnemers aan evenementen, moet de gebruiker de evenementen uit de Odoo agenda toevoegen aan de Outlook agenda voor de eerste synchronisatie, de evenementen verwijderen uit Odoo en dan de synchronisatie starten.
Even after synchronizing the Odoo Calendar with the Outlook calendar, Outlook will still send a notification to all event participants every time an event is edited (created, deleted, unarchived, or event date/time changed), with no exceptions. This is a limitation that cannot be fixed from Odoo’s side.
Samengevat: zodra een gebruiker zijn Outlook agenda synchroniseert met de Odoo agenda:
Als je een evenement aanmaakt in Odoo, stuurt Outlook een uitnodiging naar alle deelnemers aan het evenement.
Deleting an event in Odoo causes Outlook to send a cancellation to all event attendees.
Het unarchiveren van een evenement in Odoo zorgt ervoor dat Outlook een uitnodiging stuurt naar alle deelnemers aan het evenement.
Archiving an event in Odoo causes Outlook to send a cancellation to all event attendees.
Als je een contact toevoegt aan een gebeurtenis, stuurt Outlook een uitnodiging naar alle deelnemers aan de gebeurtenis.
Als je een contact verwijdert uit een gebeurtenis, stuurt Outlook een annulering naar alle deelnemers van de gebeurtenis.
Synchroniseer Odoo Agenda en Outlook
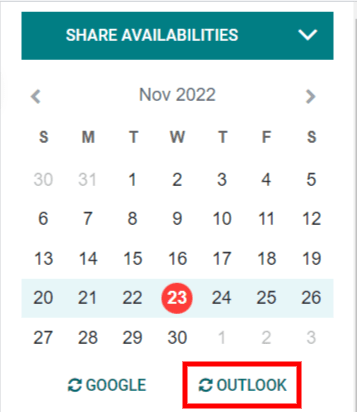
Open in de Odoo database de Kalender module en klik op de Outlook sync knop aan de rechterkant van de pagina, onder de maandkalender.
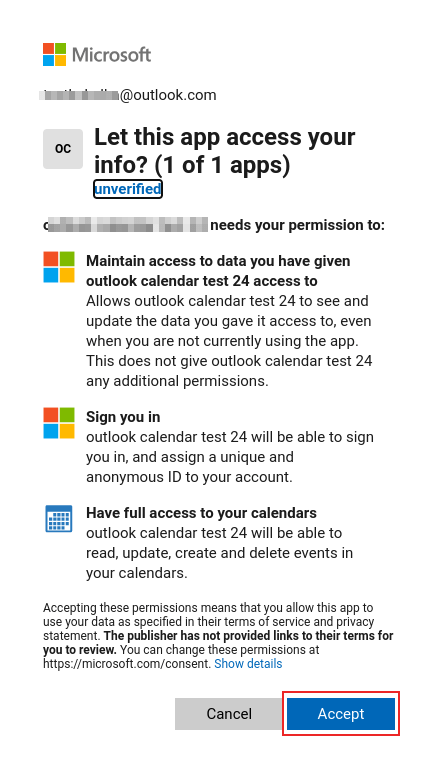
De synchronisatie is een tweerichtingsproces, wat betekent dat gebeurtenissen worden afgestemd in beide accounts (Outlook en Odoo). De pagina wordt omgeleid naar een Microsoft inlogpagina en de gebruiker wordt gevraagd om in te loggen op zijn account, als hij dat nog niet is. Geef tenslotte de vereiste rechten door op Accept te klikken.
Notitie
Alle gebruikers die de synchronisatie willen gebruiken, hoeven alleen maar synchroniseer hun agenda met Outlook. De configuratie van Microsofts Azure account hoeft maar één keer te worden gedaan, omdat de client-ID’s en clientgeheimen van Microsoft Entra ID tenants uniek zijn en de gebruiker helpen bij het beheren van een specifieke instantie van Microsoft cloudservices voor interne en externe gebruikers.
Zie ook
../../algemeen/integraties/mail_plugins/outlook
Synchronisatieproblemen oplossen
Het kan voorkomen dat het Microsoft Outlook Agenda account niet correct synchroniseert met Odoo. Synchronisatieproblemen kun je zien in de database logs.
In these cases, the account needs troubleshooting. A reset can be performed using the Reset Account button, which can be accessed by navigating to . Then, select the user to modify the calendar, and click on the Calendar tab.

Klik vervolgens op Reset Account onder de juiste agenda.
Reset Opties
De volgende resetopties zijn beschikbaar voor het oplossen van problemen met de synchronisatie van Microsoft Outlook Agenda met Odoo:
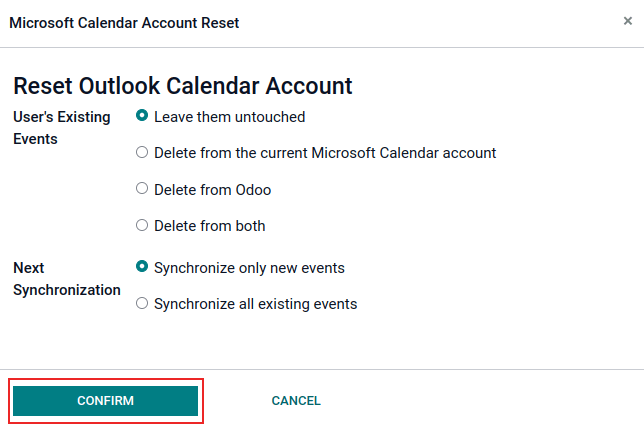
Gebruikers bestaande gebeurtenissen:
Laat ze onaangeroerd: geen wijzigingen aan de gebeurtenissen.
Verwijderen uit het huidige Microsoft Agenda-account: verwijder de gebeurtenissen uit Microsoft Outlook Agenda.
Verwijderen uit Odoo: verwijder de gebeurtenissen uit de Odoo-kalender.
Verwijderen uit beide: verwijder de gebeurtenissen uit zowel Microsoft Outlook Agenda als Odoo agenda.
Volgende synchronisatie:
Synchroniseer alleen nieuwe gebeurtenissen: synchroniseer nieuwe gebeurtenissen op Microsoft Outlook Agenda en/of Odoo agenda.
Synchroniseer alle bestaande gebeurtenissen: synchroniseer alle gebeurtenissen in Microsoft Outlook Agenda en/of Odoo agenda.
Click Confirm after making the selection to modify the user’s events and the calendar synchronization.