결제
Odoo에서 결제 항목은 청구서나 업체 청구서로 자동 연결되거나 독립형 기록으로 만들어 나중에 사용할 수 있습니다.
If a payment is linked to an invoice or bill, it reduces/settles the amount due on the invoice. Multiple payments on the same invoice are possible.
결제가 청구서나 업체 청구서에 연결되지 않은 경우, 고객이 회사에 미납 중인 금액이 있거나 회사에서 공급업체에 미납액이 있는 경우입니다. 이러한 미납 금액으로 미납 청구서/업체 청구서를 차감 또는 정산할 수 있습니다.
더 보기
청구서 또는 업체 청구서에서 결제 등록하기
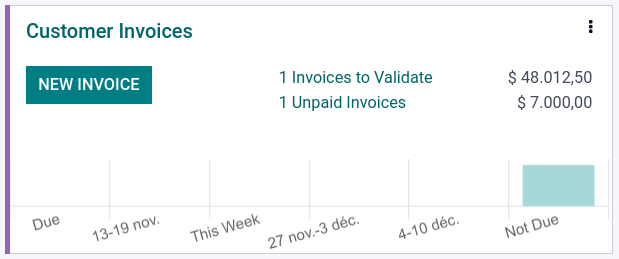
고객 청구서나 공급업체 청구서에서 결제 등록 을 클릭하면 새로운 전표 항목이 생성되고 결제 금액에 따라 지급해야 하는 금액이 변경됩니다. 해당 금액은 미납 수금 또는 지급 계정에 반영됩니다. 이 때 고객 청구서나 공급업체 청구서는 결제 중 으로 표시됩니다. 그런 다음 미납 계정이 은행 거래 내역과 조정되면 청구서나 공급업체 청구서는 결제 완료 상태로 변경됩니다.
The information icon next to the payment line displays more information about the payment. To access additional information, such as the related journal, click View.
참고
고객 청구서 또는 공급업체 청구서 상태가 반드시 :guilabel:`발행 완료`인 경우에만 결제를 등록할 수 있습니다.
If a payment is unreconciled, it still appears in the books but is no longer linked to the invoice.
If a payment is (un)reconciled in a different currency, a journal entry is automatically created to post the currency exchange gains/losses (reversal) amount.
If a payment is (un)reconciled and an invoice with cash-basis taxes, a journal entry is automatically created to post the cash-basis tax (reversal) amount.
팁
주거래 은행 계좌가 미납 계정 으로 설정되어 있고 Odoo에 결제가 등록되어 있는 경우(관련 은행 거래를 통하지 않음), 청구서 및 업체 청구서는 결제 완료 로 즉시 등록됩니다.
청구서나 업체 청구서에 연결되지 않은 결제 등록하기
를 통해 새 결제를 등록하면, 청구서나 업체 청구서로 직접 연결되지 않습니다. 대신, 미수금이나 미지급금이 관련 청구서나 업체 청구서와 수동으로 매칭이 될 때까지 미납 계정 과 매칭됩니다.
청구서 및 업체 청구서를 결제와 일치시키기
새로운 청구서나 업체 청구서를 승인할 때 고객이나 공급업체 미납액 이 있는 경우에는 파란색 배너가 표시됩니다. 청구서나 업체 청구서와 매칭하려면 미납 대변 금액 또는 미납 차변 금액 아래에 있는 추가 를 클릭합니다.

The invoice or bill is now marked as In payment until it is reconciled with its corresponding bank transaction.
그룹 결제
그룹 결제 기능을 사용하면 동일한 연락처에서 출금 및 입금 결제를 하나의 결제 항목으로 결합하여 프로세스를 간소화하고 더욱 편리하게 결제를 진행할 수 있습니다. 그룹 결제를 등록하려면:
또는 로 이동합니다.
특정 연락처에 연결되어 있는 청구서/대변전표 또는 청구서/환불을 선택합니다.
(작업 메뉴) 아이콘을 클릭한 후 결제 등록 을 선택합니다.
결제 등록 창에서 전표, 결제 수단 및 결제일 을 선택합니다.
그룹 지불 옵션을 활성화한 후 결제 생성 을 클릭합니다.
이제 청구서 혹은 업체 청구서는 해당 은행 거래와 조정이 완료될 때까지 결제 중 으로 표시됩니다. 대변전표나 환불의 경우에는 결제 완료 로 표시됩니다.
일괄 결제하기
일괄 결제 기능을 사용하면 여러 연락처의 결제를 그룹화하여 조정 작업을 쉽게 진행할 수 있습니다. 또한 수표 를 은행에 입금하거나 SEPA 결제 를 하는 경우에도 유용합니다. 기능을 사용하려면 또는 로 이동합니다. 결제 목록 보기에서 여러 결제 항목을 일괄로 그룹화하려면 해당 결제 항목을 선택한 후 를 클릭합니다.
결제 일치시키기
결제 매칭 도구로 미조정 고객 청구서 혹은 공급업체 청구서를 모두 열고 개별적으로 처리하여, 모든 결제와 청구서를 한곳에서 매칭시킬 수 있습니다. 회계 현황판 으로 이동하여 고객 청구서 또는 공급업체 청구서 전표에서 :icon:`fa-ellipsis-v`(:guilabel:`드롭다운 메뉴`) 버튼을 클릭하고 결제 매칭 을 선택하거나 으로 이동합니다.

참고
조정 중에 차변과 대변의 합계가 일치하지 않는 경우는 남은 잔액이 있는 것입니다. 이는 나중에 조정하거나 직접 상각해야 합니다.
일괄 결제 일치시키기
일괄 조정 기능을 사용하면 특정 고객이나 공급업체에 대한 여러 건의 미납 금액 또는 청구서를 한 번에 조정할 수 있습니다. 으로 이동합니다. 해당 연락처에 대해 아직 조정되지 않은 거래가 모두 표시되며, 고객이나 공급업체를 선택하면 조정 옵션이 표시됩니다.

부분 결제 등록하기
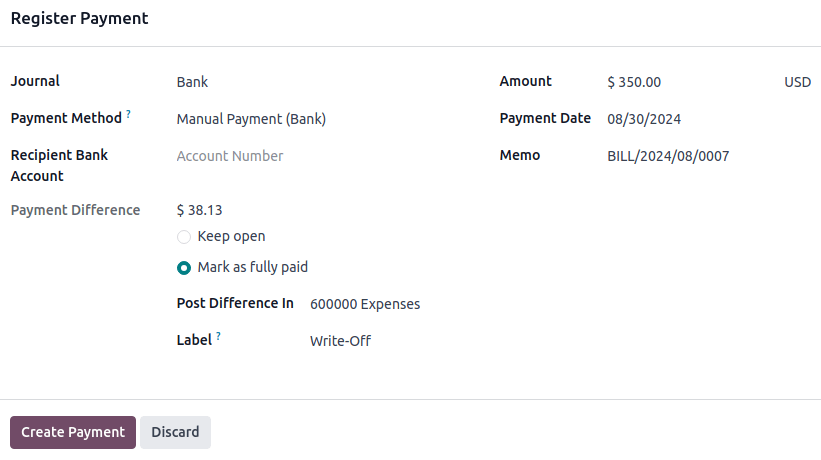
부분 결제를 등록하려면 관련 청구서 또는 업체 청구서에서 결제 등록 을 클릭합니다. 부분 결제의 경우(결제된 금액 이 청구서나 업체 청구서 총 잔액보다 적은 경우), 결제 차액 필드에 미납 잔액이 표시됩니다. 두 가지 중에서 선택할 수 있습니다.
Keep open: Keep the invoice or the bill open and mark it with a Partial banner;
완납으로 표시: 차액 게시 필드에서 계정을 선택하고 필요한 경우 라벨 을 변경합니다. 전표 항목이 생성되어 선택한 계정과 미지급 또는 미수금의 잔액을 조정할 수 있습니다.

은행 거래에 대한 결제 조정
결제가 등록되면 청구서 또는 업체 청구서 상태는 결제 중 으로 표시됩니다. 다음 단계로는 관련된 은행 거래 내역과 조정 하여 결제 워크플로우를 마무리하고 청구서나 업체 청구서를 결제 완료 으로 표시합니다.